Category Archives: art supplies

Mixed Media Techniques on Blotter Paper

Standard
Mixed Media Techniques on Blotter Paper

Hey friends, what’s going on today?  Well…..

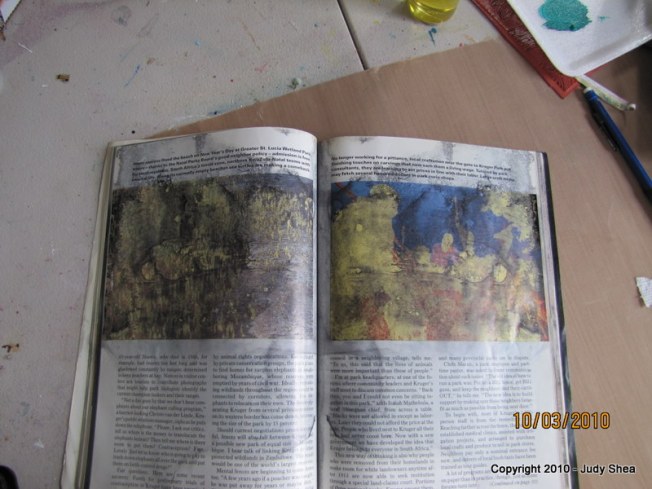
… I thought I would take my under paper (blotter) on my art table and take it to the next level with more layers of paint.  I’ll show you how I use texture paste on art tissue paper and use those torn pieces as collage fodder. Finally, I show you how I put an image transfer on the piece.


I really hope you enjoy that and share with others.  Please subscribe, click the thumbs up and share if you liked it.

I’ll be back soon with more.

Thanks for your comments; I just love hearing from you.

Judy  

Edgar Allen Poe Journal

Standard

Hey, everyone… This weekend is the end of July!!!  Can you believe it? Wasn’t it just May?

This weekend, I published a video on how to create of journal from a notebook.  I covered the back and front of the notebook, creating a personal journal, with layers and layers of paint and just did an overall mixed media frenzy on it.  After all the love/hate process and the stages it went through, I love the way it turned out.

I created this as a gift for my amazing niece, Christina, for her birthday.  She loves Edgar Allen Poe and she loves to write. So, I created this journal for her to enjoy and write in.

I hope you enjoy it.

If you do enjoy my channel, whether it be my art or cooking, I’d love it if you subscribe and hit the thumbs up.  Please share with all your family and friends.

I’ll be back soon for another video on some sort of art.. .culinary or mixed media.

Love to hear from you with your comments.

Thanks for all your support and being here.

Judy♥♥♥


Re-post – Gel Skin Art

Standard

Here is a re-post of the “skins”, I made a while back.  Thought you would enjoy a 2nd go round on reading it and for the new subscribers and visitors.

The skin with the beads, is my favorite.  I’ve been tearing that up and using it in my work for about a year now. Here is an example of how I used it recently in my coffee filter art piece; see post here.

First up was Golden’s Self Leveling Clear Gel and the Clear Tar Gel.  I took a palette knife and spread a good amount on some freezer paper.. like frosting a cake.

I sprinkled some finer glitters and shiny things like colored micro beads, sequins or whatever I had.  The self leveling gel and the tar gel had the same results.  I think I will try mixing color into the gel to make it a solid color, then adding the pretty shiny things.  Adding snipped colorful fibers or fabrics would be an interesting effect, don’tchya think?  I’ve done it and it is.

Then I took fluid acrylics and dropped dots all over a sheet until it was crowded and ran a knitting needle around it making swirls and shapes.

I also took blobs of paints at the top of the freezer paper and spread them downward, but they came out too thin.  Not so great.  Using heavy body paints might work better.  But, still interesting and one of a kind.

Once they are dry, you can peel them off of the freezer paper.  Now what do you do with them?  How about adding them to a collage page, journal page or  cut into strips or chopped up to put into some dryer sheet collage art cloth… see my tutorial here on how to make it.

I haven’t been back up in the studio since before vacation.. sad.  I’ll get up there, get my creative juices flowing and be back with some fun stuff.

Thanks for stopping by?

Judy

Mixed Media Collage Tutorial

Standard

I so enjoyed the 3 day weekend that just passed.  I was hot here in Mass.  A little too soon for me, but that tends to happen here.. not much of a Spring and then wham.. summer.  Give me a cold rainy day and I’m happy.  Strange, I know, but very comforting to me.  Whatchya gonna do?  Make art… that’s what… and that’s exactly what I did.

Here’s a tutorial just for you on how I made a collage on Bristol paper.  I started out thinking I would work on 3 collages at the same time.  Two on Bristol paper and one on deli paper.  The idea was to work on one while layers on another were drying.  Well, I started out that way, but there was too much going on and I couldn’t keep track of all the steps of the techniques.  I ended up focusing on one page for now.

You’ll see that I tend to lean more towards the teals, as in my other work too.  See this post and you’ll see what I mean, jelly bean.

Supplies/Materials:
Golden Gel Medium
Bristol paper 11″x14″
Golden fluid acrylic paints
Claudine Hellmuth Studio paints
scrap ephemera
polymer clay handmade embellishment (gotta have the clay in there)
lace papers
ink jet image transfer
my own hand carved rubber stamps
Portfolio Oil Pastels

Let’s start by showing you some of the handmade stamps I made.  Ok.. let me also tell you how I (bleep swear) at carving.   So they are not perfect and my back and neck  and eyes were sore after hours of carving, but they are my own originals.  Now, if you want to see some beautiful hand carved stamps.. go visit Autumn Hathaway’s website.. she is the queen of carving stamps.  She even has her own stationery line.  Gorgeous!

Here are mine.. aren’t they cute?  The pink ones are the ones I did this weekend and my own designs.

CLICK ON ALL IMAGES FOR A CLOSER LOOK

So, I started with the paper and scraped down some turquoise paint with a credit card.

Then added some Quin Azo Gold…

I used a little of the studio paints for patches of red.  More layers of turquoise and then I gave the entire page a wash with Titan Buff.  Ahhhh.  Let dry.  Actually, let all layers dry one at a time.

… and now, my friends… I begin the fun process of collaging.

I start the design using one of my stamps (love saying that).

STOP!  Wait a minute.. what time is it?  Did I forget to make dinner?  Um, ya, I think I did.  Ah, heck…. everyone for themselves; leftover night.

Continuing………. More of my stamps, scrap papers, corrugated cardboard from a coffee cup sleeve; stamped with red.

Added an ink jet image transfer from a transparency.

More papers, and stamps and lace papers.  Lace papers just melt into the collage when you use gel medium.

Here I put a strip of masking tape to protect the page from paint so I could put in a black and white stripe… then pull of to reveal a perfect line.  Love this.. makes me happy.

Here’s what it looks like before I start using Portfolio crayons.

I rubbed the black crayon around the edges.  I also used orange, teal, yellow and white crayon around the page.

Here’s the final.. I added a handmade polymer clay embellishment on one of the leaves. Also added a piece of my handmade tar gel skin with beads and glitter (right next to the spiral lace paper).  I cut about a 1/2″ from all around the edge of the page and snipped the corners.

Here are a couple of closeups…
  

There you have it.  I’m going to shoot for different colors on my next collage.  Ones that I don’t usually use.

Hope you enjoyed my tute.

Don’t forget to rate and  “like” me if you enjoyed this.

Thanks for stopping by.

Judy

In the Studio – Tutorial & Give-a-way!

Standard

It’s still darn cold here in Massachusetts.  We are all wondering where Spring is.  We’ve taken 1 step forward and 5 steps back.  I wouldn’t doubt if we went from cold to hot and have no Spring at all.

Well, I’ve been sneaking in some art work in the studio and made a little tutorial for you.

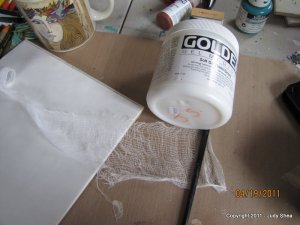
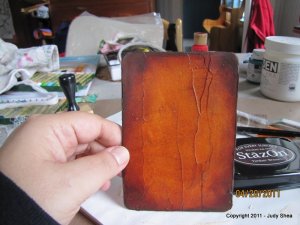
You can see from my photo below what I used for materials/tools – palette paper, acrylic paints, Staz on ink pad in brown, Portfolio oil pastels (optional), Wood Icing,  drink coaster (I’ve been collecting them from restaurants for years), blending tool, Stampbord shapes.  Also not shown below… cheesecloth and gel medium.

Note: Click on all pictures for details.

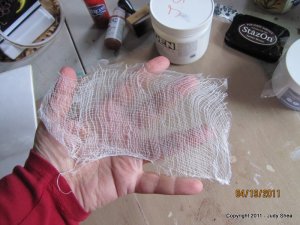
I started out by taking a piece of cheese cloth layed out on palette paper and spread it with Golden Gel Medium… let dry.

It will rip right off the palette paper with no sticking.

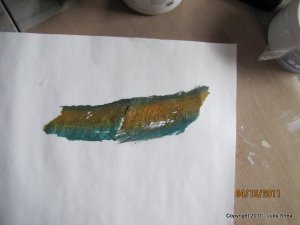
Rip it to the size you want and paint with acrylics.  Here I used raw sienna and turquoise.  Set aside to dry.

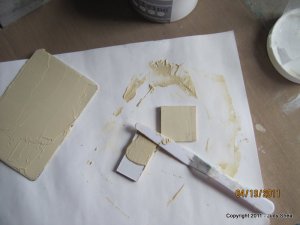
Take a coaster and spread it with Wood Icing.  Let dry. and do the same with the small shapes of Stampbord.  I only iced 2 shapes for this piece.

While the Wood Icing is still wet, you can stamp shapes into them; I chose not to for this project.

Once dry, I scraped into the Wood Icing with a sharp tool to make designs.

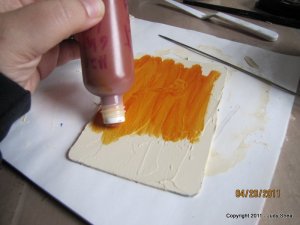
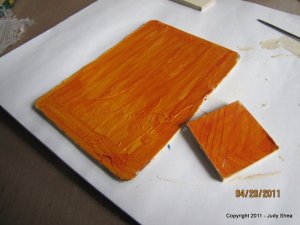
I painted the coaster and smaller shapes with Quinacridone Nickel Azo Gold fluid acrylic.

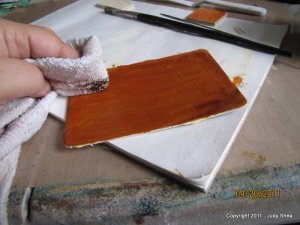
Once dry, I spritzed them with Walnut Ink and rubbed into the surface.

Then I took the blending tool and brown Staz On ink and rubbed the edges of the shapes.

Oooooo… ahhhhhh… McDreamy.

Now, take the smaller shapes and spray more walnut ink to get into the scratch grooves you make and wipe off the raised areas.  Paint with acrylics or use Portfolio crayons to make beautiful colors.

Here is what I ended up with.  I scratched some circles and painted them and put some splashes of red in there to make them pop.  I also did a little rubber stamping on them.

I glued the cheese cloth on the coaster the added the finished Stampbord shapes.

Here is my end result.  Coaster measures about 6″x4″.

I love the colors of this piece.  Makes me happy.  So happy, that I am going to give it away.

Leave a comment here and pass it along to a friend to also leave a comment and I’ll pick a winner in one week (Wednesday, 4/27).  Make sure you leave your email address so I can let you know if you won.

Thanks for stopping by and playing along.

Judy

Sketchbook Challenge – January

Standard

If you notice over in the right column of my blog, I have the Sketchbook Challenge badge.  I posted about it at the end of my last post.

I have to say (yes, I have to)…. I took the time to sketch.. Something I am not used to doing.. nor have I really ever done much.  I went to an fine art store recently and found some small visual journals.. one with watercolor paper and one with bristol board.  The notebooks only measure 5 x 3 1/2″.  Adorable.

The “Sketchbook Challenge” theme  for the month of January is “Highly Prized”

I’m really loving this..  Take my little notebook with my black liner pen and my little  water color paint set and hunker down with a cup of tea and play… fun and portable. I plan on doing more of this.  Talk about feeling like a kid again.. hits the spot.

So, to me.. my home and my family and what’s in my home (not materialistic things, but family and love) means so much to me… is “highly prized”.

Here is my funky doodle-like home… made with love

Remember this is only 5 x 3 1/2″.

I’m determined to learn how to draw trees better.

You can see the flickr group HERE for this challenge.  Run, don’t walk.

Thanks for stopping by.

Judy

Styes, Watercolors and Holiday eating… oh my!

Standard

I sure hope everyone had a nice Thanksgiving Holiday break.  It was nice having a 5 day break from the full-time job, but the days sure do go by so fast, don’t they?

I started last week with a sore eye… ended up at docs and found out I had a stye …geesh (ew, some of these images are gross.. mine is/was not that bad.. ..  So, hot compresses all day, he told me, but those didn’t seem to work UNTIL I added a tea bag to the hot compress and then it started to get better.  Plain old black tea bag or as my friend, Amy, calls it “dust in a bag”… love that.  The tanic acid seems to be a healer.. remember that.

.. and speaking of healing, I will need a healer after eating too much at the Thanksgiving gathering.  Everyone ate too much.. ok.. me.. there I said it.  I need to pull out my Weight Watcher’s food journal again and keep track of my eating.. god I hate the keeping track stuff.  If you can keep track of what you eat in the long run.. you will succeed… but who can?  I digress.

Maybe I can incorporate a food diary and art.  So making my daily food journal on some cool collage/painted pages.  I have to be realistic now.. will I really paint 10’s of pages to write a food diary on?  Maybe some quick swipes of credit card painting and some doodling?   God, that’s depressing (just kidding.. no I’m not…… really.. yes I am.. nooooooo).

.. and speaking of art (I needed to change the subject)…..   I bought some really cool Koi watercolor paints on ebay last week and I was playing around with  them as I lounged in front of the Christmas tree during some time off.  Yes, it’s up already.  Ugh.

These paints are so cute.. great for travel or just working in a different place than your studio.  I really like the effect they leave.. very light & dreamy.  I actually snuck in a little oil pastels (Portfolio) on the pages too… another nice effect.

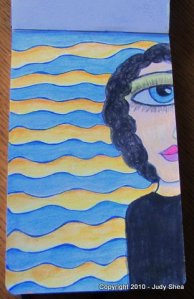
Playing with them in my 5×7’ish (that’s a measurement.. no?) moleskine journal.. here’s what I did:

She is so funny.. as I look at her she looks like a beautiful cyclops.  That’s one big friggen eye.

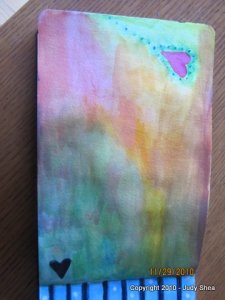
This page was just the excess paint I smooshed around and blended when I changed colors.. no waste.  Rubber stamping on top of these pages will look so nice I think.

You can use any kid’s watercolor sets.. This one is just compact and I thought the price was decent.  Merry Christmas to me… a little early.  Shhh.. I have a few more gifts coming my way.

Now, go make some art.

Thanks for stopping by.

Judy

Mixed Media Citra Collage Tutorial

Standard

Last year about this time I did two posts on the beautiful Autumn that we had… you can see the posts HERE and HERE.  Well, that was last year.  This year is a different story.  I have no pictures because the colors are dull this year.  The summer was so hot for so long, the trees just got too stressed and couldn’t generate enough chlorophyl.   I guess that’s like us really isn’t it.. sometimes?  Dontchya think?   Let’s hope that next year it comes back in full force with beautiful backgrounds.

Speaking of backgrounds… I wanted to show you a very cool technique that’s been shown here and there using CitraSolv.  It’s a degreaser used for household cleaning.. well, check it out HERE.  Then check out the CitraArt HERE.  Pretty darn cool if you ask me.. go ahead ask me… .. It’s funny you should ask… Yes, I thinks it’s so cool that I made a mixed media canvas collage with it.

Let’s start from the very beginning.. …(wait do you hear Julie Andrews?)  Sorry.

I looked all over for a bottle of Citra Solv.. nothing in the local stores even though the CS website listed the retail store locations.  So, I finally found a bottle at Vitacost.com.   Citra Solv works well with the National Geographic magazine pages the best, as it is contains a clay coating used for the crisp images the magazine is known for.

Moving on….

Here are the steps I took to make my Citra Backgrounds.  Start with your bottle of Citra Solv and a Nat Geo magazine. Now, you may want to work with a window open or go outside.. it’s not a terrible smell.. just a very STRONG orangey odor.  I got sick of it after a while.

I put my CS in a small plastic spray bottle instead of using a brush.  I thought it would be easier to spray.  I started to use a small plastic “solo” bathroom cup and a brush to spread it on and this is what happened…

Ummm.. apparently the plastic in the cup did not agree with the CS.  However, this plastic spray bottle is fine…

Let’s begin… can you stand it????

Open the magazine to some colorful pages and begin to spray.  Spray, turn to next colorful page.. spray,  next and so on…  now don’t be stingy with the liquid.. if it’s drippy that’s ok…

See how it begins to “melt”.. oh so fun.

Spray all the pages you want and close the book and let it sit for a while.. at least 15 minutes.. if you don’t see a change when you open the page.. spray some more and close the mag… some pages are better than others…. BUT oh look and see some of my results…

Do you see where I have the pencil pointing above?… I saw a face in that blotch and I started to enhance it further.  Look for images and play.
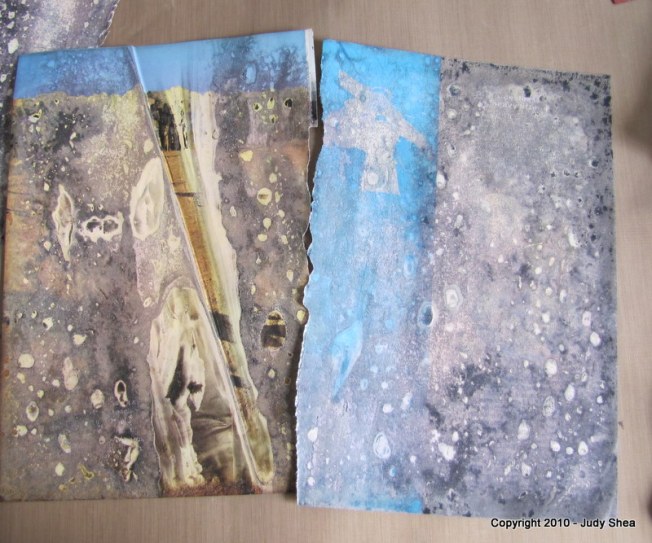
Above, I started to rubber stamp and play with the face.

So, there you have the way to make the Citra Backgrounds.  Now, let me show you how I applied it to a new mixed media canvas piece.

I started with a blank canvas, put down some fluid acrylics, letting each layer dry.  Then on the far right I put a large strip of heavy acrylic paint.

I let it dry then put my heat gun to it really close.  This will make the paint react with the intense heat and start to bubble… I got this technique from Gary Reef.  You’ve heard me mention him before.. such a love; you can see the video HERE.

Look at that beautiful texture.  I’m excited now.  When you are happy in bubble town, let it cool down (that rhymes, by the way).

I painted the white with gold acrylic paint and heated it again causing more bubbles… and then another layer of gold…

Once the paint was dry and cooled, I put random ripped masking tape over the gold.
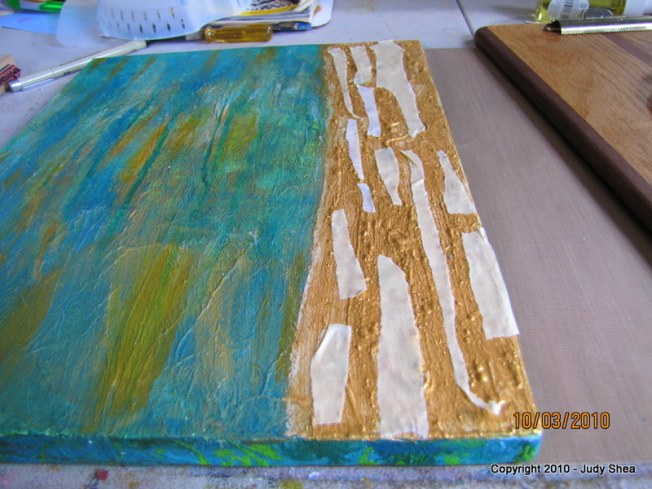
Then painted it red then pulled the masking tape off revealing the gold underneath.

I DIDN’T LIKE IT…I needed to tone down the red.. just wasn’t working for me.

So, I painted the gold over it…..
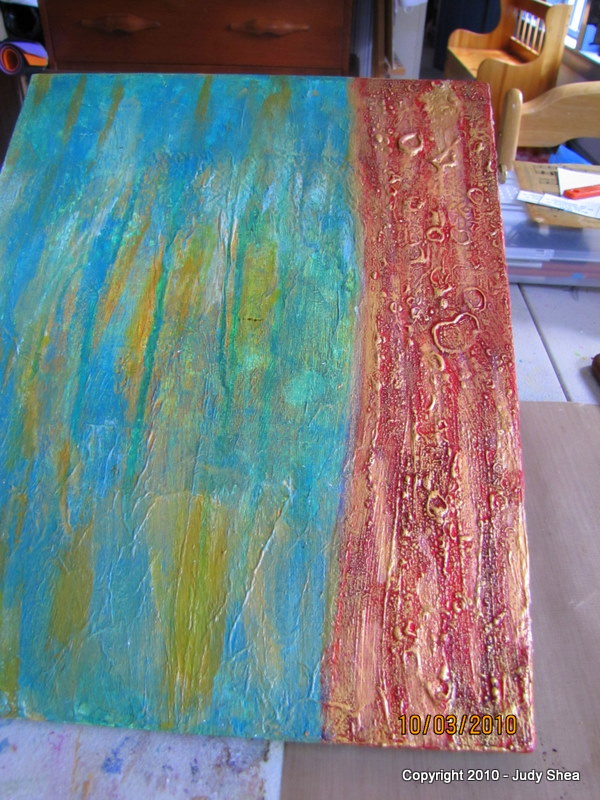
Close up below.. love the texture…

OK… let’s get on with using the Citra Backgrounds….

So, here you can see the citra pages on the left and going up and on the top… Did a little rubber stamping on them and “antiqued” with some brown shoe polish around the edges..  On the bottom is a ripped resin music page.  It’s coming along, but still needs some lovin.

Ah Huh…. one of my favorite techniques.. pushing molding paste through stencil… Here, I tinted molding paste with black acrylic paint.. and mixed to make a black paste.

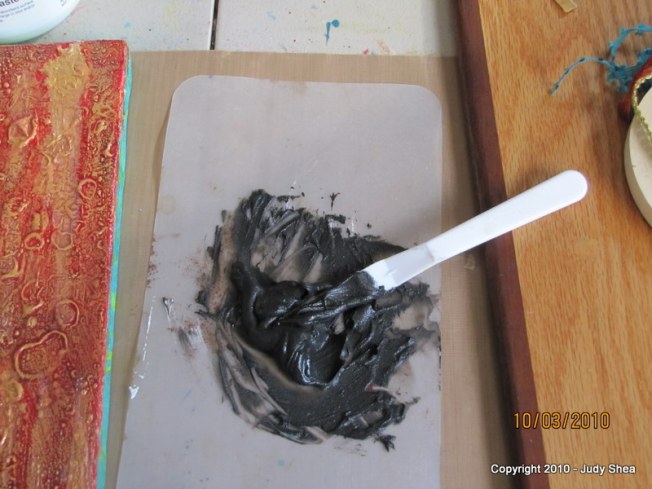
A little boo boo on the top left of the fleur-de-lis.  I’ll need to let it dry and redo that section.

Below is a picture after the fleur-de-lis was done and I added some gold trim along the red strip, hand made polymer clay embellishments, ribbon and gold paste that I rubbed over the molding paste design.  People, I’m just in love with Inka Gold waxy paste by Viva Decor.  I can’t get enough of it.

Here is the last picture I took.  At this point I’ve added, black tissue paper, black stenciling, fabric, lace paper and I blinged up a boring metal pendant.  However, I have to admit.. I know it’s not done.. it still needs a final image above the music paper.  It’s look very royal.. maybe a queen?  Beeswax?    What do you think?

I had so much fun creating this piece.  Hope you enjoyed the post and tutorial as much I as enjoyed creating it for you.   I’ll show my final canvas in my next blog post.

Thanks for stopping by.

Judy  ❤
Grow, Be Happy & Succeed!

Standard

Hey Bloggers: (just plain ole “bloggers” today)

I found this somewhere and don’t know who said it, but really makes you ponder.  Soooo….keep on dreaming, playing and be happy. (I said that)

~~~~~~~~~~~~~~~~~~~~~~~~~~~~~~~~~~~~~~~~~~~~~~~~~~~~~~~~~~~

We do not stop playing because we are old; we grow old because we stop playing.

You have to laugh and find humor every day.

You’ve got to have a dream.  When you lose your dreams, you die.

There is a huge difference between growing older and growing up.

Anybody can grow older! That doesn’t take any talent or ability. The idea is to grow up by always finding opportunity in change.  Have no regrets.

~~~~~~~~~~~~~~~~~~~~~~~~~~~~~~~~~~~~~~~~~~~~~~~~~~~~~~~~

That’s the simple message for today…

I’m taking the day off from work to have a fun art day with a couple of my artsty fartsy friends.   What to work on and what I need to bring.. that’s always the tough part of having an art day away from your own studio.  Keep it portable and don’t bring EVERYTHING.  I think I’ll work on an online class I joined and have not had time to be involved.  That’s what I love about Julie & Chris.. do it at your own pace and the videos will always be there to play over and over. AND.. they will always help you even when the class is over.  Life is good.

Ok, my little “Labor Dayers”.. Have a great holiday weekend.  Yes, summer is over and pssst… come closer… don’t tell my kids, but one is back in high school and my oldest is off to college for her 2nd year and I’ll have the house to myself again….. Yaaaaay!!!  Ok, did that sound mean?  Really, I love having them here … if sleeping til noon means that they are “here”.  Let’s go….. contribute to society or else.  I love ’em.  Someday I WILL miss it.. I know I will.  We had a great summer, but it did go by fast, as they all do.

Thanks for stopping by.

Judy


Kelly, Journals and Fun.. oh my

Standard

Hey Blogsters..

Well, let me tell you about my workshop last weekend with Kelly Kilmer.

First, if you ever get a chance to take a class with the Kell-ster, you have to. A fabulous artist and person. Makes you want to pull up a couple of comfy chairs, grab your favorite liquid consumption and snack (why do I always have to include food?)  and chat all night long.

The weekend was held at a private studio… AND.. thank you Susan, for hosting us.

Being my first class with Kelly, I was a bit nervous to learn how to make/bind a book, but I  felt immediately at ease with her and following her instructions was a breeze.

Ok.. let me stop the chit chatting and get to some pictures, since you’re all so impatient.. geesh.


.. and here she is our fearless leader…. and I do mean fearless.. hey she’s from LA, what do you expect…. just kidding, Kelly.  She is originally from the Bawstin area.

Let’s get to the journal pictures…

This would be my front cover… and my few pages below, top.

and another couple of my pages…


Ok.. screeeeech…let me stop for a second.. and show you the decorative tape that Kelly brings with her for her students…

.. and I have a feeling this isn’t all of it…  My name is Kelly Kilmer and I have a Tape Addiction.  Now, this is the kind of addiction I want to have.. where do I sign up?

Moving on to MORE delicious art…


So, there you go.. a fabulous weekend with Kelly Kilmer.  A great experience for me.  I definiely made some new friends that I will keep in touch with.

And here we are all journaled and focal pointed out.

(I hope I was able to capture a page or two from everyone’s journal; if I missed anyone, I apologize).

Fun, fun, fun… I need a nap.

Thanks again Kelly.. please don’t be sad to see us go.. we feel the same way.