Tag Archives: sewing

Paper Towel Journal

Standard

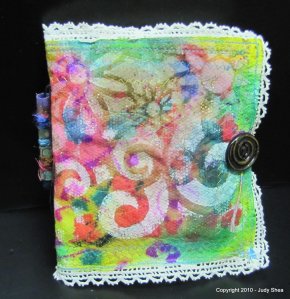
Remember my last post about the paper towel painted backgrounds?  Well, I decided that I liked them so much, I was going to make something out of them or at least one.

Now mind you, I am not a journal maker or a sewing, so I combined two things I am not good at and here’s what I came up with.

Go ahead and click to see details and close ups.

Lots of trial and error here, my friends…  First off.. paper towels still rip.. Even if they are the “quicker picker upper”… they rip.  I still had fun, cuz it was just plain cool.

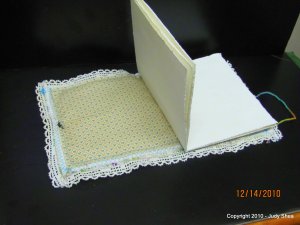
So, basically.. took the paper towel and sewed some lace trim around the edges and backed it with another piece of cotton.  I used metallic gold and turquoise thread.. and some beige for some of the inside cover.  I then sewed all around the front with gold swirls.. not as easy as I thought.   Then sewed another piece of fabric for the inside covers to putt batting in.. so it would be a puffy journal…   Sewed 3 sides, slid in the batting and sewed up the fourth side.  I took 4 pieces of watercolor paper and sized them smaller than the book size, which is about 5″ x 6”, closed.  I bound the pages with wax linen thread… put fabric beads I made with some other acrylic beads to dangle on the tail.  Sewed a polymer button I made to the front, highlighted with gold wax.  Made a loop-di-loop string to wrap it from the the back.  Does all that make sense?  Did I mention that paper towels rip?

Badda Bing.. Badda Boom.. there you have it!!  Quick and dirty paper towel journal..  Ok, it wasn’t quick it took me a few hours.. and my back.. oh my back..hanging over the sewing machine… glasses on.. glasses off.. change threads, change bobbins.. dog wants to pee.. string in my hair.. now I gotta pee.  Fuhgedaboudit!!

My thoughts:  I will definitley give this another try.  I wouldn’t use a paper towel again, but there are other non-fabric materials to use.. I think of Tyvek envelope paper for my first thought.  Of course leather is just..well, perfect.

I’m sure the front of this journal will not hold up if I abuse it, but it’s only for play… I think I will try to seal it with gel medium to make it stronger.

I’ve been playing with some used coffee filters.  Oh messy and vintagy.. love it.  I’ll be showing those soon.

I also finished my textured canvas piece that I showed  in the same blog post I linked above; that’s also coming up.

Thanks for stopping by.

Judy

Oh Buttons…Oh My

Standard

Hey Blogsters…

As you can see, my banner above is full of buttons, beads and embellishments.   Those are all made of polymer clay. Well I’ve been busy in the workshop making some to show you.   I thought I would show you how to make my buttons.

Some call me a texture queen cuz I just love textures.  In clay and on my mixed media canvases, pushed into molding pastes, built up by using stencils.. I’m in love.

So, let’s have some fun, shall we?

Safety note:  Make sure you wash your hands thoroughly after working with the clay.  Also, work in a well ventilated area when using the oven when baking the clay.  Make sure your oven is regulated.  If it spikes, it may burn the clay which will give off fumes.  You may want to test the temperature by using  a separate thermometer to show exact temp before you put your clay in the oven.  Please visit this site for everything polymer clay such as baking, brands, conditioning, safety, etc.  Just search via the index to the left.

What you’ll need:


  • 1 package polymer clay (I like Premo or Fimo Soft). I used a beige color to get the results I want, but you really can use any color; it’s your world.  A whole package will make several buttons.
  • textures: rubber stamps, jewelry, other buttons, doily, etc..
  • baby powder or water
  • brown acrylic paint
  • dedicated oven for baking polymer clay
  • knitting needle or wooden skewer to make the button holes
  • Future Floor Wax  or any other sealer or varnish
  • don’t forget rags, paper towels, too
  • optional: rubber gloves

Start out by conditioning your clay in her hands until soft and pliable.  I also have a dedicated electronic pasta machine to help with conditioning.

Depending on how big you want your buttons, make a log out of your conditioned clay.  Cut these into equal pieces if you want them to be all the same, and then roll into balls and then press with your finger to make a disc.   You can also use something flat, like a jar lid to smoosh it down.

Now, here is where the fun comes in.   Take your discs and start to impress them (maybe do a dance or tell a joke; just kidding) with objects or rubber stamps.  I am using a rubber stamp sheet that is flexible.

Sandwich in it between the sheet and press down making the textured impression.

Well, lookie there.  Are you excited yet?

Do this to all your discs, using the other textures… Here’s an old plastic doily that I pushed the clay into with a plastic lid.

Excited?   Okay, I’m exhausted.. I’ll do one more… tough crowd.

Now make your button holes using your knitting needle, wooden skewer or whatever suites your fancy.

Once you finish these steps with ALL your discs, it’s time for the shakin and bakin.. well, we’re not gonna shake, but we are going to bake.

Here are your buttons, ready to go in the oven.  I use a ceramic tile.

Bake these according to your clay package directions and visit the site I mentioned above in my “safety note”.

The timer has gone off and the baked clay is cooled, right?  Let’s keep going…

Here they are baked and cooled.

Feel like getting messy?  You may want to wear rubber gloves… or not… up to you.

Now, it’s time to antique them.   Take your brown acrylic paint and smoosh (there’s that word again) it into the grooves and crevices of the textures.

With a lightly dampened rag, wipe off the excess on top, so all that’s left if the paint in the deep textures.  This will also give the clay a golden vintage look.

Let dry completely or you can speed it up with a hair drying or heat gun, moving over it in a fanning fashion. Note: make sure your push your hole maker thingamajiggy back in the baked holes, as the paint will get in the and they need to be free of it.

Here they are all “antiqued” and “vintagy” (is that word? it is now)  looking.  I threw in a few turquoise buttons, one of my favorites.  Now tell me you’re excited.

One last step…….

Get out your varnish and brush on one coat on the buttons, front and back.

Let the varnish/future dry, or you can use your heat gun again.

Here they are finished.  So purdy.. I see you smiling.. you ARE excited?

Here are a few other techniques.  I used a burgundy clay with a gold antique, a black clay with turquoise antique and then the red button was baked with no texture then I stamped on it with a rubber stamp with black ink stamp pad.

You can certainly sew these button on sweaters or make smaller ones for shirts.  They can be washed, but in cold water and put the garment inside out.

My main uses are to use them in my mixed media art.  However, it you can make charms, bracelets, necklaces, mosaics. … Make a colorful bunch and fill up a glass jar.. put them in a cool looking bowl..just imagine.

Here is a small canvas I did with wire sewing one clay embellishment and thread sewing a button.  They are great for chunky journals too.

I hope you liked this tutorial.  I have such fun making these pieces.  They look so beautiful all in a pile; as you can see from my banner.

Please let me know if you have any questions… or have any feedback.

Please share this with your friends; it’s such a fun project with beautiful results.

Thanks for stopping by.

Judy

Next up……. Polymer Clay Artist Trading Cards (ATC’s) Workshop.   Don’t miss it!
… for the birds

Standard

Hey Blogsters:

I recently went to a fun filled workshop at Ink About It called Beeswax Birds. These were created by Autumn Hathaway.  Autumn is such a great teacher; one of the best.  What a fun time we had with her sense of humor, kindness and patience.   You can read about her, our class and see the “flock” of the birds made at the workshop on Autumn’s blog.  Thank you Autumn.  We hope you come back to Ink About It very soon… please!

Here is my bird (2 different lightings):

My next little fun project was a surprise find from a garden center store that was closing.  They were selling all their display shelving.  This was hiding in th corner, calling my name.  I knew I needed something in my studio to put my gels, mediums and smaller paints on and keep on my art table.

Here it is how it started:

I gave it a light sanding, painted everything but the shelves and started to add decorative papers/cardstock to the shelves.

Here it is after I painted the front of the shelves and added a crackle technique and stained it.

After everything dried, add did some rubber stamping  and paint doodles to the sides.

I am so loving that this sits on my table and at my reach.

Thanks for stopping by

Judy

Next up:  LOVE LETTERS

Swaps

Standard

Swaps can be fun.  Here’s one I did for manilla tags.

On the tags I used: Clearsnap’s Colorbox Cat’s Eye Ink Pads, and smooshed those different colors around, rubber stamps, polymer clay button I either sewed on with thread or fun wire, embossing powder, ribbon and brads.

Swaps need a good coordinator and most importantly committed participants.. one person can ruin it all.  I’ve done a few, most are excellent, but a couple have fell through the cracks.  I’m still waiting for the results of one; it’s been almost a year.  People get busy and can see it through to the end.   Now, I choose wisely or not at all.. lately it’s been the latter.

Here is another I did for ATCs.  I made them out of polymer clay.  Now, that was fun.  The recipients were thrilled to get something so different.

Some, I stamped into the raw clay with rubber stamps then antiqued with brown paint or shoe polish, others were covered with decorated napkins once out of the oven.  The others were covered with a sheet of millefiori clay canes.  All of them have been embellished with clay buttons or beads.

I can’t help but use polymer clay thingamajigs on all my work.  they don’t seem complete without one, two or ok maybe three.

Thanks for stopping by.

Judy

Next up…. Mixed Media Mirror Frame.. Oooo la la

Fabric Cuff

Standard

Hey Blogsters…

Well, as promised, I’m showing you my fabric cuff I made out of scrap material and fibers… you know bit and pieces of colorful things.  I can’t take the credit for the idea.  I got it from the ThreadBangers YouTube videos here. I said, “hey, I can do that”.. so I did.

Here is what I used:

Super Solvy
desired fabric length piece as a base
metallic gold thread
any cool colors of fabric, yarns, fibers you have
lace (gives it that nice touch)
elastic cord
polymer clay hand made button

I took the base material and used that as my first layer; I wanted the layer on my wrist to be softer.  Then I just added all the scrap pieces of material and the fibers on top of the base layer.  Really, just like in the video.   You then sandwich the fabric (it will be chunky) in between the Solvy film… or like a taco.   Sandwich.. taco.. you get the idea.

Hold it all together and sew that baby flat.  I used metallic thread.. up and down, all around for about 15 minutes.. make sure everything is sewn flat.

Here’s the fun part… now let it run under warm water and use your fingers to massage the ooey gooey stuff out of it…  You can’t believe it’s a solid piece.. at least I couldn’t, but it doesn’t take much to make me happy.

Now, let it completely dry.

Select and cut the cuff to the size to fit you and sew the button to one end and the elastic cord loop to the other and that’s it, my friends.  Here you go:

I received some really nice compliments on it and my niece gave me the idea to make just back and white.  So, I thinking black and white scraps with silver glittery fibers and silver metallic thread.

It was quite a fun project and using the Solvy is amazing.. Imagine the pieces you could make with it for fabric journal pages, purses and collage.. oh my.

Thanks for stopping by!

Next up:   fun textured collage on wood

Look Who Made a Journal…

Standard

… and that would be me.

Hello Blogsters:

Yes, I’m a bit behind… having the same trouble as my friend, Amy, (read her blog post) with sciatic pain.  Not fun, believe me.  Amy and Karen both had to watch me hobble around like an invalid.. Thanks, my friends for your help on our art day, which I wasn’t going to miss.. no way, now how…. on to art talk….

I’ve always have been intimated by making an Art Journal; especially the sewing of the binding.. Give me the heebie jeebies.  But, I’ve been intrigued by them.  I’ve seen plenty of YouTubes and other blog tutorials, but never was I gutsy enough to try it….  And then there is the piece of writing in it too… WHAT? .. what am I going to write about?  It’s enough to make the book and make the backgrounds, but now I have to write in them too? <insert running away and screaming sounds here>.

Wait.. who says I have to write in them?  No one and therefore, I don’t. (well, for now anyway.. one step at a time)

So with that, I asked an art friend of mine and amazing book maker and taker of many book classes, Raine, to show me how to make a basic book….. from scratch.  She did.  I wish I had taken pictures of each step, so I’m sorry I didn’t, but it was my first time, so for the next one, I will.

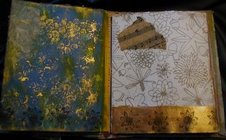
Here is the finished book and then I’ll show you some of the backgrounds I started to create.

P8130037

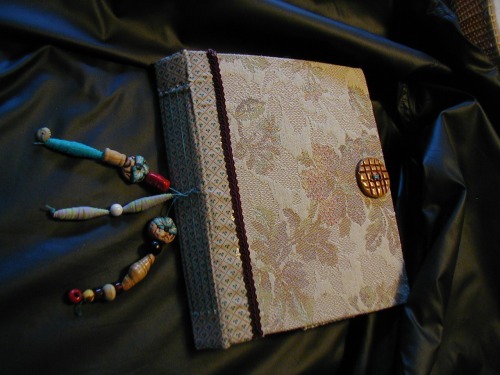
We started with heavy cardboard for the front and back covers and a manila folder strip for the spine.  I used Weldbond glue to adhere the upholstery fabric to my front and back covers; a cotton fabric was used for the spine, gluing the manila folder strip to it.   She showed me how to do a Pamphlet Stitch using waxed linen thread.  I sewed 4 signatures in it.  How cool is that?  I put beads on the left over threads hanging down from the spine.  The button on the front cover is one I made from poly clay.  The size of the book is approximately 8″x8″.

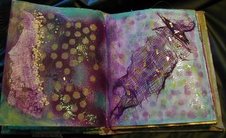
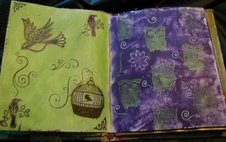
Here are some pages I’ve background and for those who know me.. I LOVE textures, embellishments, found objects and playing with layers:

book9

book8

book6book7

book5book3

book4book2

Some of the techniques/textures I used in this book so far, and I say ‘so far”, as I have not finished this by a long shot.  Materials: gesso, acrylic paints, color mists,  polymer clay, tissue paper, cheese cloth dyed with ink sprays, rubber stamps, wax crayons, decorated duct tape (yes, it comes that way, I’m not kidding; on the last page shown), resin music paper, ink jet transfer.

I can’t tell you how satisifying and accomplishing this project was and I have to thank Raine for helping me.  I appreciate it more than you know.

Here is a small vinyl book that used to be a calendar note book that I altered, but have not sewn any pages in yet.  Now that I know how to sew a signature, I can attempt this myself.

P8130021

This was covered with crackle paste, then I used a Walnut Ink to stain it.  The bird, was an ink jet transparency that I put directly on the cover over old book page and gel medium over it.  Sanded around it and put beads on the ribbon.

Thanks for stopping by.

Judy

Next up…”Do You Doodle?????”

Sewing Project

Standard

this week, i had to share a new experience that may come easy to some of of you, but for me it has always been intimidating….  SEWING!.. on a machine..  i bought a new “huskystar” sewing machine about 2 years ago..  my intention was to so some fabric dolls, mixed media fabric art and maybe repair some clothing  for the family.  well, i did one thing  2 years ago and put it away…  this year, i decided to take the machine out again and push myself to learn the basics. with a little help from my mom (the best mom in the world, by the way; happy birdthday mom.. 83 this week!!) i was able to tackle the bobbin loading and winding, learn some different stitches and had some fun.  i did it.. i passed the hyperventilating stage of machine sewing.  before that, the last time i sewed on a machine was when i was in the 9th grade in home economics class..  we had to sew a skirt and in order to get a good grade on it, we had to wear it to school.   i remember making a patchwork skirt that had a ruffle on the bottom of it… god it was so ugly and not to mention that i didn’t have a cheerleader body either.  so the day came to wear it to school. i walked to school everyday.. i had a slip on and it kept riding up to my waist….that was a blast.  oh, and this was 1974.   i was the only student in that class that wore my skirt.  (“debbie downer” sound from SNL, please.. waa waa waaaaaa).  i think i got a “B”.  isn’t it funny how we remember these stories from school and i can’t even remember what i ate for dinner last night.  ok, enough of that dreaded memory… i’m sure i can find others… it’s actually more funny than sad…at least it is now.  send a comment on an embarrassing/funny school memory if you have one; i’m sure you do.

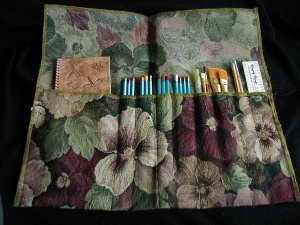
back to my original sewing intentions.  i recently saw online, somewhere, an art supply fabric wrap.   i decided to challenge myself and make one; here is how it came out..

 p2110007

p2110002

p2110006

i used an upholstery book sample that i recently purchased from skybluepink.     you can make the pockets any size you want to fit your own art supplies.   

that’s a wrap!

judy