Tag Archives: Gelli Plate

Perfectly Imperfect Stamps- Blog Hop with StencilGirl & Foam Board Express

Standard

ALERT:  LOTS OF PICTURES & 2 GIVEAWAYS!!

Welcome to a new blog hop.  This time, the StencilGirl Creative Team is collaborating with Foam Board Express and asked us to show what we can do with StencilGirl stencils and FBXpress foam board.

LOGOFoamcorexpress Foamcorexpress

After you are done reading my post, I shall release you to the rest of the team members to make you even more “hoppier”. (sorry)

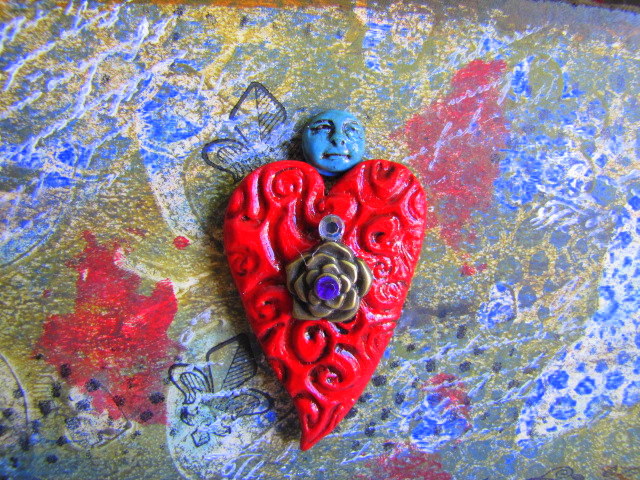
“Perfectly Imperfect”?  What does that mean? Well, you’ll see as you follow my steps and see the pictures.

Note: There are too many pictures, so I am making them smaller, but you can click to enlarge.

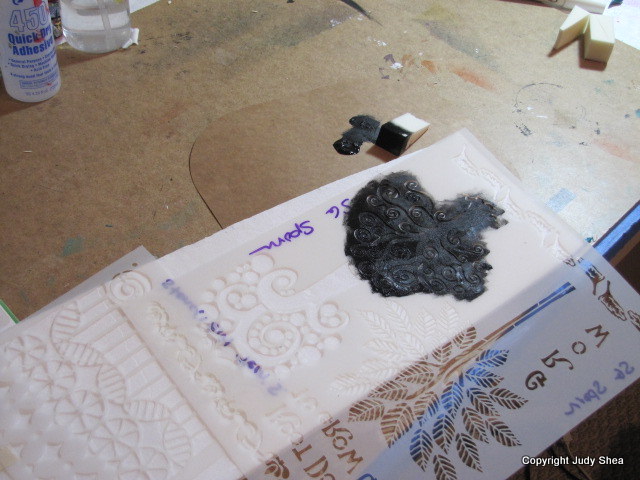
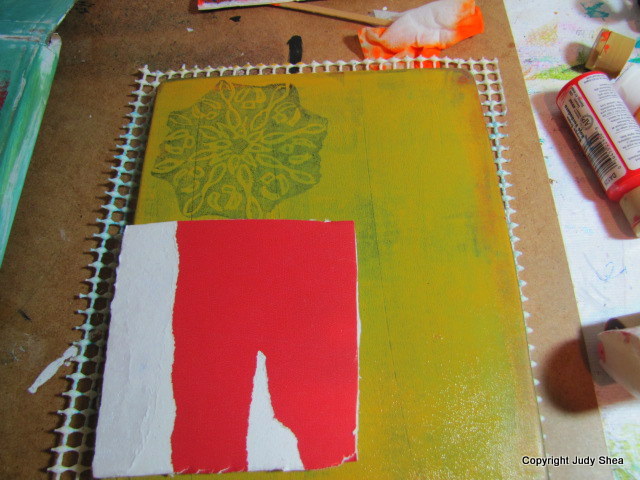
I broke a piece of the board off and peeled the first layer of paper off of it.  It left behind another thin layer.  I sprayed with water and rolled the damp paper off to reveal just the foam.

IMG_3782 IMG_3783 IMG_3784 IMG_3785

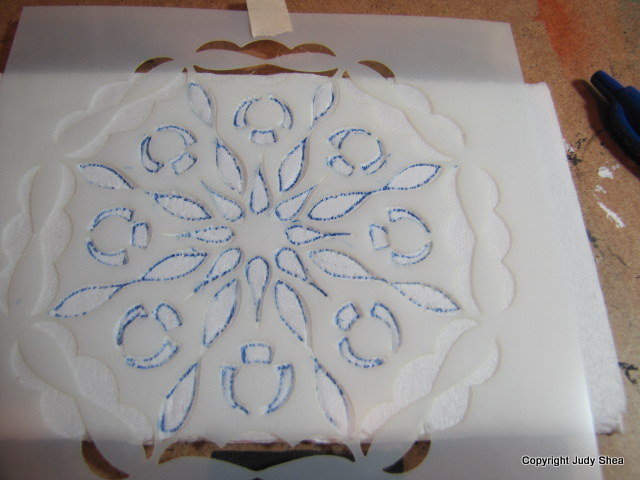
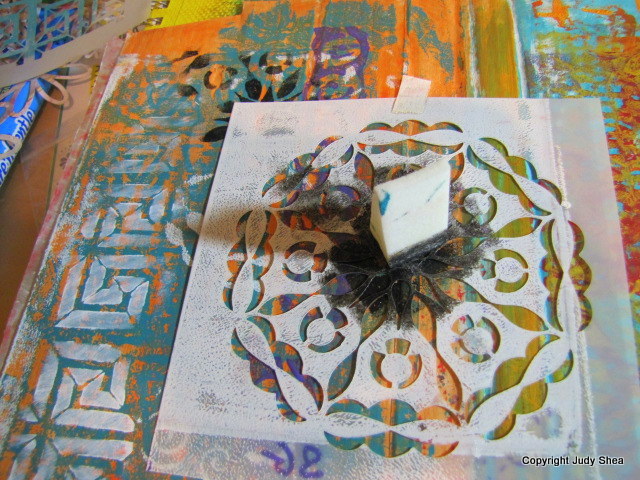
Using StencilGirl stencils Terry Stegmiller (Layerd Salad)  and Jessica Sporn (Judy’s Trees (that’s me) and Doors & Windows) and Mary Beth Shaw (Mandala).

Update:  During the burning process, I wore a mask, had the window open and ran an air purifier. I don’t think you need to do all three, but the mask is helpful and the window open a bit.

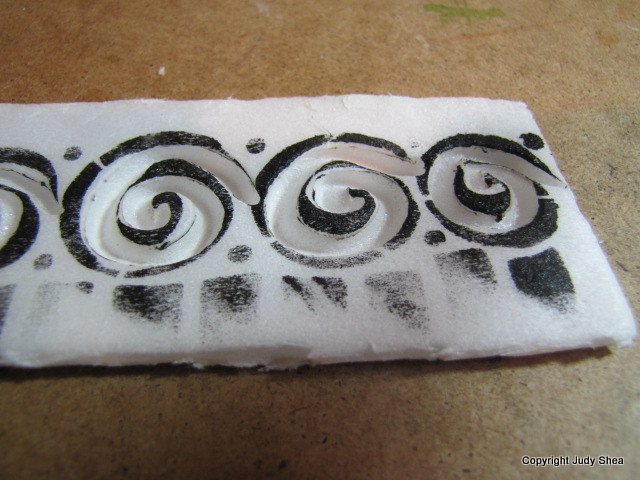
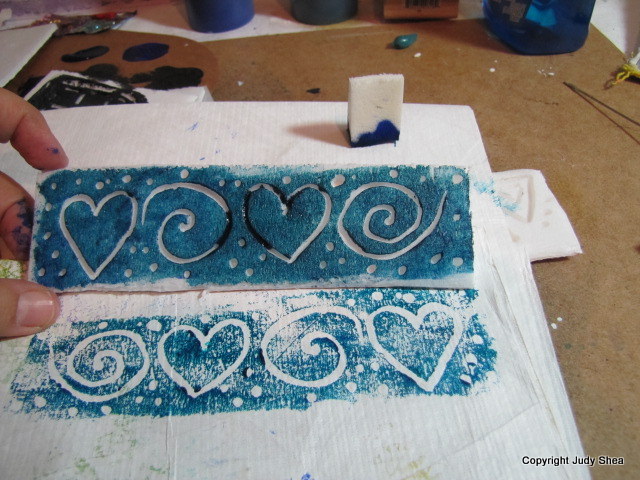
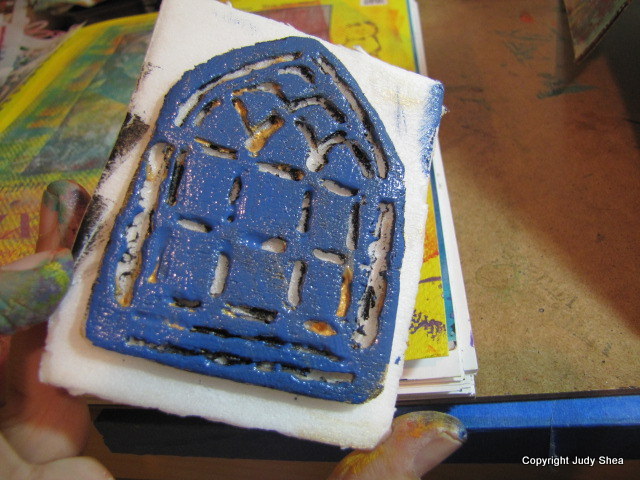
The tool I used was the Creative Versa Tool.  I used a couple of different tips to get the result I needed.   Here is where the “perfectly imperfect” comes in.  It’s pretty impossible to get a perfect cut, but I like them that way.  So, to me they are perfect.  The idea is to burn off the white foam around the design. Not easy, but fun results.

IMG_3795 IMG_3797 IMG_3799 IMG_3800

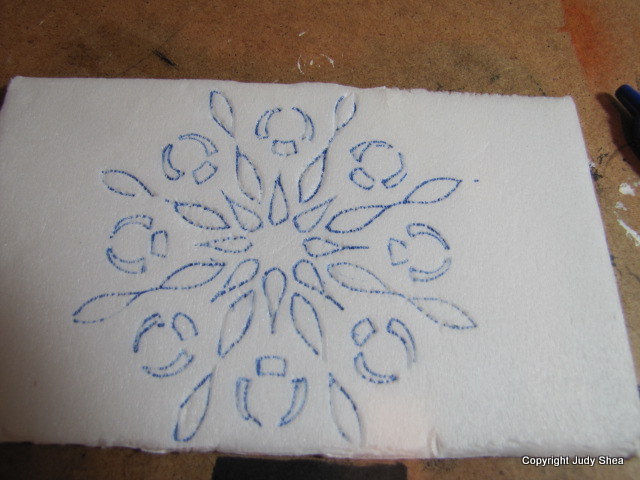
Only using a section of this stencil.  Can you see the burned foam? You have to move fast or the foam will just melt and you are left with bigger sections.   I used a pen for the mandala stencil.  I also make a couple of free form designs.

IMG_3801 IMG_3803  IMG_3805  IMG_3807 IMG_3809  IMG_3815 IMG_3816 IMG_3817 IMG_3818 IMG_3819 IMG_3820 IMG_3821 IMG_3822 IMG_3823 IMG_3824

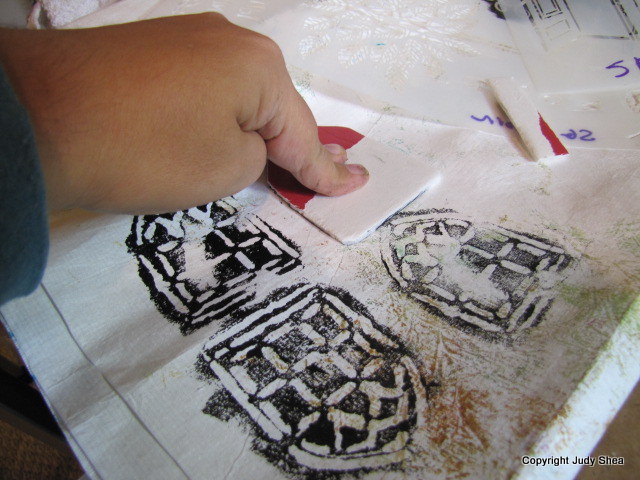
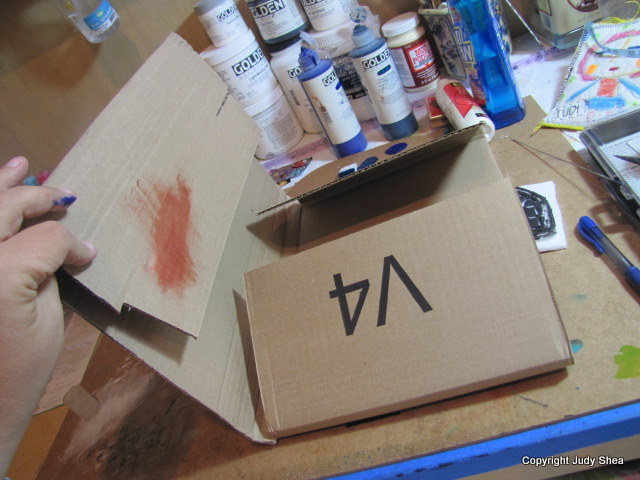
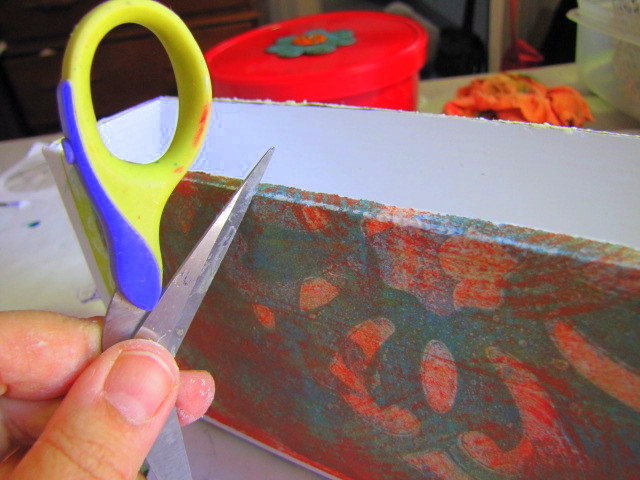
Now what?  I have all these cool imperfectly perfect stamps.  I could stop there, but nope… remember THIS POST, where I took a cardboard pamphlet and made it a piece of art?  I ended up giving as a gift to my lovely friend Corrine Gillman.  Anyway, I had a mailer that was calling to me to use my new stamps on it.  On to my mixed media mailer.

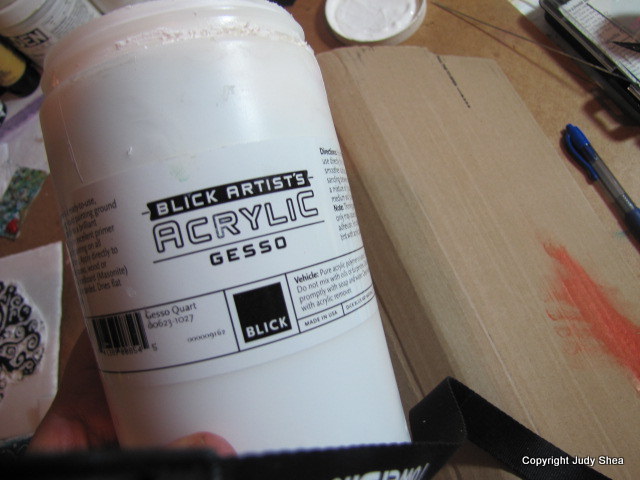
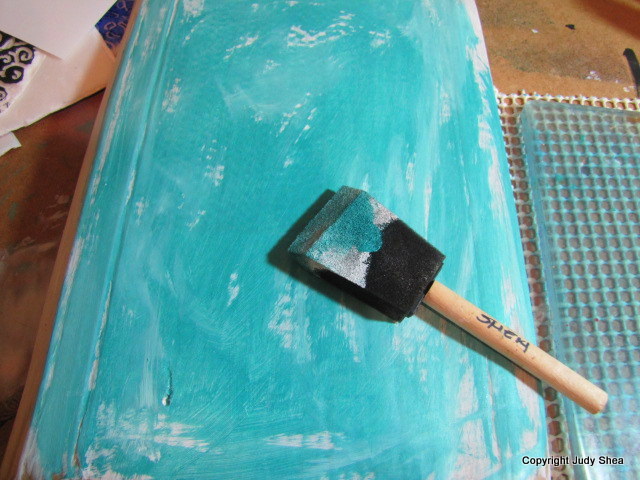
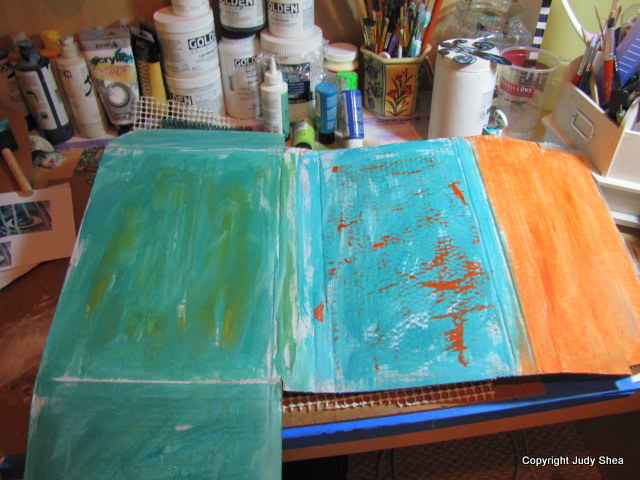
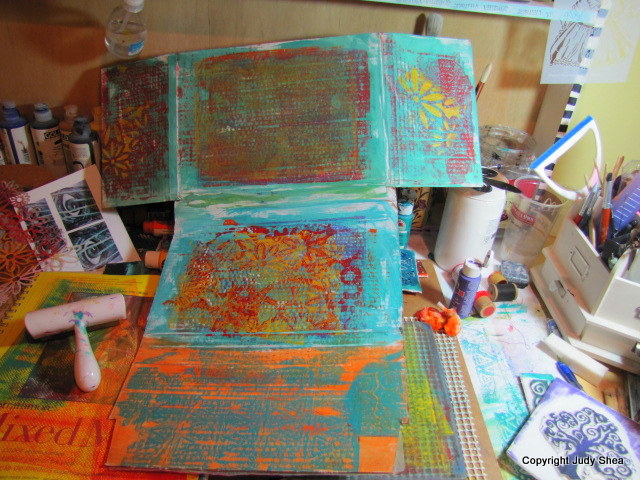
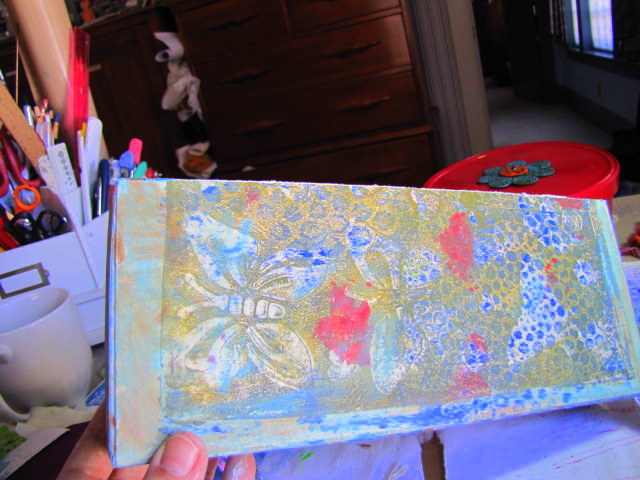
First I gessoed the outside of the mailer. Then I started to paint it with simple craft paints.

IMG_3825 IMG_3826 IMG_3828 IMG_3829 IMG_3830 IMG_3831

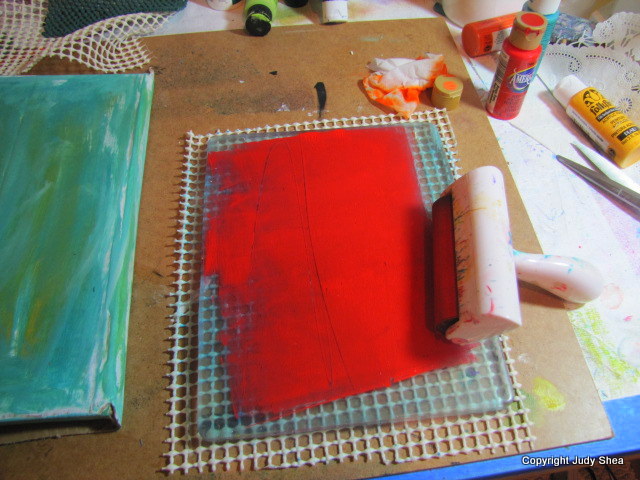
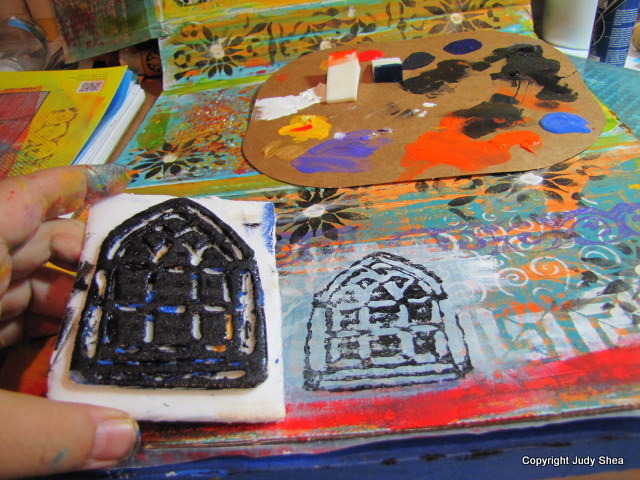
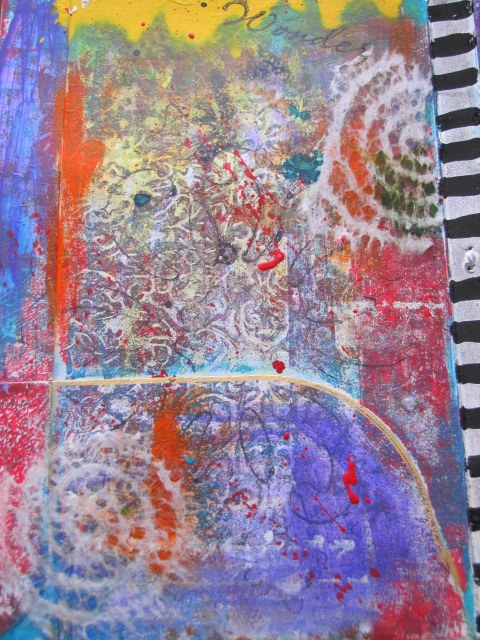
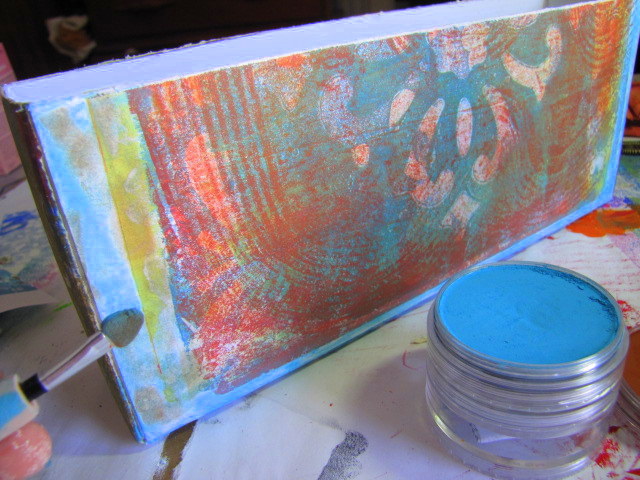
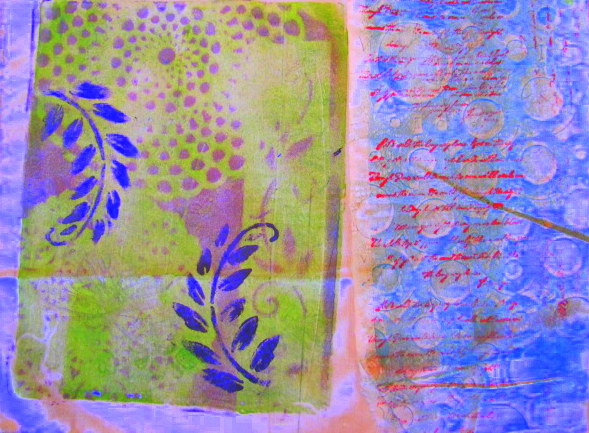
Then I pulled out my Gelli Plate and started to make designs, using the foam stamps and stencils. I put a non-skid rug mat under my Gelli Plate so it won’t move as I brayer it.  Works great!  I also use a piece of the mat as a stamp.

IMG_3832 IMG_3833 IMG_3834 IMG_3835 IMG_3836 IMG_3837 IMG_3838 IMG_3839 IMG_3841 IMG_3842 IMG_3843 IMG_3844 IMG_3846 IMG_3847 IMG_3848 IMG_3849 IMG_3850 IMG_3851 IMG_3852 IMG_3854 IMG_3855 IMG_3856 IMG_3859

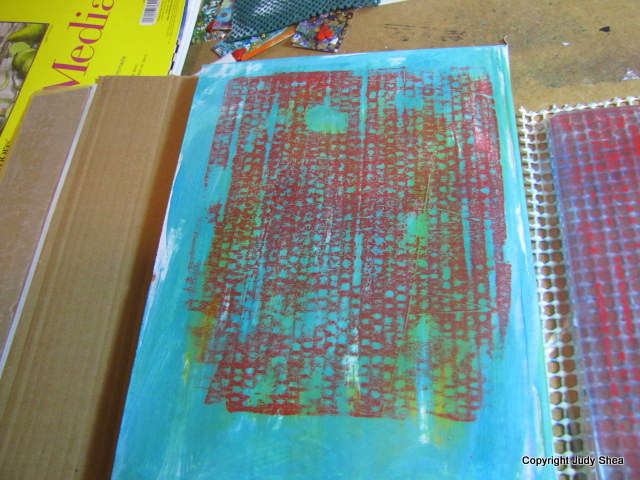
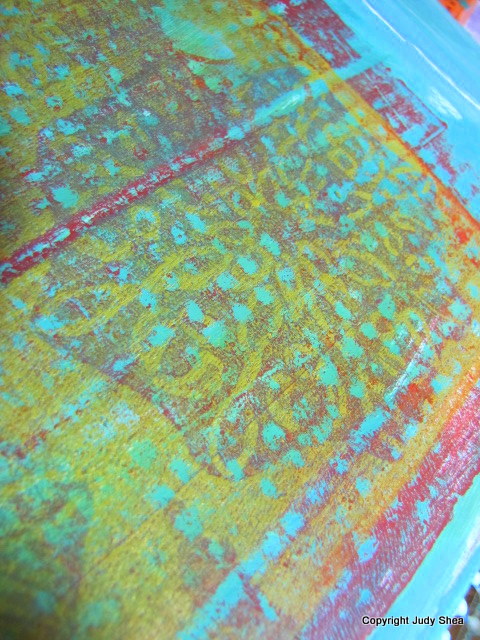
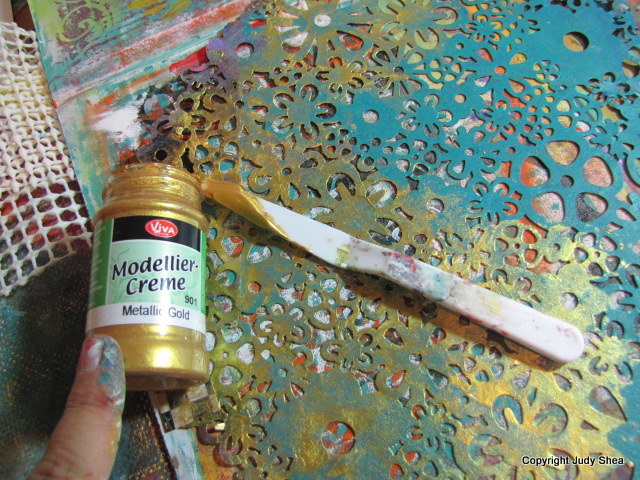
I used Viva Modeling Cream in gold for some accents with a very old paper stencil.

IMG_3860IMG_3861

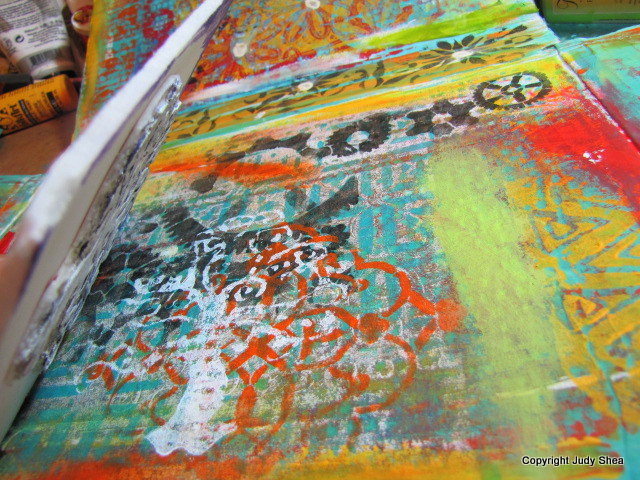
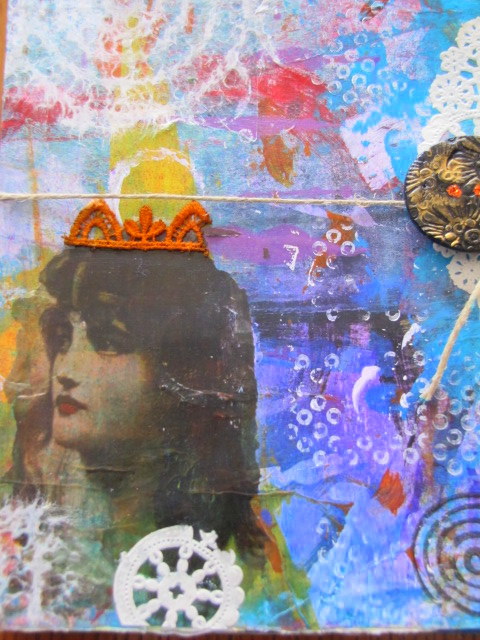
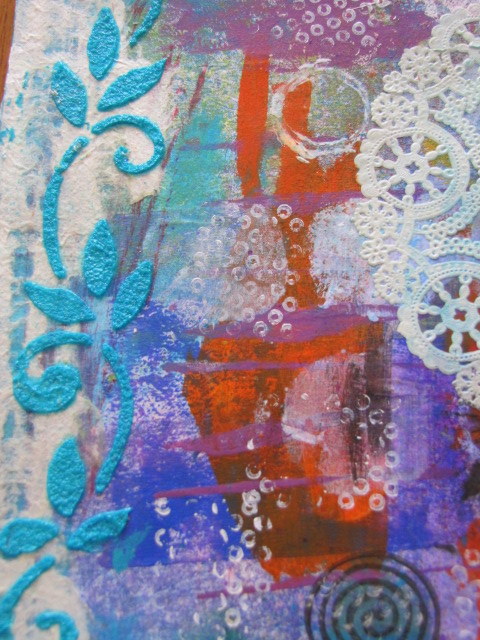
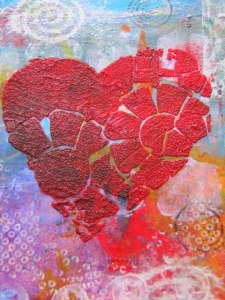
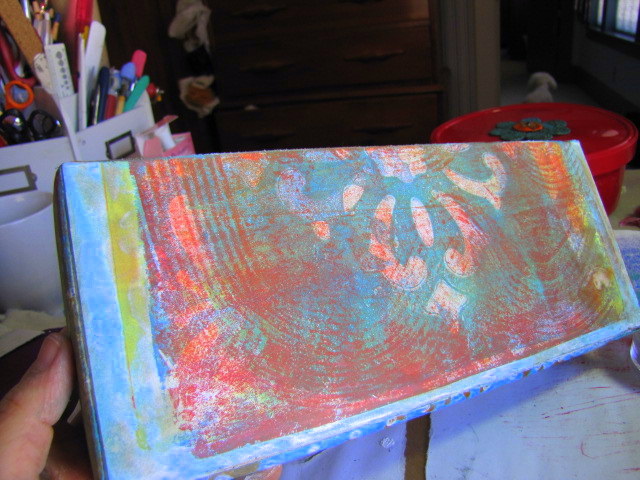
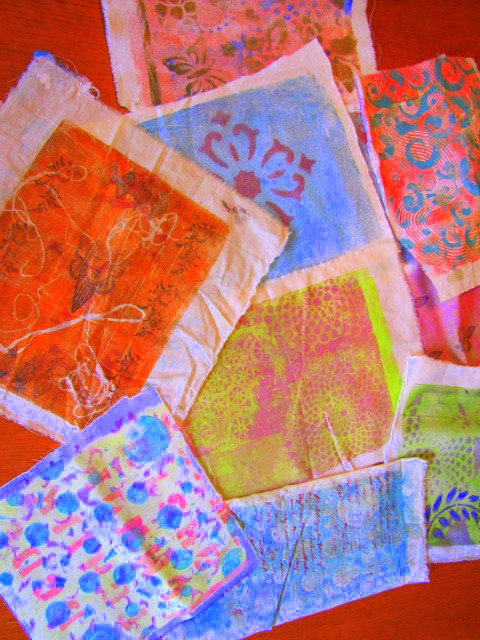
I kept stamping (only using acrylic paint) and then did a little collaging and added some lace paper.  Here is the result.

IMG_3874 IMG_3875 IMG_3876 IMG_3877

Wow.. what a trip.  I really hope you enjoyed that; I certainly did.

Thank you to Foam Board Express for letting me experiment with their product.  You can find FBXpress on Facebook and Pinterest.

Now, come with me to follow the other bloggers joining me on this hop.  Let’s see what everyone does with their foam board.

StencilGirl Talk
Mary Beth Shaw
Carolyn Dube
Julie Snidle
Janet Joehlin
Judy Shea (ahem, that’s moi)
Linda Kittmer
Leslie Tucker Jenison
Jessica Sporn
Maria McGuire

…. and now for the give-a-ways.

Number 1:
PRIZE PACKAGE:
 Foam Board Express would like to offer a package of five (5) of its 20-inch by 30-inch flat display foam boards, including one black foam board, one white foam board and three additional foam board sheets in colors chosen by the winner.  Color choices include:  green, red, yellow, dark blue, neon yellow, neon orange and neon pink.

Number 2:
StencilGirl is giving away Mary Beth’s new DVD called: StencilGirl Mixed Media Sampler Journal
U8166_CM_ShawSamplerJournal_DVD.indd

All comments on all blogs are eligible. Combined prize going to one winner.

Well, I don’ t know about you, but I’m exhausted.  That was a jam-packed post and two great prizes to win.

I can’t thank you all enough for supporting and following me.  Your comments mean a lot.

As always, thanks for stopping by.

Judy  ♥♥♥

Mixed Media Mail Updo

Standard

Hey thereI know I know….I’ve been gone for about 3 weeks.  Life/work, once again, gets in my art way.  But no fear, I’m here now.

I’ve been working on this video for a few weeks. I finally found the time to finish it.  I started out as a large pamphlet I got in the mail.  I thought it would be neat to alter it with some mixed media magic. Once I finished filming, this sucker was about 45 min long.  So, had to cut it down a little and fast forward a lot.  I put some comments in so you would know what I was doing.   Let me know what you think.

If you have any questions about my process, give me a shout.. glad to help.

Now… enjoy!

Here are some close ups.

IMG_3288    IMG_3289    IMG_3290 IMG_3291   IMG_3292

IMG_3293   IMG_3294

If you  live in New England or even Massachusetts, you probably are ready for Spring like the rest of us. We’ve had enough snow this winter and I’m ready for a nice long walk… I don’t know… Maybe late April?

I hope you enjoyed the video.  Love to hear back from you.

Judy

Gelli Prints – Recycled Box

Standard

Well, I’ve been waiting for this week to come for about 4 months now. This marks the end of very long days, and sometimes nights, preparing for a very big customer event at work.  So, mission completed and have sent all the executives off on their trip. I promised myself once this week came, I would take some time off and enjoy some time in the studio….

…. and that’s exactly what I did this morning…… follow me, will you?

I recently purchased something that was contained in this long box.  I decided to recycle it … I could do something with it… right.. something for the art studio???  I think so.            CLICK ANY PICTURE FOR A CLOSER LOOK.

I gessoed all over.  If I were to do it again, I would sand the sheen off. But, a couple of coats; wait til each coat dries.  Tip: sand the box first.

IMG_3190   IMG_3191

Then, I used up my Gelli Prints I had done over the past couple of months.  See my posts/videos HERE and HERE.  Measured, cut and glued.

I used Martha Stewart’s Decoupage Glue and Sealer.  I had it in the studio, so I do not favor it, really.

IMG_3192

One the sides were glued down well, I scraped the edges with a scissors blade to get rid of the excess paper coming over the edges.

IMG_3194

Then I used Pan Pastels to fill in any white spaces.

IMG_3195 IMG_3196

It’s coming along.

IMG_3197  IMG_3198

Took a rubber coaster and used it as a stamp (dots) with some Staz On black ink.  Then I used Distress Ink (walnut stain) to rub along the edges of the box to stain it or vintage-ize it (I made up that word).

IMG_3200  IMG_3201

Not shown here, but I added some stamping around with black ink.  Painted a text stamp with white acrylic paint and stamped all over.  I also took some brown and orange paint mixed and filled in some of the corners of the box.

Ok.. now I must put some “buttons n’bellishments” on there, don’t ya think?  What to choose, what to choose.

IMG_3204  IMG_3205

Then on the back.. I think a big face.  Yes?

I put a coat of the Martha Stewart sealer on one side and Liquid Laminate on the other.  The MS sealer had tiny bubbles and dried that way.  No big deal, but wasn’t crazy about it.  The Liquid Laminate was, as always, great.  Nice thin coat that dries fast.

IMG_3211  IMG_3212

IMG_3213  IMG_3214

Ok, now it’s done.. what shall I use it for?  It won’t take anything to heavy, I had to think light.  I decided to use it for my smaller stencils and Gelli Print bookmarks I made. I LOVE! I LOVE!

IMG_3216    IMG_3218

I love what embellishments do for an art piece.  My online “Buttons n’bellishments” workshop is over and I’ll be sharing the student results very soon, along with a Flickr group.

If you want to see what else you can alter/recycle with your Gelli Prints.. Check out Carolyn’s Heart Boxes and Corrine’s binder along with Jessica’s pasta box recycle.

As always, thanks for stopping by.  Leave some love.. I love hearing from you.

Judy

Fabric Printing with the Gelli Plate

Standard

Ok, everyone.  I keep it short, as work is taking me down this week. But I had time to play at Carolyn’s Gelli Print Party.. now every first Friday of the month..  Won’t you join us.  Check out her blog and all the linkys to the party.

I enjoyed some of the prints.. not all, but was still quite fun.  I imagine building even more layers of stamps and image transfers.  Endless, I tell you.. endless.


Here are some close ups of the fabric prints.  I increased the saturation, as the paint on the fabric is very suttle and the camera did not justify the colors.


IMG_3170 IMG_3171 IMG_3172 IMG_3173 IMG_3174 IMG_3175 IMG_3176

Thanks for stopping by.  Share the love.

Judy ♥

More Gelli Plate Fun & a Gelli Journal Give-a-way!!!

Standard

Hey, I’m back with another video on some gelli’ing.  It’s now the end of the Gelli Print Party with Carolyn Dube, but I’m just loving the prints and making some cool art from them.  Go check out Carolyn’s blog and see her videos, then check out her linkys to see what others are doing. 

A Colorful Journey

Now, check out my latest video.

In my last video, I took some of my favorite prints and made nice strips with them.  Maybe bookmarks? Click picture for close up.

IMG_3131  IMG_3129  IMG_3130

As much as I love my prints, what am I going to do with them all?  I’m going to make a journal with them and give it away, that’s what.  Yahoo!!!

First, let me be clear…. I am NOT, I repeat AM NOT a journal maker.  So, I am just taking the pages and sewing them together.  Nothing fancy.  Make one signature, sew it to a cover and then they can be journaled on with backgrounds already for you.  Thanks to my friend, Raine, for showing me how to do this a long time ago.  She makes amazing journals.  I don’t even know the name of the stitch I’m using, that’s how much of an non-journaler I am.  In and out, that’s what it’s called.. the “in and out” stitch.  No, not really.  I kid, I kid.

So, here is the journal I stitched together.  Simple, not fancy and ready for your mixed media fun and journaling, collaging or whatever you want to do with it.  You could glue a blank page to an inside page and journal on that OR paint some squares of lighter paint to write on.  So many ideas.

IMG_3132  IMG_3134  IMG_3135  IMG_3137  IMG_3136-001

I gathered all the Gelli papers together and ripped them down to size with a metal ruler and just pulling strips off so they would have torn edges.  A few pages are smaller than the others, just for fun.  Then I made a cover page and coated with Liquid Laminate (love that stuff) to seal.  I made 3 holes in the binder and used wax thread and an upholstry needle to sew all the pages together.  Again, in one hole, out the other until I used up the thread and the pages were nice and snug.  Strung some fabric beads I had made on the binder edge and added one of my “buttons n’bellishments” to the cover.  If you want to learn how to make one of these embellishements, take a look at my online class and join us.

I hope you enjoyed our party.  Thank you, Carolyn, for a great Gelli Print Party!!!

If you want to win this Gelli Journal, leave me a comment here and then if you have a Facebook page, like and share my post there.   I’ll pick a winner this Friday, 1/11.

Thank you for stopping by, as always.  I love to hearing from you.

Judy

Gelli Plate Party

Standard

Happy New Year, everyone.  New Year’s Day is a family day for us.  The holiday craze rush is over and it’s time to chill and enjoy the final day of my vacation.

Boy, what a great week I had.  I tried to get in my studio as much as I could.  I did manage to finish up my online class, “Buttons n’bellishments” and have it ready for Joggles in February to start the workshop.  Please check it out and join us.

Now, I don’ t know a better way to start off the year than by having a party.  A Gelli Plate Party, that is. Carolyn Dube is the instigator on this one.  Go to her blog to find out the deets and check out her video HERE.  She’s already on Day 2.

This is my first take on the Gelli Plate.  I got myself one for Christmas. Thank you, Judy!  Lots of fun ideas rolling through my head.  I mean, really, where does it end?   I had to cut down the video a bit, cuz I just couldn’t stop my self.  So, I took some still shots to show you my results at the end.  Carolyn warned me.  But, I’m safe now.

Join me for a Colorful Gelli Print Party!

Wasn’t that fun?  I hope you enjoyed that.  I can only imagine even getting more creative the more you play.  I love the imperfections.  I tried to use my already printed sheets to create more layers instead of always using a new one.  I was groovin to Bruno Mars in the beginning, so that’s the reason for my dancing papers.

So, I had a pile of Wausau paper and many craft paints that were just sitting around my studio for years.  Wondered what I was going to do with them eventually.  And then they invented the Gelli Plate.   See that, I had them sitting there for a reason.  Love when that happens.

Love to hear back from you.  Let us know if you’ve “gellied” lately.

Thanks for stopping by.

Judy