Tofu Anyone?

Standard

First, hello… I can’t believe that summer is over… again. I hope you are all are doing great.

Since my last video, there has been a lot of changes for me. The most important one is my mom passed away. I know you all watched us cook in our Sito’s Kitchen segment on YouTube. She passed in May, the day after Mother’s Day. It breaks my heart to even write this. I haven’t sat and watched one of our videos, as it’s just too hard to hear her voice right now.

I know she would want me to continue cooking and to be happy.

With that said, I have a question for you. Do you love tofu? If yes, then you will love my next video. If not, then let me try to convert you as one way is marinated and the other is crunchy with an amazing, easy, orange sauce.

Watch the video and let me explain how it’s done.

Thank you and love you all.

Judy

Chicken Meatballs – 1 Weight Watchers Smartpoint Each

Standard

Well, hello my friends.. can we just talk about how fast the summer has gone.  I wished for cooler weather when it was hot and humid and here is it and it’s making me realize that another summer is gone and in the books. I don’t want to put a jacket on. I want to walk around town in my t-shirt still.  Ah, those are the days when you can dash out of your house without grabbing a jacket… right?

OK OK.. so not all is lost when you have some comfort food to make.. That’s why I’m here.. stay with me.

I’ve just uploaded a new video for making Chicken Meatballs.  I started getting into replacing all of my ground beef recipes with ground chicken. Not sure when that started, but it was years ago.  I don’t particularly like the taste of ground turkey (anyone with me on that), unless I mix with ground chicken or there are a lot of spices and other tastes in it.  I digress.

These meatballs, simmering in a sauce for hours is the key to comfort food, I think.  Of course, then my house smells like meatballs for two days. LOL

I got 28 meatballs from this recipe and each one is only 1 Weight Watchers Smartpoint each.  C’mon now.. it’s true.

Here is the new video:

You can, of course, change up your ingredients with different veggies, bread or cheese.. it’s your world.  I would highly recommend cooking the veggies first.. this is what gives them a sweet taste. Would you do that for me, please??

Ingredients:
1 lb ground chicken
1 lb chicken sausage taken out of the casings
1 slice reduced calorie bread made into crumbs
1/3 cup pecorino romano grated cheese
2 beaten eggs
for the sauted veggies: onions, red pepper, garlic, mushrooms, italian seasonings. You can change up these ingredients, as you wish.

Let me know what you think and if you give them a try and let me know.  I’m all about simple.

Hearing from you means the world to me.  Please share, subscribe and like.

Happy Fall

Judy 

Find me here:
Blog: thekeytomyart.wordpress.com
Instagram: foodiejudy_ww
Facebook: https://www.facebook.com/judy.shea.12

Cauliflower “Potato” Salad

Standard

Well, my friends, I know it took me weeks to get you this “potato” salad video. You still love me?  Thank you. Wait, you did say yes, didn’t you?

OK, let’s talk about that it’s the end of August. It happens every year and I’ll always still be denial that summer goes by too fast.  You can already feel the coolness in the evenings. That’s ok.. I think we have some real heat coming at us this week anyway.

Raise your hand if you love potato salad. OK.  Raise your hand if you love cauliflower. OK then.  Well, my friends, this video is for you (pretending you all raised your hands for both. LOL).

You can’t go wrong with this salad. It’s fast, easy and comes together like that (snapping fingers).

It doesn’t need a lot of explanation; it’s pretty easy to follow and you or your guests will love it.  How about for Labor Day?  Maybe going to a party or something. It’s perfect.

Please give it a try and let me know how it comes out. I know it will be a NO FAIL. I promise.

Thank you for sticking by me and all the love you send my way.  It’s appreciated more than you know.

As the “Terminator” said.. “I’ll be back”. Am I aging myself here?

Love and hugs

Judy

Please share my social media sites with friends. How fun to all be together.

Blog: thekeytomyart.wordpress.com
Instagram: judys_heart
Facebook: https://www.facebook.com/judy.shea.12

Cauliflower Fried “Rice”

Standard

Hello Hello, my friends.  Where did July go.. I want to know… tell me, please??  I know we say this every summer.. it just goes by too fast.

I wanted to share that I have a new video that shows how to make Cauliflower Fried “Rice”.  I’m telling you, it’s so good.  It comes together in 10 minutes or less.  Make it what you want by adding in your favorites veggies or proteins.

Like I said in my video, I don’t like the frozen riced cauliflower you buy in the market.. just has a funny taste.. but do buy the already riced cauli in the produce section. Better yet, if you have a food processor, save yourself some money and rice your own.

I hope you see how easy it is to pull this meal together.

I love hearing from you and don’t forget to give me a thumbs up and subscribe.

My next cauliflower video will be Cauliflower “Potato” Salad.  Stay with me.

Thank you for all your support and being here. I love the response.

Judy 


Cauliflower “Potato” Salad (with WW Smartpoints)

Standard
Cauliflower “Potato” Salad (with WW Smartpoints)

Happy Summer, friends!!!!  I hope you are all enjoying your summertime and staying healthy and safe. So far so good over here.  The weather has been quite nice.  We took a trip to Lake Tahoe a couple of weeks ago and was such a nice break.  Beauty, is the word I would describe Tahoe. Just a beautiful place to hike, bike and enjoy water activities.

Here are just a few of the 100’s of pictures I took.  I told my husband, I just can’t stop taking pictures.  Seriously, it was that beautiful. I even saw a bear’s butt.  Don’t get that confused with a bare butt now. LOL


Ok, so moving on from vacations to food.. now, that’s more like it. Chop chop, Judy. Speaking of “chopping”….

Of course you know all the rage is about cauliflower.  I love cauliflower and grew up on it. Mostly, my mom would roast it in the oven.. plain, salt, that’s it.  There is a lot you can do with this beautiful white vegetable.  Check out my YouTube channel where I make a dish called “Zahra” (meaning flower).  CLICK HERE to watch it.

I’ve made you wait long enough.

I made this cauliflower salad for my family and then again for a July 4th party. This is so good.. the crunch, the “potato salad”, the color. Just yum.

Makes approximately 10 servings.  You can add even more veggies to make it bigger.  Each serving is 1 Weight Watcher Smartpoint (and that’s for the mayo).

Ingredients:
1 large head of STEAMED cauliflower, cut into bite size florets
3 hard boiled eggs
1/2 cup chopped dill pickles
1/3 cup chopped red pepper
1/2 cup chopped asparagus
1/2 cup of corn
1/3 cup of chopped red onion
1/3 cup chopped curly parsley
3/4 cup light mayonnaise (I like Miracle Whip) (7 smartpoints)
1-2 T of lemon juice.
Salt, pepper, paprika or any herbs or spices of your choice. I love that the paprika gives it a little orange color.

Now, you know this your world and you can put what you want in this salad for other veggies, but this is what I did.

Steam your cauliflower florets. I think it’s best to steam as they won’t get water logged.  I steamed for about 15 minutes.  Steam it to the texture you like.  I didn’t want them too raw, but not soft either…. so like baby bear.. “just right”.

20180704_174337

Once the florets are steamed through, let cool.  While cooling, chop up your other vegetables.

Look how pretty.

20180704_174307

The dressing is fairly simple. I’m all about simple, folks.

Mix the mayo with your herbs and spices you choose and the lemon juice or you could use apple cider vinegar as another option20180704_174343

Once your cauliflower is cooled, add it to the bowl and mix it with the dressing.

Boom!! Done!!  Cover and let sit for a few hours or overnight in the fridge… or as they used to say in the old days, “ice box”.


20180704_174859

20180704_175040

Those eggs make all the difference if you ask me. So many options to add to this, really.

Give it a try and be the talk of the town.. or the party.. or your own family.. or yourself. 

Thanks for stopping by and checking out the blog, once again.  You are all the best in my book. I do have a book.

Love your comments and let me know if you try it.

Judy ♥

Homemade Granola – Weight Watchers Friendly

Standard

Hey friends, I’m back with another video.

I don’t think the New England weather knows what it’s doing this year. Hot as heck one day then so cool the next. I won’t complain, as I would rather have the non-humid days. Who’s with me on that?

Today, I’m sharing my granola recipe that is also Weight Watchers friendly.

This granola makes me happy.  I put it on top of my yogurt and/or fruit.  I used to be so afraid to make it, but it’s so easy as you can see in my video. Make it your own so you know what’s in it.

I hope you enjoy and share any recipes that you make or if you give any of mine a try. I love it when a follower tries one of my recipes and tells me how easy it was and they loved it.  That makes me so happy. It’s a win win.

If you’d like to follow me in other places besides my blog, here is where you can find me:
Instagram: judys_heart
Facebook: https://www.facebook.com/judy.shea.12

Thanks for all the support. It means a lot to me.I’ll be back soon with another recipe to share.

Judy ♥♥♥

Eggplant/Veggie Chili

Standard

Can you believe it’s the end of April already?  I had my fireplace on last night and this morning.. Still chilly around here.. and speaking of CHILI (LOL)….

I have a new video making a simple, delicious Eggplant Veggie Chili.  I was inspired with this dish at a restaurant recently, so I thought I’d make it my own.

Please take a gander and let me know if it’s something you would try out?

I can’t thank you enough for your support and my new subscribers for joining me.

Love to hear from you all.

Judy ♥♥♥

Sito’s Kitchen – “Mamooniyeh”

Standard

Hey friends… I’m back with a new Sito’s Kitchen video with mom.  Today, we make a dessert that I grew up with called “Mammooniyeh” (not really sure of the spelling), but oh my gersh.. it’s so good.  Be the person who makes something different at home or to bring to a dinner party.

I hope you enjoy this one.


Have I told you how much I appreciate you lately???  Well, I do.. more than you know.

I love all the feedback I’m getting.

Please share and subscribe and like.  That keeps me creating food and art.

Love yaz

Judy ♥♥♥

Follow me on:

Blog: thekeytomyart.wordpress.com
Instagram: judys_heart
Facebook: https://www.facebook.com/judy.shea.12

Sito’s Kitchen – Making Maldoum

Standard

Hey everyone…  I just uploaded a new video with my mom in an episode of “Sito’s Kitchen”.  Today, we are making “Maldoum”, an eggplant dish.  So good.  You could certainly leave out the meat to make it vegetarian.

I hope you enjoy and I’ll let the video speak for itself.


Thanks for the love and support of my blog and YouTube channel.  Your comments and emails are so important to me.  To mom, too.

Judy 

Homemade Naan and Pita Bread

Standard

Hey, I know it’s been a while since I put a recipe on my blog. I have been putting them directly on YouTube/Instagram (the devil.. lol) or Facebook.

I’m posting a video I did today where I made Naan and Pita Bread from a two ingredient dough made with Flour and Greek Yogurt.  Check out my other videos on YouTube to see how I make the dough.


I’ve been balancing work (the devil.. lol), family, art and cooking.  Can I get 2 extra days to the weekend, please??

Thanks for being here and all your comments. Lots of love to you, my subscribers.. you mean so much to me.

Judy ♥♥♥

The Coolest Way to use Art Tissue Paper and Stencils by StencilGirl.

Standard

I’m so thrilled to be back (been a long time) with StencilGirl as a guest artist to bring you a cool technique using art tissue paper and stencils.  The hardest part was picking the stencils to work with.  How can I choose from so many great designers? It’s just not fair, you know.  I’m sure you’ll recognize some of them.

Making their appearances are stencils from: Mary Beth Shaw, Michelle Ward, Seth Apter, Traci Bautista, Cecilia Swatton’s, Maria McGuire’s, Terry Stegmiller, Margaret Applin, Jessica Sporn, Carolyn Dube. Sure hope I didn’t forget anyone.

I’ll let me video say the rest and show you how it all develops and how much fun it is.

You must give this a try, but be forewarned.. it’s addicting.

Thank you StencilGirl, again for letting me share one of my passions of mixed media art and my addiction to stencils.

Happy Stenciling!!!

Judy  


Mixed Media Techniques on Blotter Paper

Standard
Mixed Media Techniques on Blotter Paper

Hey friends, what’s going on today?  Well…..

… I thought I would take my under paper (blotter) on my art table and take it to the next level with more layers of paint.  I’ll show you how I use texture paste on art tissue paper and use those torn pieces as collage fodder. Finally, I show you how I put an image transfer on the piece.


I really hope you enjoy that and share with others.  Please subscribe, click the thumbs up and share if you liked it.

I’ll be back soon with more.

Thanks for your comments; I just love hearing from you.

Judy  

Art Auction for Puerto Rico

Standard

22814016_10156571264088475_1349770968908651883_n

Hello again, friends –

I wanted to make you aware of an important fundraiser that is being organized by my good friend and artist, Jessica Sporn.

Read all about it here.  Just click on the link to be taken to the auction.

22406227_10156522056318475_3417240051161031995_n

The artists and art pieces that are being uploaded for sale is sensational. Please consider bidding as you think about gifts for the holidays.  It’s a win win here.

I have 2 polymer clay pieces in the auction; please check all the art out. Some will stop you in their tracks.

Thanks for taking the time to read this.  Please share with your friends and family and please stop by the auction to bid.

Happy Arting,

Judy 


Pumpkin Cake

Standard

Hi Friends, I’m back pretty quick, huh?    The weather here is turning into crisp fall days. The leaves are falling quickly and it’s chilly one day and warm the next. We are starting to get buds on the flowers again.  Welcome to New England.  I hate to think what’s coming.  The Farmer’s Almanac says it will be a brutal winter, but don’t they say that every year?

Hey, so I as able to sneak in another video while I was at my mom’s, but it’s just me this time.  I’ve been a member of Weight Watchers for the past year and want to start sharing recipes that I make/create for member or for anyone, really.  I don’t change the cooking in my home.  My family eats what I make.   Even with 2 gluten free (celiac) daughters we all just adjust.

So with that said, I went and made a sugar free pumpkin cake that is so good.  Now, if you can stay away from too many pieces, you’re in good shape.. well, that’s the idea anyway…. to get in good shape, right?

Enjoy the short video and I hope you make it.

Thank you for all your lovely comments.. they mean so much to me.

Judy ♥ ♥ ♥

Sito’s Kitchen – Lentil and Onions

Standard

Hey wonderful followers –  I’m back with a new cooking video with mom. This time we are making a lentil and onion dish called “Mujadara”.  It’s pronounced “em-jed-darrah”.

It’s so great to get mom in the kitchen again.  So happy she is still wanting to do this with me. I’m am truly blessed.

Anyway, enjoy the video and I’ll be back with another recipe one on my own and hopefully getting another art video lined up.

Let me all know how you are doing.. I’d love to hear from you again.


Thanks for sticking by me and your lovely comments.  I truly cherish them

Judy♥♥♥


Edgar Allen Poe Journal

Standard

Hey, everyone… This weekend is the end of July!!!  Can you believe it? Wasn’t it just May?

This weekend, I published a video on how to create of journal from a notebook.  I covered the back and front of the notebook, creating a personal journal, with layers and layers of paint and just did an overall mixed media frenzy on it.  After all the love/hate process and the stages it went through, I love the way it turned out.

I created this as a gift for my amazing niece, Christina, for her birthday.  She loves Edgar Allen Poe and she loves to write. So, I created this journal for her to enjoy and write in.

I hope you enjoy it.

If you do enjoy my channel, whether it be my art or cooking, I’d love it if you subscribe and hit the thumbs up.  Please share with all your family and friends.

I’ll be back soon for another video on some sort of art.. .culinary or mixed media.

Love to hear from you with your comments.

Thanks for all your support and being here.

Judy♥♥♥


Sito’s Kitchen – “Itch”

Standard

Well, hello my friends and Happy Summer.

I sure hope you are all enjoying your weather wherever you are. We have had such a strange summer with lots of little thunderstorms and sunny, hot days.  It just feels good to leave the house without grabbing a jacket and walking in warm weather.  It doesn’t last long, so better enjoy it while we can, right?

Today, I am posting a video of Sito’s Kitchen with mom and I making a great dish called Itch (pronounced “eech”).  This simple dish is great alone, in a salad or as a scoop-able dip/appetizer.

As I write this, I realized you could replace the bulgar with quinoa.  Get creative, but the tomato paste is key here.  Take this to a party and you will be the talk of the town. LOL!!

I love hearing from you. Please leave a comment and like my post if you do enjoy it. Don’t forget to hit the thumbs up and subscribe.  I would love it if you shared with with your friends. 

I’ll be ready for an art video soon, so stay tuned for that.

“See” you soon

Judy ♥♥♥


Sito’s Kitchen – “Hushweh”

Standard

Hey friends.. how is everyone doing in your part of the world?  We are getting better weather.. for a duck.   Spring is trying to emerge here in Massachusetts, but it’s coming.  We’ve had a couple of tease days of summer.  So nice by the ocean.

Well, I have a new video with my mom up.  We made a rice stuffing called Hushweh.  We pronounce it “HUSHOO”.  This dish is amazing.  This is what we grew up on… as you can tell that I’m not a size 0.. haha.  I’m so happy that my mom, at 91, wants to still do these with me.  It’s what she grew up with since she was a little girl… cooking, sewing and just taking care of others. Lots of sacrifice.  I don’t know how she did it, but you just do.

Anyway, thank you for stopping by.  I love all your comments and support. Don’t forget to LIKE the video and subscribe.

We’ll be back soon with a few more recipes.  In the meantime, enjoy!!

Please let me know if you try this recipe and how it came out.  I could never get the rice right.  Secrets are the key.

Love yaz

Judy ♥♥♥

Sito’s Kitchen – Making Tahini & Hummus

Standard

Friends… HELLO.

Here in Mass, the weather is cold and dreary. We are wondering where Spring is. I feel like I live in Forks, WA. You know.. where the movie “Twilight” took place? I think “Bella” and “Edward” are going to show up at my door.. LOL
Then, in July and August, we’ll be complaining how hot and humid it is, right?

Cooking and art is funny. Funny, as in “strange”. You know, I have to cook everyday.. everyday…. and I do enjoy trying to be creative in that department. BUT, art.. art… I have to make time for it. Some days, I don’t know why it’s hard to get in the studio. Anyone have that issue? Please say yes. 🙂 So much going on in my head.. thoughts.. always thoughts. Do you know we have THOUSANDS of thoughts that twirl around in our brains, everyday. Which ones to you take action on? Which ones do you ignore on purpose? Which ones do you forget? Many are negative, many are positive. Squirrel!! That’s me.

Art doesn’t have to be an all day process. They (who’s “they”?) say just do 15 minutes a day of art. I think for me it’s ALL OR NOTHING. I discussed this with a group of women this week. What does that mean to you.. all or nothing? If I’m going to get in my studio, I want it to be for a full out project. But.. it doesn’t have to be that way. A little more consistency with little visits than ALL or NOTHING. You with me??? Let me know what it means to you.

I’m trying to take advantage of my mom wanting to do these videos with me. She surely is fun to do these videos with. Even with her shyness and getting tired, she knows what needs to be done and wants to take over. The boss, the queen, the best!! I do so cherish the amazing stories (of family and survival) she tells me of the old country when we are together. Recently, we spent the weekend together, just her and I.  Those memories of that time with her, will always be forever in my heart.

I hope you enjoy this video as I attempt to make tahini from scratch and then hummus. I put so much garlic in. My mom tries to tell me to put more oil in the hummus to “kill” the garlic. As you can see, I try to ignore her and get through the video. It was really garlicky… no vampire visits today. Ha!!!

Thanks for being here. I do this for my readers and subscribers and at the same time, I hope you’ll love what I show you.

Would love it if you LIKED and SUBSCRIBED to my YouTube channel.

Happy Spring!!!

Judy ❤

Sito’s Kitchen – “Zahra”

Standard

So happy to share with you Part 2 of Sito’s Kitchen. Join us as we make “Zahra”. This is a cauliflower casserole made with ground beef and tomato paste.. so easy and the results are delicious. Such a warm, comforting food for the big snow storm we are experiencing right now.

I hope you enjoy and please click the thumbs up and subscribe if you love it.

As always, thanks for stopping by and leaving your lovely comments.

Judy

Sito’s Kitchen Video – Tabbouleh

Standard

Knock Knock.. who’s there? Judy. Judy Who? Well, you know how that little rhyme goes. Guys, I know, I know.. Blogging has been way down on my list this year.
Oiling the cranky bones and hopefully getting back in the swing with showing some art videos and cooking videos. I am active on Facebook if you are there, give me a shout.

Speaking of cooking… Today, I bring you a new video with my mom that we made. This time, we are making Tabbouleh. It was mom’s 91st birthday. We are so blessed that she is still basically healthy and is still living alone and able to take care of herself. Must be all the middle eastern cooking.. wouldn’t you say?

I hope and pray all of you are doing well. I’d love to hear from you and read your comments.

I’ll be back shortly with another cooking video and try to get an art creation in there, too.

Thanks for sticking by me.

Love and hugs,
Judy

Mixed Media Cardboard Art

Standard
Mixed Media Cardboard Art

IMG_5018

Hey everyone… thought I’d share a new video I did making a mixed media piece art from a butter cardboard carton.

I haven’t done a video in a bit, except for my Baklava one.  It was nice getting back in the studio getting my hands messy.  It’s all just play. I’ll let the video speak for itself.

Hope you like it and let me know what you think.

I love hearing from you.

Enjoy

Judy ♥ ♥

Image Transfers

Standard
Image Transfers

Well, Happy New Year to everyone!!  Where did 2015 go?  Where did I go?  I’m here and there and as always, catching up to life.

So, as some of you know, I love image transfers.  I mostly love transferring them on to soft surfaces, then use them in my art. One of my favorite surfaces are tea bags.. used ones.  I’ve done this several times making art gifts for friends, just because.  I love sending a surprise gift when they least expect it.  Especially if it’s so meaningful to them.

Here are a couple pieces I did for friends who had lost family members.  I love taken a youthful picture (that I grabbed off of their Facebook page… I’m not a stalker, honest) and transferred the image on a used tea bag or muslin fabric.  Surprise little gifts with meaning.  These were done on coasters.

The one on the left, I was able to capture a hand written note that my aunt gave to her daughter. This was on a tea bag. The one on the right, was a friend’s father. That was on muslin.

Since we all drink tea in our house, I have plenty of dried bags to use.  My husband is an old fashioned Irishman and drinks the basic Lipton tea. These seems to have the most dying effect that makes a nice vintage/iron look.

20160131_183014     20160131_150414

Let the bags dry with the tea in them. Once dry, cut off a top and shake out the dried tea. Gently pull them apart down the center seam.  Some of the berry teas work well, as they leave a purple hint behind.

20160131_161350

As you can see, I love the catholic icons. Bottom center photo is my parents on their honeymoon in Syria.

My favorite transfer method is using clear ink jet printer transparencies. Print them on the dull side. I always rotate my images horizontally.  I use polymer medium (not the gel that is thick, the liquid that you can shake in the bottle) to transfer on your surface.  It takes a lot of practice and even now, I still do the process a few times before they are completely transferred. If they are not perfect, that’s perfect to me to give that worn, vintage look.  These are now ready to put in any of your art. Collages, journals… etc.

Below, is a recent wedding gift I was commissioned for.  I used tea bags as the first layer. onto a wood board.  I transferred the e.e. cummings poem (the bride’s favorite), then the picture of the couple onto muslin. I used molding paste, stencils, acrylic paints and some embellishments to give it a little blingiddy bling.

IMG_4927IMG_4928IMG_4933

IMG_4937

IMG_4930

From what I was told, the couple loved the gift. Whew!

IMG_4955

Well, thanks for checking in with me.  I love to hear from you and all your comments.  I appreciate them so much.

Let me know how you are doing and what you’ve been up to.

Judy ♥ 


Baklava -New Video

Standard

Hey there, friends.   I hope this post finds you all doing super.

It’s been challenging to get any art videos done in the past few months… or for that matter, art time in general.  However, I recently went to a party and decided to make Baklava for our hosts.  Since I hardly make it, I thought I would capture it on video.  Of course, I had to call my mom a few times for some help.  So, instead of “Sito’s Kitchen”, this is “Judy’s Kitchen”.

Hope you enjoy this and make it, too.  It’s not as hard as you think. Holidays are here and this would be perfect to bring to a party. They will be impressed.


I’m hoping to keep up these videos by visiting my family’s homes in the future and creating their favorite recipes.  Well, that is, if they want to be on film. We’ll see how that all turns out.

I’m hoping to get some recent art posted soon.

Thanks, for all your patience, sticking by me and your lovely comments.

Judy ♥ ♥

Journal Disaster Recovery

Standard

I am a novice at making art journals. I only know the basic stitch to bind pages and that’s all I really need. But, oh boy, this one made me mad and sad.  I don’t have all the pictures, because I was having a pity party for myself once the disaster struck.  I’ll try to describe it as best I can.  All I can say is BIG lesson learned.

Some of my Facebook friends may remember this 11×14 page I decorated using black gesso, then white acrylic paint through a stencil, then watercolors. I doodled around the flowers with a white Uni-ball Signo pen.  I just loved this and I wanted to do something with it.

IMG_4899

It hung out a while until I decided to make a journal out of it using manila folders as my filler paper. Great.. fun… can’t wait.

So, I cut my manila folders down to size and poked my holes with an awl. Used binding tape for the binder, then sewed my signatures in.  Loved it. Yay. Happy.

IMG_4900 IMG_4901 IMG_4902

IMG_4904 IMG_4905 IMG_4906 IMG_4907

Ok.. looks good, right.  Well, now I wanted to seal it.  Here it comes. AND I don’t have pictures.  I start to brush on some medium. I can’t recall if it i was Golden polymer medium or Collage Pauge or even self-leveling gel, but as I brushed it on I didn’t even think anything was wrong.  I thought the white streaks were the medium and I told myself it would dry clear. NOPE NOPE NOPE.  It was the white pen ink streaking.

Imagine something like this, below, but all over my flowers.

paint streaks

I was heart broken. I thought maybe if I gently rubbed, I could save it.  No can do people. It was ruined.  Especially after rubbing it.  So I continued to rub it all off.  It was so sad.. after trying CPR and first aid, it was too late.

OK.. let’s get to happier times now….

Sooooooo.. the obvious thing to do was cover it up.  I found some art papers from my weekend class with Jane Davies a year ago called “Big Fat Art”.   I cut them to size, glued on my new covers, added some texture and here it is.

IMG_4921  IMG_4922

Yes, I love it.  Big and bold.  I have fond memories of my flower cover, but the show must go on, right? If I were to do it again, I would have sprayed a finish on it.

Well, thanks for listening to my saga. I hope you enjoyed it and learned from it, too.

As always, I love hearing from you and thank you for your tremendous support of my art adventures.

Judy  ♥ ♥ 

Rubbermoom Rubber Stamps by Jessica Sporn

Standard

Hey folks.. howzitgoing??  It’s been a bit hot the past couple of days and we haven’t had any rain, but today we are getting a much needed soak.  What a perfect day to do some art, don’tchyathink?

Jessica Sporn asked me to see what I could do with her new rubber stamps from RubberMoon. Thanks, JS.  My first thought, was to create something in polymer clay, but then I remembered some fun paper casting I had done a couple of years ago to make some cool embellishments.

I used two of Jessica’s stamps.  KRISHNA and MEZUZAH; you can see and order them here.

Let’s start, shall we.

I took 2 Kleenex brand tissues and pulled apart the plys. That gave me 4 layers, but now cut them in 4’s. You want to have a small stack of square tissues. I used about 7 layers for this.  Using matte medium and the rubber stamp facing UP, start to layer one tissue on the stamp and brush the medium over it, covering the design.  Keep repeating until you use up the 7 layers.  You can try more layers if you want.  Here, I’m using KRISHNA for my tutorial.

IMG_4910 IMG_4911 IMG_4912 IMG_4913

After each brush of the medium, I gently rub my finger of the layer to smooth it out and make sure the design shows it’s details.   Now, gently lift the layers off of the rubber stamp and you can see the design.

IMG_4914 IMG_4915

Let this dry for a few hours until hardened.. or even overnight.  You can see the two rubber stamps dried below.   Next I ripped around the edges of the square tissue to round them off.  Then I took white acrylic paint and painted the the top of the design.

IMG_4856 IMG_4858 IMG_4859

Time to add some color. You can use any colors you’d like.  I painted the entire image, let dry. Then I used gold acrylic paint and a pearl pen to just highlight the the parts that were elevated. I just mixed them on a palette then used my finger to gently swipe the color.

IMG_4877 IMG_4878 IMG_4879 IMG_4880

IMG_4891 IMG_4892

I did the same with the teal paint and gold highlights.  Now they are ready to used as embellishments once they are dry.

IMG_4893

I used Krishna for a tag and the Mezuzah for the top of one of my soft journals I sewed out of paper towels. Really.

IMG_4897 IMG_4909

These are easy supplies and I’m sure you have them in the house.  You can used watered down glue instead of medium.

I had a lot of fun with this simple technique and what a great excuse to get me back in the studio. Even though it took me 2 months to getter done… right Jessica?

In my last post, I mentioned giveaways.  As I said, these supplies are gently used and I want to give them another home. I either already have a duplicates or I no longer use them.  Here before you, my lovely peeps, I have a flower stencil, a piece of an orange barrier/temporary fencing, which I use as a stencil. I was given to me by my friend Corrine Gillman. Thanks, CG. Also coasters from my collection to make art on and some beautiful decorative napkins for collage.

IMG_4918

Crossing fingers that you win.  I’ll pick a winner by next Friday, June 5th.

Thanks for visiting, commenting and being fantastic subscribers.

Judy   

I’ve Been Unruly

Standard

Hey friends.  My absence from my blog makes me sad, but no fear, here I am.

What’s going through my mind lately:   Since we moved our home (almost 2 years, crazy) I’ve moved my studio to the basement and that’s where my full-time job is; on the computer.. ALL DAY.  I’ve been rethinking how healthy this is for me. Although it’s a finished basement and is a beautiful room, it’s still much cooler (nice in the summer) and not sure how good that is for my back issues. It has a nice rug, but still sits on cement.  My mom told me not go work down there. As she said to me in her cute accent “it not good, Judy”.

Honestly, I think it’s effected my desire to create art.  In my old home, I had a sunny room upstairs that I was up there creating as much as I could.  Maybe I am associating my back pain with my art down in the basement.  Maybe I need separation of office and art studio.  What do you think, my friends????  I’m usually a more private person, but thought I’d put this out there. Thank you.

Any whoosie whatsie…..

I thought I would share my recent Artist Spotlight appearances on the Unruly PaperArts website.  I was honored to be interviewed and asked to submit a tutorial.  It actually forced me to get back in the studio and get cranking on some art. Yay for me.

Click on the picture, below, to read my interview.

judy project 1

Click on my bookmarks to see my tutorial.

judy shea project 8

I hope you enjoyed both of those.  Model Magic is not as easy to work with as you may think. Once dry it can break easy. Especially if it’s thin.  I wanted to change it up a little from the polymer clay. Still a load of fun.

Have I told you how much I appreciate you lately?  No?  Well, I do.  A LOT!!!!    Because I do, I will be doing some giveaways. Passing on some of my gently used art and giving it a new life.  Stay tuned.

Always love hearing from you.

Judy ♥  ♥

Making Fabric Dolls with Some Great Dollz

Standard
Making Fabric Dolls with Some Great Dollz

Happy Sunday!  If you are a football fan, you’ll be watching the Super Bowl tonight. And.. if you live in New England, you’ll be watching the Patriots play and hopefully win… deflated balls or not.

We just finished having about 3 feet of snow dumped on us last weekend and another foot is falling tonight. We were doing so good, too.  It’s been pretty dry up until now.  Working from home, there is no such thing as sick days or snow days, but it sure makes for a great commute.

Two weeks ago, I was invited to my dear friend, Corrine’s home for some fabric doll making. I’ve never made one before, but always wanted to.  A few more friends (Kay, Barbara and Eileen) joined us at Corrine’s old/new farm house she is renovating with her super duper super hero, David (who drilled some holes in my clay for me). Here are some pictures of our fun day.

Our hostess, Corrine and a little table set up and we are ready to go. (click on any picture to enlarge for details)

20150117_104429 20150117_104434

20150117_141643     20150117_152953    20150117_152854 20150117_152844 20150117_151925

This one is mine.  Can you tell?  Teal colors (I think I have an issue) and clay wings, heart and face. Named her Edie, but I think she looks pissed, don’t you think?  She’s saying “Great, now what?… I have these damn heavy wings on me and how the hell am I going to fly.. they are upside down and they look like arms. I hate you”.  That’s not nice talk, Edie. I gave you life, after all.

20150117_153100

Check out some of Corrine’s art dolls here.  What a great day for art. We got to hang out with her beautiful 5 dogs, lots of laughing, eating and chatting it up.  And, as for sewing, Corrine sewed the shape of Edie.. thanks, you’re a doll.  You’ve given me confidence to go for a bigger doll next time.

Thanks for stopping by.. means so much to me when I hear from you and to just know you were here.

Judy ♥ ♥ (Go Pats!)

Catching My Breath

Standard

I know I know.. where have I been, right? Seems like forever since I posted. Well, I’m finally trying to sneak back in the studio for some creative time.  What took me so long?  Well, I don’t have excuses, but more like “reasons”… but this blog is all about art, food and fun. No one wants to hear about my full-time job consuming me and just plain being “in a funk” that keeps me away (see how I did that there?)  … and Happy New Year to you all.  I often wonder how long we need to say that to people. Is it 2 weeks?  Let’s say that, shall we?

Just backing up a little for some show and tell.  I went to Art is You in Stamford, in October (gosh, was that really 3 months ago?). I took 3 full-day classes.  There seemed to be so much energy present this year. Maybe it was because it was my 3rd time attending and I was more comfortable.  But, I do know that I was not 100% focused. Was that the beginning of my art funk? I was trying to push through and ignore the feelings.  They say, out of sight out of mind. I guess the longer you stay away from art, the more you don’t want to dig in again. I’ve signed up for many on-line classes by some great great teachers.  Have I finished one?  NO!  I start it then I get pulled away. Do art every day..no matter how little.  “They” say that, too.  So, for 2015, I need to not be so hard on myself and give “me” a break.

I’m I alone here? Does this happen to others? How do you push through?

I quickly want to show you the art I created from my favorite class with Andrea Matus deMeng. I so love her work and her style. This was my 3rd class with Andrea and she never disappoints. This time, it was collaging on wood blocks. Here’s a peek at my 6 blocks. The bottom left if my mom’s face when she was about 20 years old. I took this class with my side kick, Jessica.


20141011_160940

Here is a peek of Jessica’s (left) and all of them together from the class together.  Aren’t they just amazing?

20141011_161012    20141011_163622 20141011_163642

The other class that I took was with Mary Beth Shaw and Pam Carriker. I got a twoferone. They shared some great techniques and we were able to try screen printing (the bird is screen printed). Here’s what I ended up with.

20141010_163450

I recently had about 2 weeks off from work for the holidays. Luckily, our company shuts down. What a nice gift. I was able to get a little art in.  For those that know me well, I love doing image transfers. We also drink a lot of coffee and tea in our house and I have been saving the used filters and tea bags.  The stain on the filters make a great background for any collages. I have a small bowl where we just dump the used tea bags in. Yup, my family doesn’t question my requests anymore. The fruity teas leave a pretty background. Once the tea bags are dry, cut across the top, dispose of the tea leaves and you are left with this beautiful tea stained filter. Gently open it so it doesn’t rip. For the coffee, lay out the filter with the grinds left and wait for them to dry. Rub off all the dry coffee.

20150104_115411

I decided to make some transfers over the tea/coffee filters on raw canvas. Here is a stained tea and coffee filter.  Doesn’t that say vintage to you? I thought so.

20150103_184440  20150103_193358

I had some deli paper that I used for wiping left over paint on and I glued that to the canvas using Pam Carriker’s Mixed Media Adhesive.  I first gessoed the canvas.  Next, I had some images that were printed on transparencies.  This is one of my favorite ways to do image transfers. Cut out your image after it’s printed on the rough side. Note: I’ve used ink jet prints here.  Cut out the image with a border around it for you to grab. Spread a thin layer of Soft Gel Gloss on the canvas and on the image. Lay it face down and gently rub it in circles with a soft cloth held against your index finger, then wait about 10 minutes. Gently peel off the transparency and you will see the image transfer on to the canvas. Check it from the corner first before you take it completely off.  I stamped a butterfly image on deli paper and ripped it around the edges and spread gel medium underneath and on top of the image. The deli paper just melts away and leaves a black, clear image.  Then I stenciled with white paint. Stained the edges with black distress ink.

20150103_18043820150103_18274120150103_18280820150103_182835


20150103_190658 20150103_190913 20150103_191542 20150103_202402

The two end pieces below, is where I used the tea bag filter and coffee filter using the same image transfer method I mentioned above. The little blue butterflies are also transfers. I rubber stamped directly onto the filters. I finally spread Collage Pauge in matte over all of them to cut down on any shine.  Such a pretty look… like an old book or letter.

20150103_202301

So.. save your tea bags and coffee filters.

Thanks for hanging out with me and being patient. Hopefully, this post has given me a good kick to keep my posts and art going.

Judy ♥  ♥

Getting Ready for Art is ME….

Standard

I wanted to get this post in before I head off to Stamford, CT for the amazing Art is You retreat.  Yes, I managed to make some swaps to share with lovely people.  Last year, I used Tyvek (check out my video), this year, it’s raw canvas.

I used raw canvas to make mixed media book marks.  The layers on this are probably about 15 or so. It started out so differently than I planned, but that’s what art is… no thinking.. start and see what happens.

I gessoed the canvas; let dry.  Started adding layers of Golden fluid acrylics after I spritzed some water. Just brushing around with a large brush. Let dry in between each wet layer that you do.

Click on picture for details.

IMG_4746  IMG_4748IMG_4753IMG_4749IMG_4750IMG_4755IMG_4756 IMG_4757

Then, I stamped on some dress pattern paper and collaged that on with decorative napkins using Collage Pauge.

IMG_4758 IMG_4759IMG_4760IMG_4761IMG_4763IMG_4764IMG_4765IMG_4766IMG_4768 IMG_4767

Teal paint in between collage. White paint marks with plastic cover and bubble wrap and adding stencil coloring.

IMG_4771 IMG_4774 IMG_4775 IMG_4776 IMG_4777 IMG_4778 IMG_4779

Pushing light molding paste through stencils… LOVE.

IMG_4780 IMG_4788 IMG_4787 IMG_4785 IMG_4781IMG_4784

Adding gold modeling cream and Posca markers for mark making.  That is what finalized it for me, all the scribbles from the markers.  All the beginning layers are buried in there deep.

IMG_4791 IMG_4794IMG_4796 IMG_4795

Then cutting up the canvas to make the bookmarks, changed it all.  Each little marker was a piece of it’s own art.  This is “The Key to my Art”.

IMG_4797IMG_4798  IMG_4800 IMG_4799

My business cards are dangling from the top.

IMG_4801

I hope you enjoyed that little ditty. It sure was fun to create these for many creative people.

I’ll be taking pictures and posting when I return. I hope I am lucky that some of you will be there again and I can’t wait to meet some new friends, too.

Thanks for stopping by and your support… always.

Judy  ♥


Farmer’s Market Chunky Vegetable Soup

Standard

20140921_161155

Well, here I am.  Back again, but with culinary art this time.

You’d never know it was the first day of Fall, since it’s about 80 degrees and muggy out today

Every Sunday, our town has a Farmer’s Market that we walk down to. What a fun place to visit.  Live music playing, all kinds of pastries, produce, gifts, breads, cheeses.. you name it.   I wanted to buy some fresh veggies to make a big pot of soup; big and chunky. What a difference getting produce from the farms instead of the grocery store.  I also had some vegetables at home that I needed to use up.  From the market, I got fresh leeks (which I have never cooked with), green beans and carrots. Let’s go home and cook, shall we?

I feel like I’ve made this recipe before, but it always comes out different.  I chopped up all the vegetables to bigger chunks.. think stew size.  I don’t measure, but I probably used 1-2 cups of each. Leeks, summer squash, carrots, green beans, cauliflower, broccoli and a few white potatoes.  Add what you want, really, this is what I had.

In a big pot, drizzle some olive oil and start to saute all the veggies together, while stirring and tossing around. This will take about 20-30 minutes.  You want the veggies to start to soften a little.  Add whatever seasonings you’d like.  For me.. salt, pepper, granulated garlic, dash of allspice and paprika.

20140921_142716

Once you feel they are a little soft, add 4 cans of vegetable stock. I used College Inn, low sodium.  Let that start to simmer, then add a 1/8 of a cup of tomato paste.  Again, if you want more, then go ahead. I wanted a hint of tomato taste. You can tell by my spoonful of paste, I didn’t measure.  What can I say, I take after my mom. (visit us on YouTube; look for the “Sito’s Kitchen” videos).

20140921_152259  20140921_153601 20140921_153625 20140921_153747

Let it all simmer for about 45 minutes or until the potatoes and carrots are soft and you’re done.  I added about a cup of frozen corn kernels toward the end.

Also, at the market, I got a loaf of fresh garlic herb bread from a local bread maker.   Serve a slice of that with the soup, topped with a little shredded parmesan cheese and oh my gosh, people.. it’s amazing.  I wish you were all with me around my table.  It’s all low fat.. well, except for the 3 slices of bread that I had.. shhhhh. Well, I had to test it, didn’t I?

20140921_161155

Note: If you don’t want to stand and cut up all the vegetables, get pre-cut ones from the market.  It’s a simple recipe, even for the kitchen challenged.  And… pssst.. if you really want it easier, use frozen veggies. Vegetables, spices, broth… BAH-ZING!  Done.

Well, that was fun and it’s great to “see” you all again.  I’m working on an art post now, as I get ready for the Art is You event in Stamford, CT that’s coming up.

Thanks for sticking it out and continuing to support me. I know I’ve been absent. We’ve had some illnesses in the family, so, Judy to the rescue… and of course that 4 letter word… W-O-R-K! Does it to me all the time.  I keep striving for balancing. That’s all I can do.

Judy ♥  ♥


Creating an “Artpron”

Standard

I know, I know.. where have I been, right?  I’ve been on an unplanned art hiatus, I guess. We all know how life gets in our creative way, at least for me. I’ve always said.. I can juggle 10 balls in the air, but not 11. Crash, boom, sizzle.

Right now the most important thing is I have a post and it’s a cute one.  Yay!!!

I said to myself.. “today, no matter what, I am going to do some art”.  Alone….. in my art bubble.

I bought this teal (surprise) apron from IKEA with the intention to make it my art apron.. my “artpron”.

Let’s get to it, shall we.

I also decided to paint outside in this beautiful weather.  I gathered all my supplies and went on the deck.

There are a lot of pictures, so hang in there with me.

IMG_4625    IMG_4627

Since I already loved the teal background color, my intention was to stencil and stamp all over it. I didn’t bother using fabric paint, since I figured I won’t wash it. I used basic acrylic paints, by the way.

But, I started with StencilGirl stencils.. then more of other stencils.. old fashioned doilies, rubber stamps. Well, I’ll let the pictures tell the story…..

IMG_4629 IMG_4630 IMG_4631 IMG_4632 IMG_4634 IMG_4635 IMG_4636 IMG_4637 IMG_4638 IMG_4642 IMG_4643 IMG_4648 IMG_4647 IMG_4644 IMG_4649 IMG_4650

Did you notice any of the StencilGirl stencils?  Let’s keep going…

IMG_4655 IMG_4656 IMG_4657 IMG_4658 IMG_4659

I have so much fun letting loose.  I was happy… here is the result….

IMG_4665

Love having you by my side for these posts.  Thanks for always responding and supporting me.

Can’t believe August is approaching us already.  Stay safe and wear your sunscreen. 🙂

Judy ♥  ♥

Having Fun with Chalk Paint and StencilGirl Stencils

Standard

What’s all the talk about chalk paint lately?  I needed to find out for myself and you’re coming along with me.

Ok, can I just say that I’ve been meaning to create some sort of “TO DO” board for a while now.  This is how I post my actions now….

IMG_4600

What up with that?  It needs to get out of my head and on a list, I know that much. So, let’s change it up.

Here is one of my art supply cabinets.  Nice open wide space on the door.  Enter black chalk paint.  I used a “Folkart” chalk paint.  I painted the section with 3 coats, drying well in between.  If I were to do this again, I would gesso it first, then add the chalk paint because the cabinet was not very porous. But, it worked out fine as you will see.

IMG_4581 IMG_4582 IMG_4583 IMG_4588 IMG_4592

Enter stencils from StencilGirl.  I first started with the Boxed Vines stencil by Cecilia Swanton

L247-2T

I wanted to get a border of these lovely vines around my chalk board. Of course, I’m using Cobalt Teal for the first acrylic paint. I have to be honest, I started to use chalk to rub into the stencil… bad choice. It was icky.  The chalk scraped on the design openings and made dust all over the place. I decided to use acrylic paint. What’s the worst that can happen? I paint over it.  No biggie.

IMG_4601 IMG_4602 IMG_4603 IMG_4604 IMG_4605 IMG_4606 IMG_4608 IMG_4609

Next up was a stencil by Jessica Sporn called Flowers, Pomegranates and Leaves

L265-2T

Let’s put some flowers and leaves on, too.  Now, I’ve switched to Amsterdam acrylic paints.

IMG_4610 IMG_4611 IMG_4612 IMG_4613

Now, let’s test the chalk on the paint.  Ok, first, can I just say that I did not have one piece of chalk in my house.  All I wanted was on little piece of white chalk. I ended up with a big box of sidewalk chalk I had to buy at the dollar store. I think I have enough to last me a while now.  Look at those big suckers, below.

IMG_4593  IMG_4614

I have to say this stuff really works.  Write on, wipe off. As you can see, I had a little fun with my to do list and some doodles.

IMG_4616 IMG_4617

Tomorrow, I will make a more serious to do list (ya, right). Well, at least it’s there when I have to spill my thoughts.
Maybe I’ll do another section on my cabinet just for inspirational quotes.

So, there you have it. Chalk paint and stencils. Lots of fun.. give it a try.

Thanks for stopping by and all your support. It means everything to me. You’re the best.

Long weekend coming up; hope you have some fun plans or just plan to relax.

Judy ♥  ♥


Auction Begins for Bring Back Our Girls

Standard

BringBackGirls

Today is the day our auction begins.   Click on the box above to be taken to the auction site.

If you want to learn about actions to take and also more about Girl Rising, which is where the money raised from the auction will go, CLICK HERE   

Take a look at all the artists that have their beautiful art ready for bidding. My piece is below.

harmonycanvas

Small Flyer for Auction

Jessica Sporn   http://jessicasporn.blogspot.com

Linda Kittmer  http://lindakittmer.blogspot.ca

Ronda Palazzari  http://rondapalazzari.typepad.com

Marjie Kemper   http://www.marjiekemper.com

Judy Shea   https://thekeytomyart.wordpress.com

Glenda Hoagland   http://pilgrimsthoughts.blogspot.com

Astrid Maclean  http://astridsartisticefforts.blogspot.com

Lisa Pace   http://lisapace.com

Jackie Neal   http://creatingwithoutcrayons-jackiepneal.com

Claudine Criner   http://claudinesartcorner.blogspot.com

France Papillon   http://www.france-papillon.com

Kristin Van Valkenburgh  http://TwinkleTwinkleLikeAStar.blogspot.com

Marcia Beckett  http://marciabeckett.blogspot.com

Ruth Levy   http://lerusho.wordpress.com/

Sally Lynn MacDonald   http://www.SallyLynnMacDonald.com

Renee Zarate   http://renee-boltonhouse.blogspot.com

Natasha May   http://natashamay.blogspot.com/

Carmen Whitehead   http://www.serendipitystudiobycw.blogspot.com/

Seth Apter   http://thealteredpage.blogspot.com/

Marybeth Shaw   http://mbshaw.blogspot.com/

Amy Ingardia-Walker  http://creativelyquirkyathome.blogspot.com/

Kelly Warren  http://happyshackdesigns.blogspot.com

Julie Bernier http://juliebernierphotography.zenfolio.com/

Adrienne Hoban  http://www.allure-decor.com/

Krista van Tol   http://craftylittlepigtails.blogspot.com

Cheryl Grigsby http://cherylspaperartz.blogspot.com

Jill Meyer www.jillmeyer.com

Lisa Flaherty http://mypeaceofpaper.blogspot.com

Kerry C. Mitchell http://kerrycmitchell.com


So, pass the word. It’s such a great cause. Please help if you can.

Peace

Judy 

Sito’s Kitchen – “Kibbeh”

Standard

Well hello and Happy Mother’s Day to all you wonderful moms out there.

I thought I’d celebrate with my mom and you with a new video of Sito’s Kitchen.  This time we are making “Kibbeh.  This is baked ground meat that is mixed with bulgar, onions, allspice.. well, just watch and I hope you will be able to imagine the amazing aromas in the house.


Enjoy the recipe and thanks for stopping by and as always, I love hearing from you.

Judy ♥ ♥ ♥

Blog Hop with StencilGirl and Seth Apter

Standard

StencilGirl Talk Image

seth marche headshot 2 thumb

Here I am again, doing another Blog Hop with StencilGirl for the NEW RELEASE of Seth Apter’s stencil designs.

I just love Seth’s art style and for him to create stencils.. well.. is a bit exciting. Take a look at his blog HERE.

I will be using Seth’s “Timeless” stencil. I love these markings he’s made and the words… and what better way to use all this texture than with polymer clay.  Are you surprised?

ApterTimelessSTencil

When I begin the process in my head of what I will create for each blog hop, most of the time, I don’ t know what I’m going to create until I sit at my art table. This time was no different. I knew I was going to use clay.  Let’s see.. bookmarks, buttons,  journal… yes a little funky journal. Let’s HOP to it.

I started with a package of beige polymer clay. Then conditioned it by softening it with my hand and through my clay dedicated pasta machine. Not loving that it is not getting soft. I’ve been through this before. Maybe my basement is too chilly or the clay is old.. not sure. But, let’s go with it, shall we?

Once I got a good sheet of clay soft enough, I sprayed the clay with water and put the stencil on top. Put my pasta machine on a thinner setting so I could get a thin cover for a journal.  Cool, huh?

FOR A CLOSER LOOK, CLICK ON ANY PICTURE.

IMG_4454 IMG_4455 IMG_4456 IMG_4457 IMG_4458 IMG_4460

Now, I have to think about what shape of journal I want. At this point, I still don’t know and let’s face it, I don’t have a lot of options. So, I’m gonna split the clay in half and make a “shard” shape, as if it were ripped. Get them even enough so the front and back covers somewhat match.  I wanted the words to be engraved into the clay. I took a pencil and went over the letters to indent them. I did this because when I stain the clay, the paint will sit in them.  That’s coming up. I put holes at the top of the covers and now it’s time to bake in my clay dedicated oven.

IMG_4462 IMG_4463 IMG_4464 IMG_4465 IMG_4467 IMG_4469 IMG_4470

While the clay was baking, I had to choose some pages to go inside of the journal. I had some scrapbook paper from years ago that was double-sided. A neutral color to go with the covers. I stamped a clock image and a “remember” rubber stamp over the pages. Now, I had to trace the covers on the paper so I could get the same, sort of, shape. Then punch holes with an awl into the paper to match the holes I put in the clay. I used a distress stamp pad to darken the edges of each page.

IMG_4471 IMG_4473 IMG_4474 IMG_4477 IMG_4478 IMG_4479 IMG_4480 IMG_4481 IMG_4483

Now, it’s time to “antique” the clay covers. I took brown acrylic paint and with a bristle paint brush (or an old toothbrush), I smooshed the paint onto and into the clay getting into the deep lines.  Let it sit for about 30-45 seconds. Then wipe it off with a damp paper towel until you like the look. After this was dried, I brushed a coat of Liquid Laminate over the front and back covers (cuz, I can’t find my Future Floor Polish… ugh).

IMG_4484 IMG_4485 IMG_4486 IMG_4488 IMG_4489 IMG_4490

Time to add some color.  I took acrylic paint and started to make the covers look purdy. Going over the parts of the design that are risen.  Turquoise, red, black, orange.  After the paint was dry, I put another coat of Liquid Laminate over the covers again.

IMG_4491 IMG_4492 IMG_4493 IMG_4494 IMG_4495 IMG_4497

What do I use to bind this funky journal? I tried binder rings, too shiny and clunky. I had some twine and using a dental floss threader, I ran the twine though the holes with the inside pages in between.

IMG_4500   IMG_4504 IMG_4505 IMG_4506 IMG_4507

Here is the final journal… you likey???

IMG_4508

Well, thank you, Seth for creating such fun stencil designs.

Before you go off to the next artist, let me tell you about the giveaway…

All comments on the hop are eligible for the giveaway. The more blogs you comment on, the more chances you have to win.  Giveaway will close on Sunday, May 4th at 11:59PM Central Time.

PRIZE:   2 lucky winners, each will get a set of Seth’s new releases.  Seems pretty cool to me.

Before you leave me to go to Leslie’s blog, I want to thank you, as always, for stopping by and supporting my crazy work/life/unbalanced world.  Ok, now you can  go to the next person on the list….  Judy  ♥ 

Judy Shea (U R HERE NOW)

On the StencilGirl Blog Today & a little giveaway

Standard

StencilGirl Talk Image

IMG_4453IMG_4452


Hey, I’m over at StencilGirl Talk today showing you how I recycled a crayon box and using Carolyn Dube’s Venetian stencil.

But, wait.. leave a comment here to win one of these cards.  I will be choosing two winners next Tuesday.

Thanks for visiting and leaving your supportive comments.

Judy ♥ ♥ ♥


A Big Fat Weekend with Jane Davies and Great Friends

Standard

(If you’d like to see the Blog Hop with Andrea Matus deMeng, please scroll below this post)

I’m still feeling the art high from this long weekend’s “Big Fat Art” workshop with Jane Davies in Rupert, VT.  Seriously, it was, as I told Jane a few times.. “Jane’s Boot Camp”.  As I say, “chop chop”.  This was my 3rd workshop with Jane. I just love her energy and sense of humor and not to mention her art.. oh my… her art.

First, Thursday started with my good friend, Jessica Sporn’s, visit to my home. She drove from New Jersey to stay with me and that evening, we had dinner with two more wonderful friends, Corrine Gilman and Kay Wallace.  I love being with like-minded women that just “get” you.  No drama. Just respect for each other at where we are in our lives. Life is short.. surround yourself with loving people that care about you. Heres’ what I think… if you don’t “get” me.. you don’t GET me. Makes sense? Think about it.

JudyandJessicaartdinnermikes

Friday morning we drove to VT for our workshop that started in the afternoon.  Now, if you’ve never been to Vermont before, you must visit.  Its beautiful drive, mountains and quaint little towns will have you stopping at each little country store and shops browsing.  However, this weekend, weather wise, was horrible. Rain, wind, fog, cold.  A good weekend to stay indoors making art.

Rupert is a very small town (population of 700’ish). Everyone knows everyone… and get this.. Jane is also the post master of the post office in the town.. or would you call her the “post mistress”. That sounds like a romance novel. You can see the post office HERE and Jane’s post about it. It’s as small as a postage stamp. I kid I kid.

Here is a picture of a barn that I passed in Rupert. I just loved it.  See the face?

20140329_101011

Jane rented houses for us and we split up. 4 in our house. Jessica and I were so fortunate to end up with two fun women, Linda and Adele. Great conversations and many laughs.. especially about my “f***ing” phone.  NO cell service all weekend.  It really goes to show how much we depend on our phones and internet. It was a nice break from all the pings and dings.

Housemates.. from left, Jessica, Judy, Linda and Adele. (ok, so where are friends that are supposed to tell you your hair look bad.. I mean, really.. hullo?)

housemates

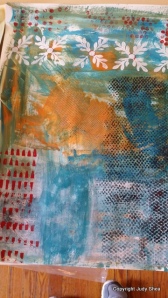
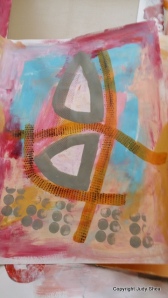
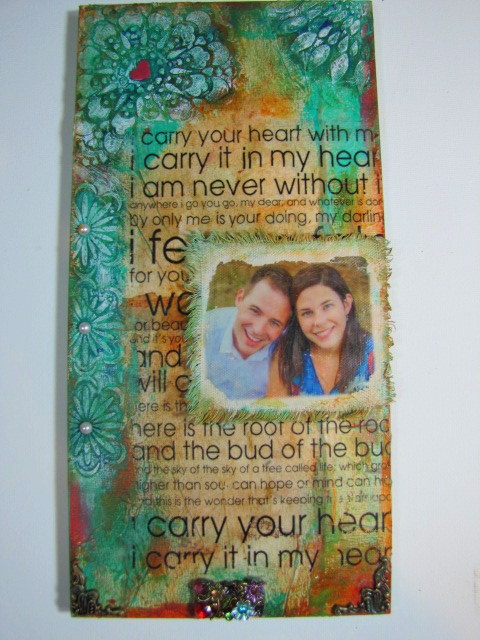
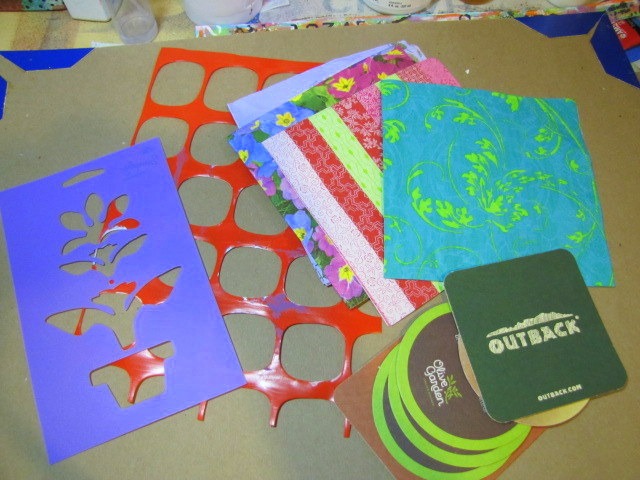
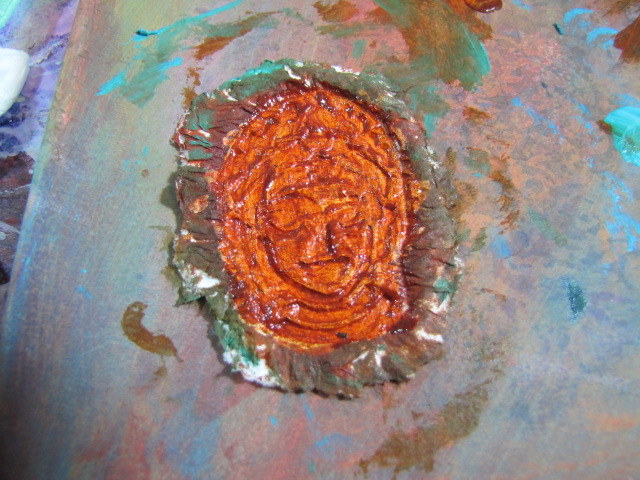
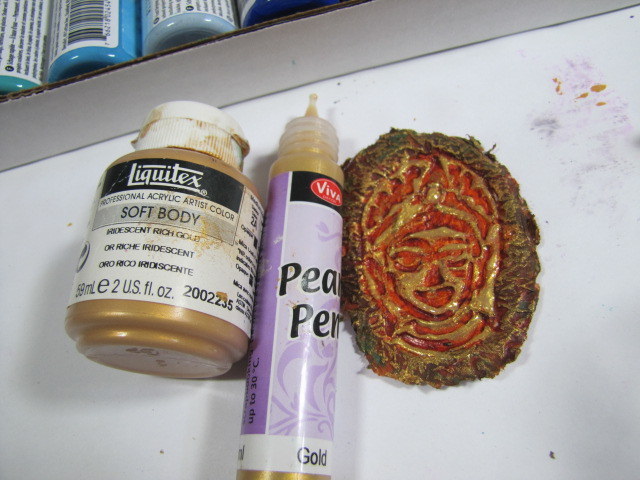
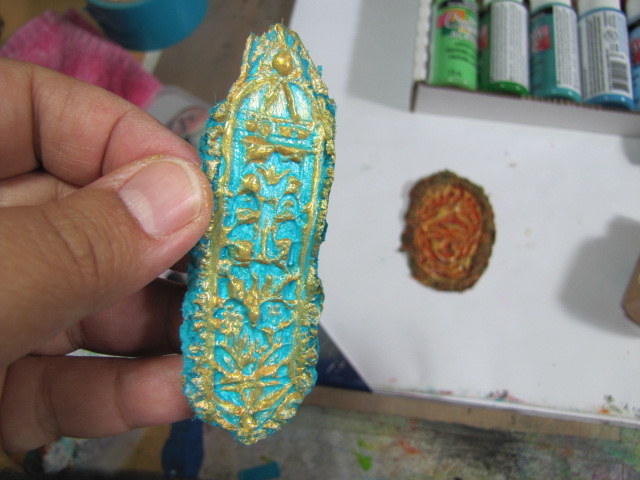
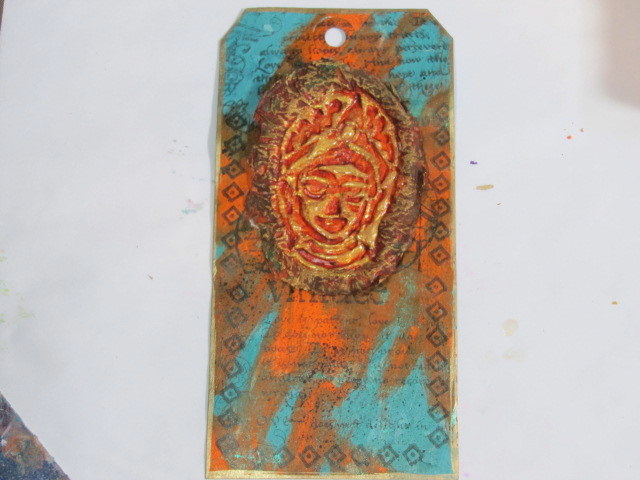
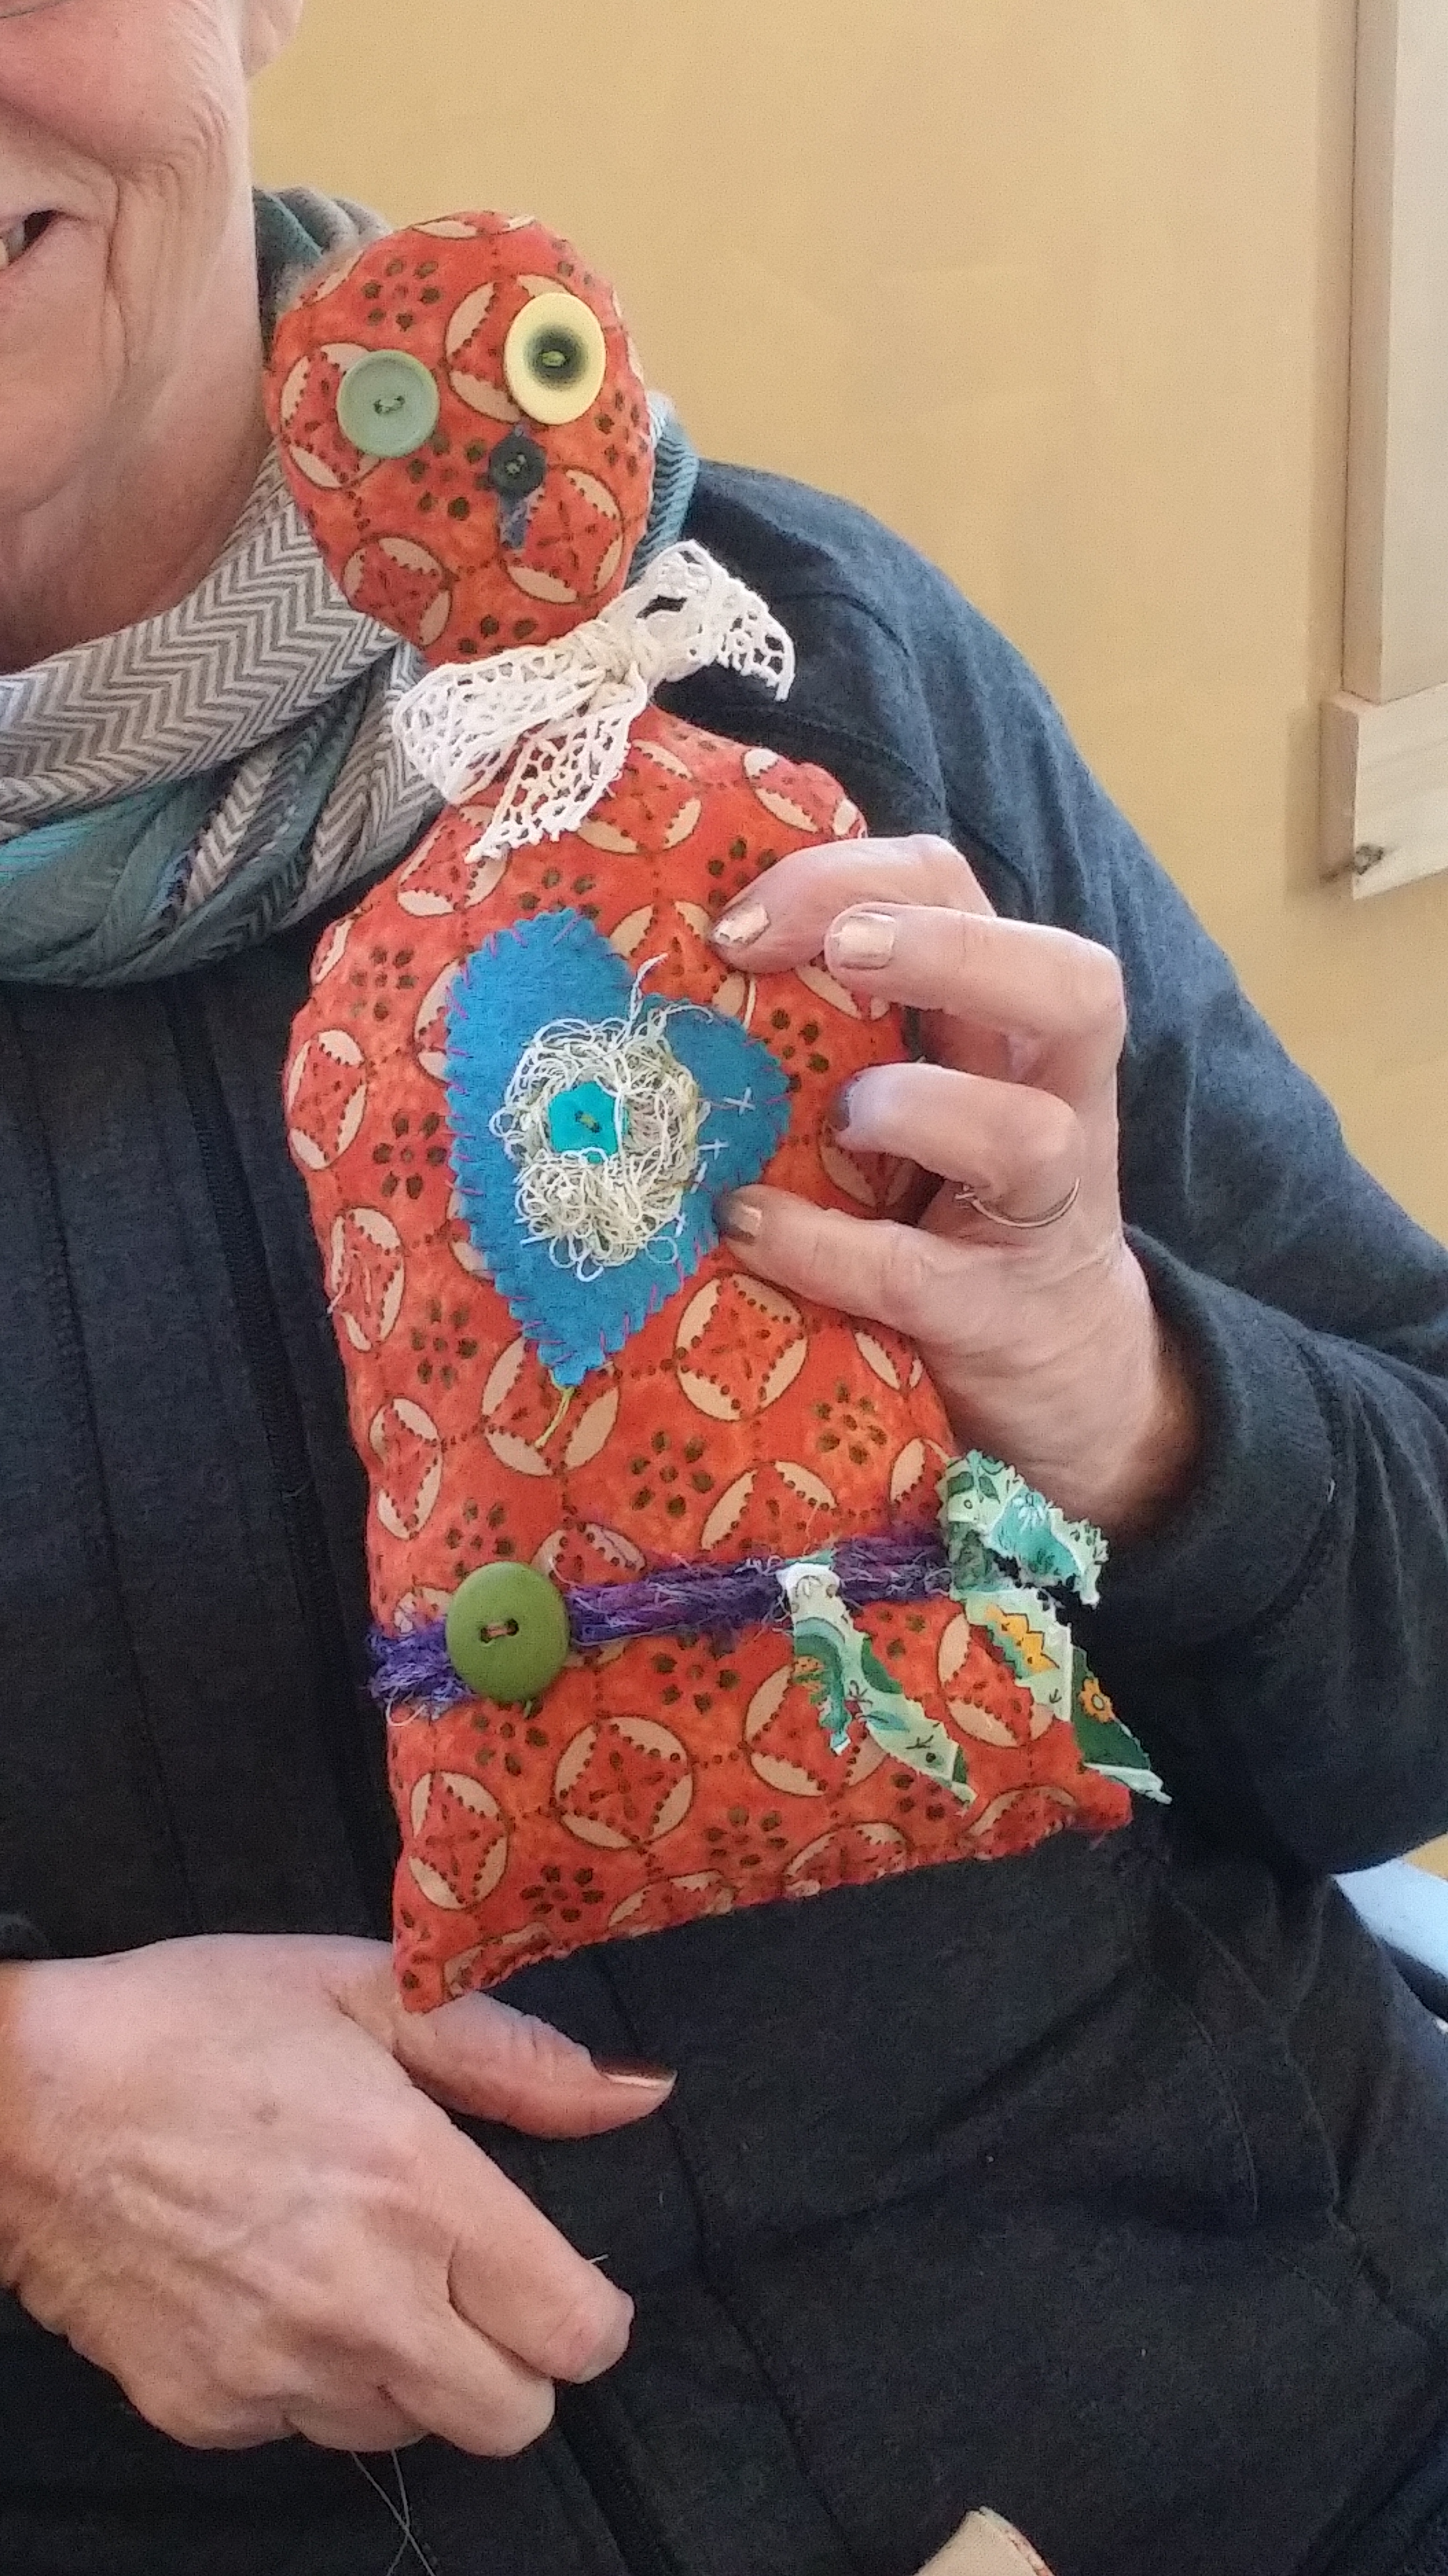
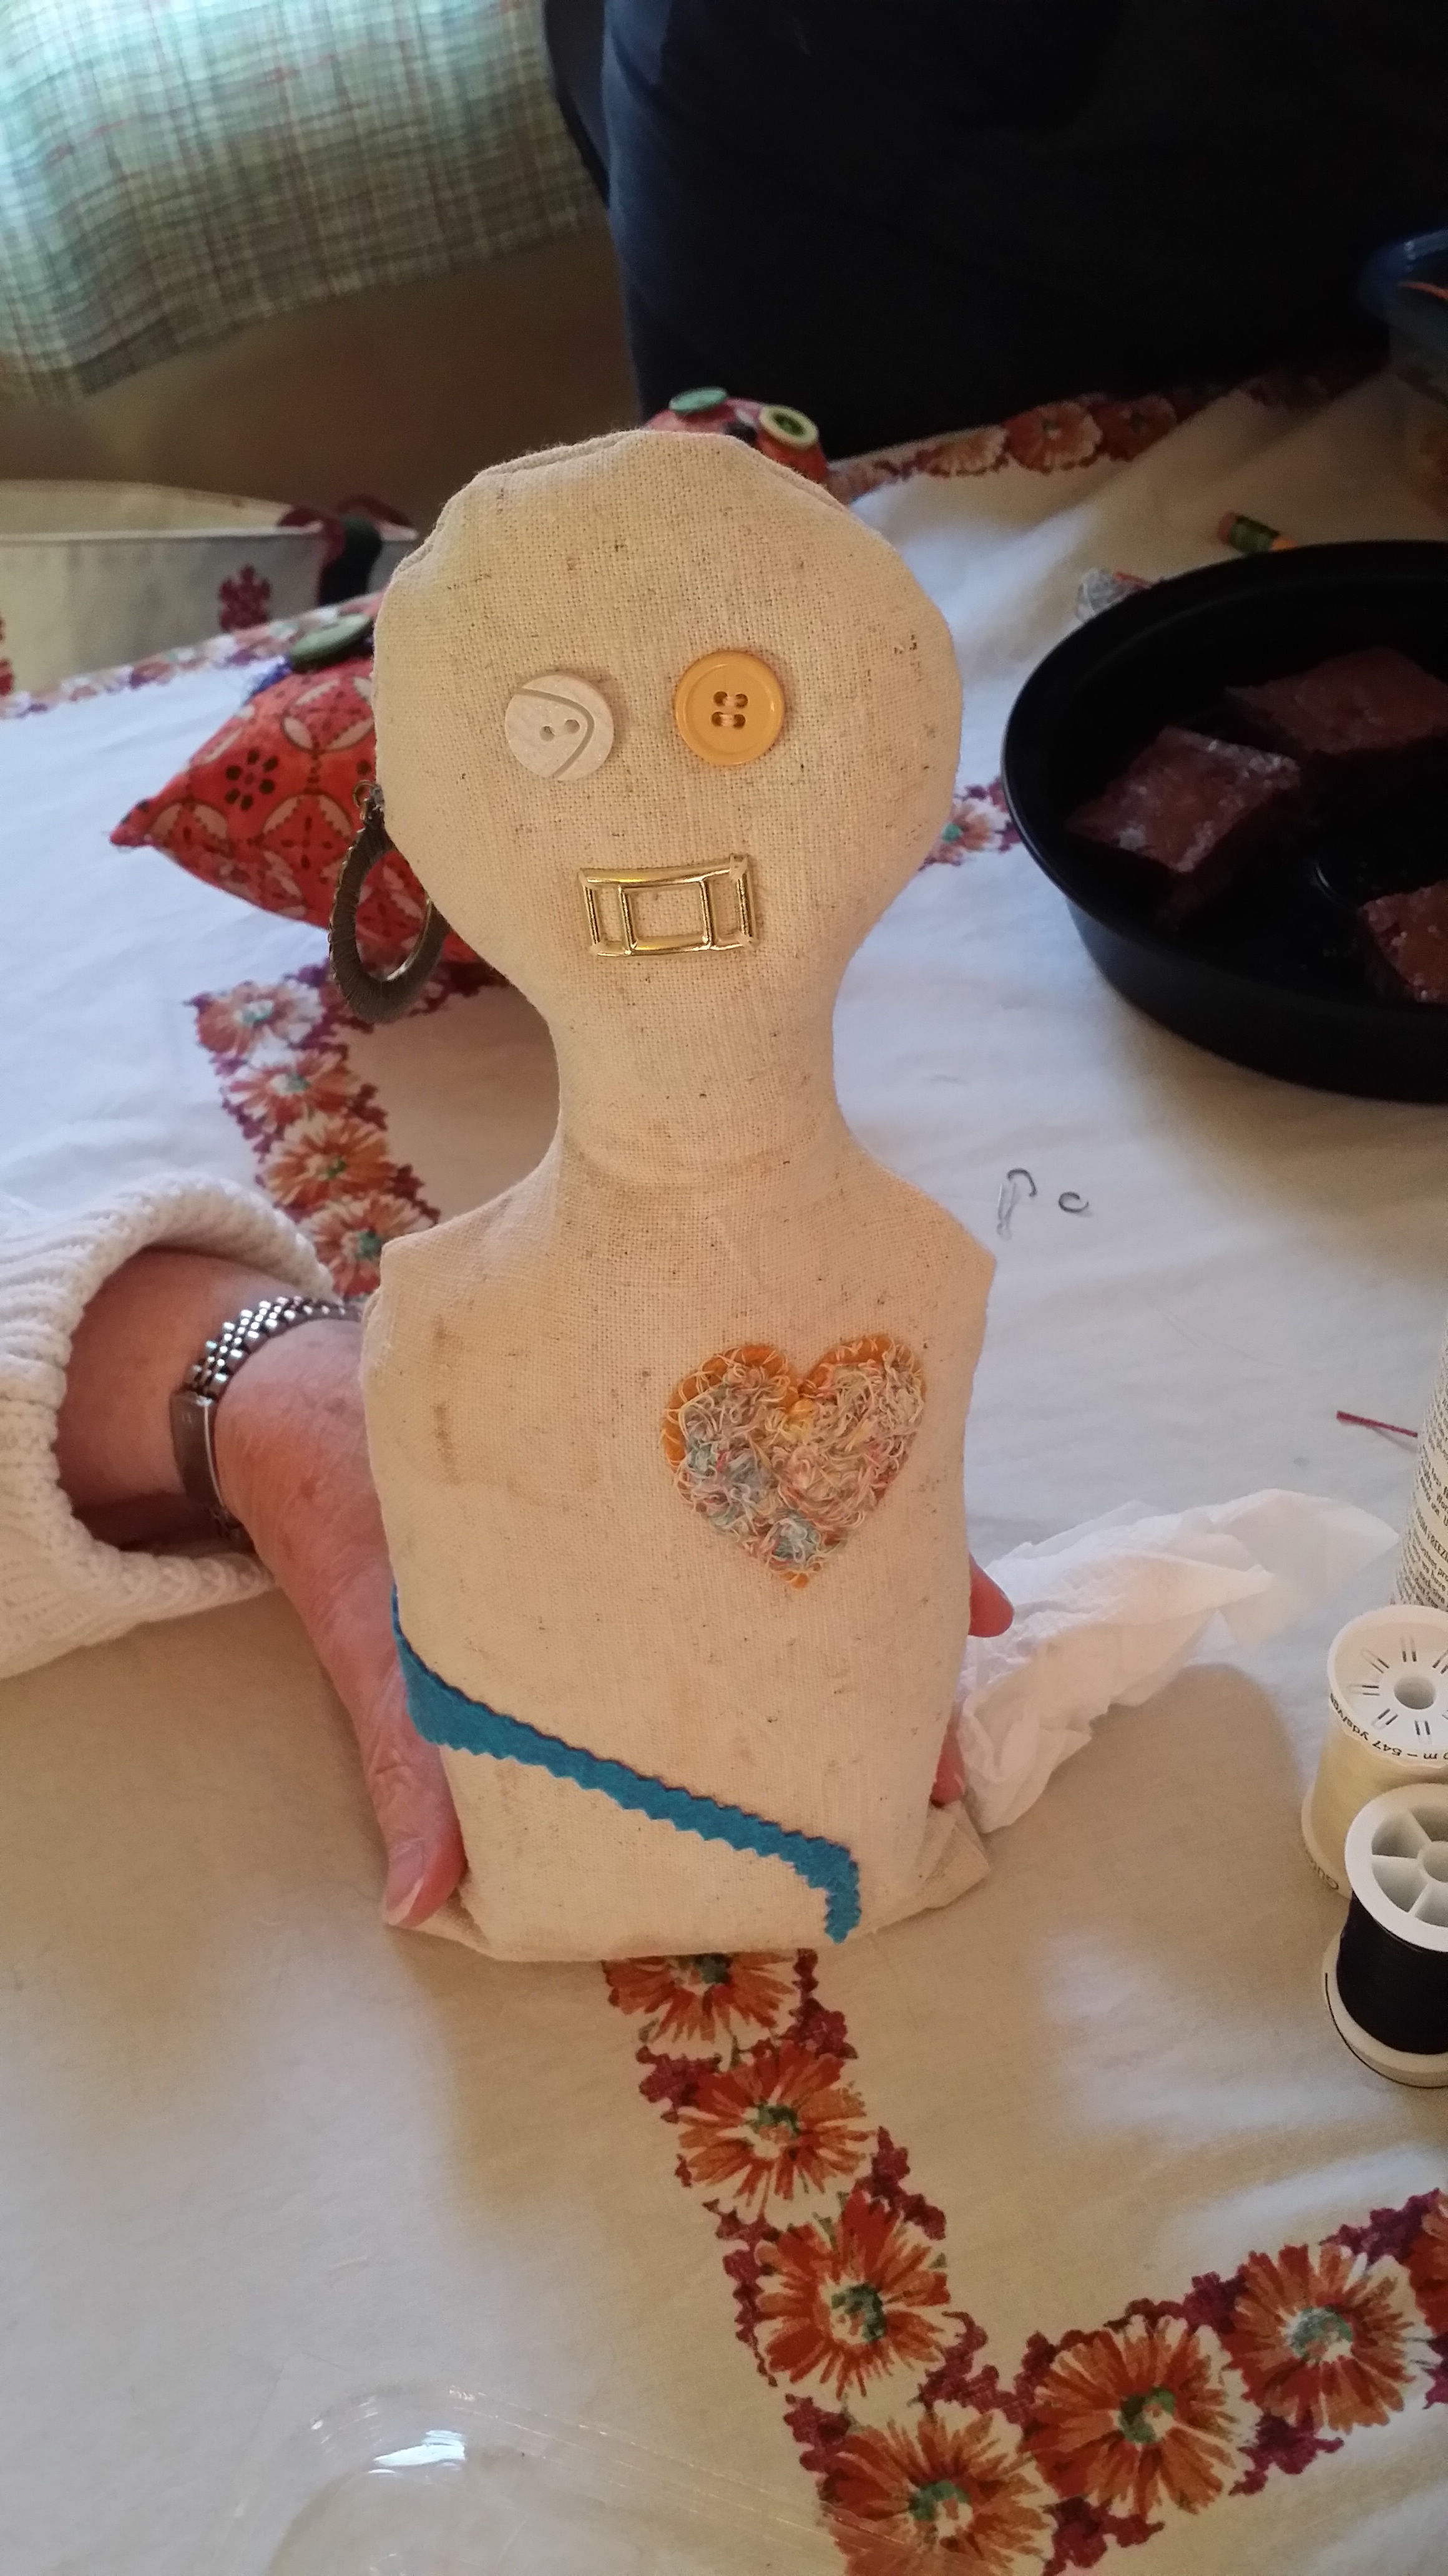
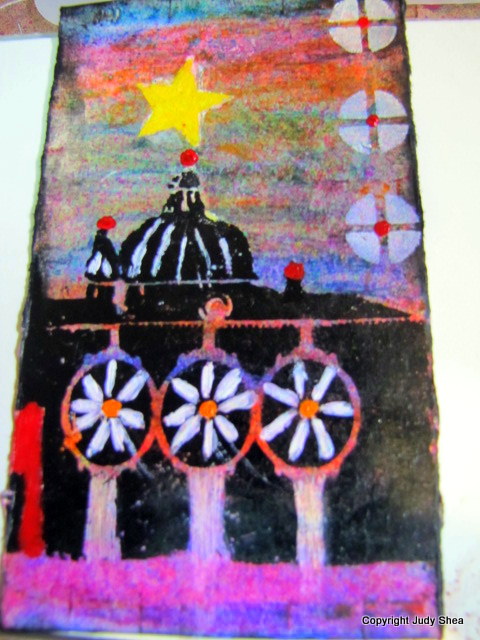
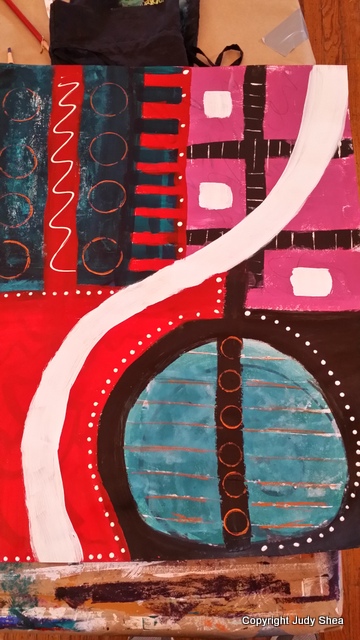
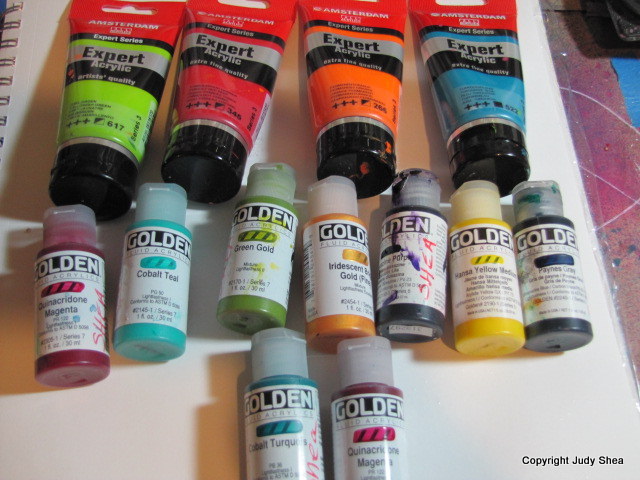
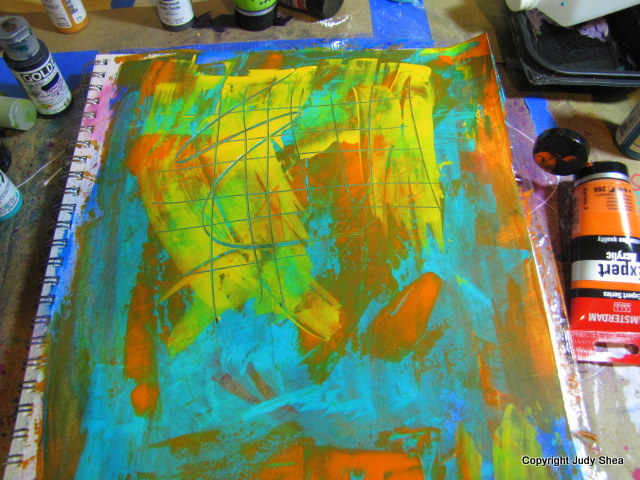
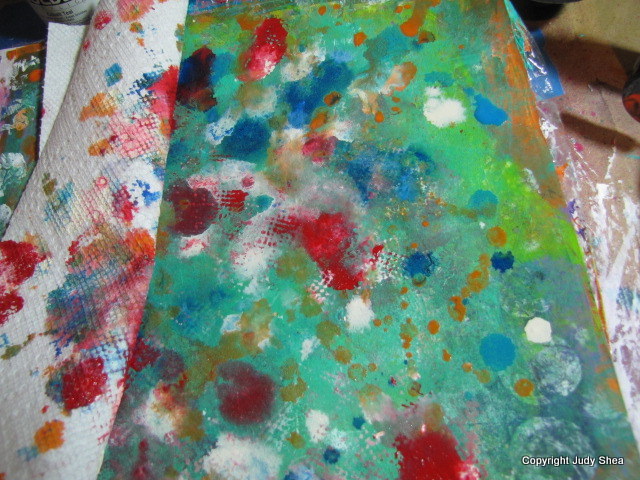
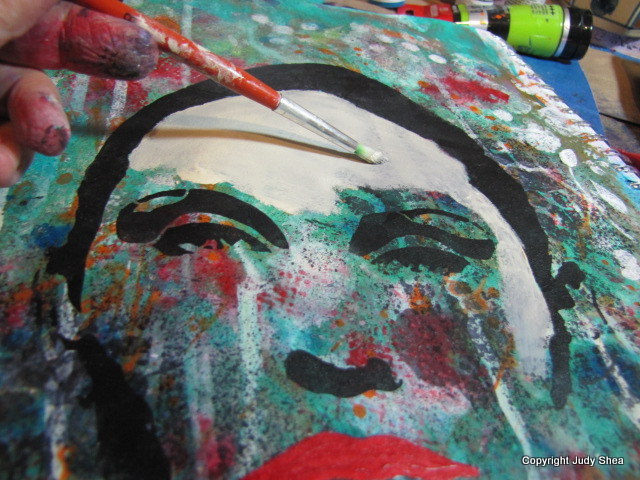
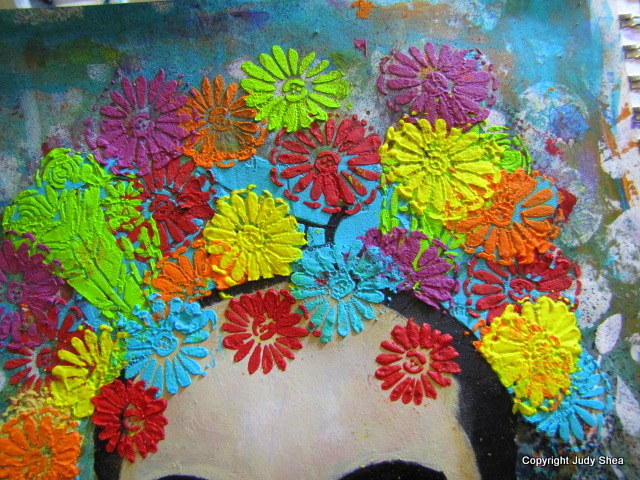
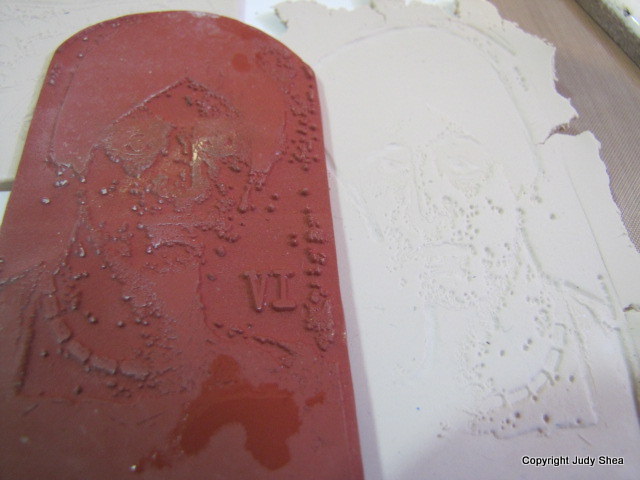
There were about 11 women in the workshop. All I can say is nice nice ladies. Really.. every single one of them were just wonderful and kind… and the talent.. well, just amazing talent.  I have to admit, cuz you know I have to.. it was a challenge for me. Totally out of my comfort zone. Working on large surfaces. Lines, paints, stencils, markers, scratch, stamp, textures, little spritz here and a little spritz there. Make your marks, don’t think, cross over to other side. Now do another and start over.  Geez, sounds like line dancing doesn’t it..or playing the game “Twister”.   Jane liked the feeling that I was pushing myself and when it was right before quitting time and my back was killing me.. I just stayed with it and pushed a little harder.  It worked. Here are some pictures of my work:

20140329_130847 20140329_141416 20140329_141426 20140329_172436


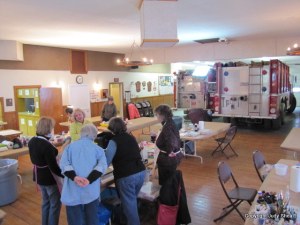
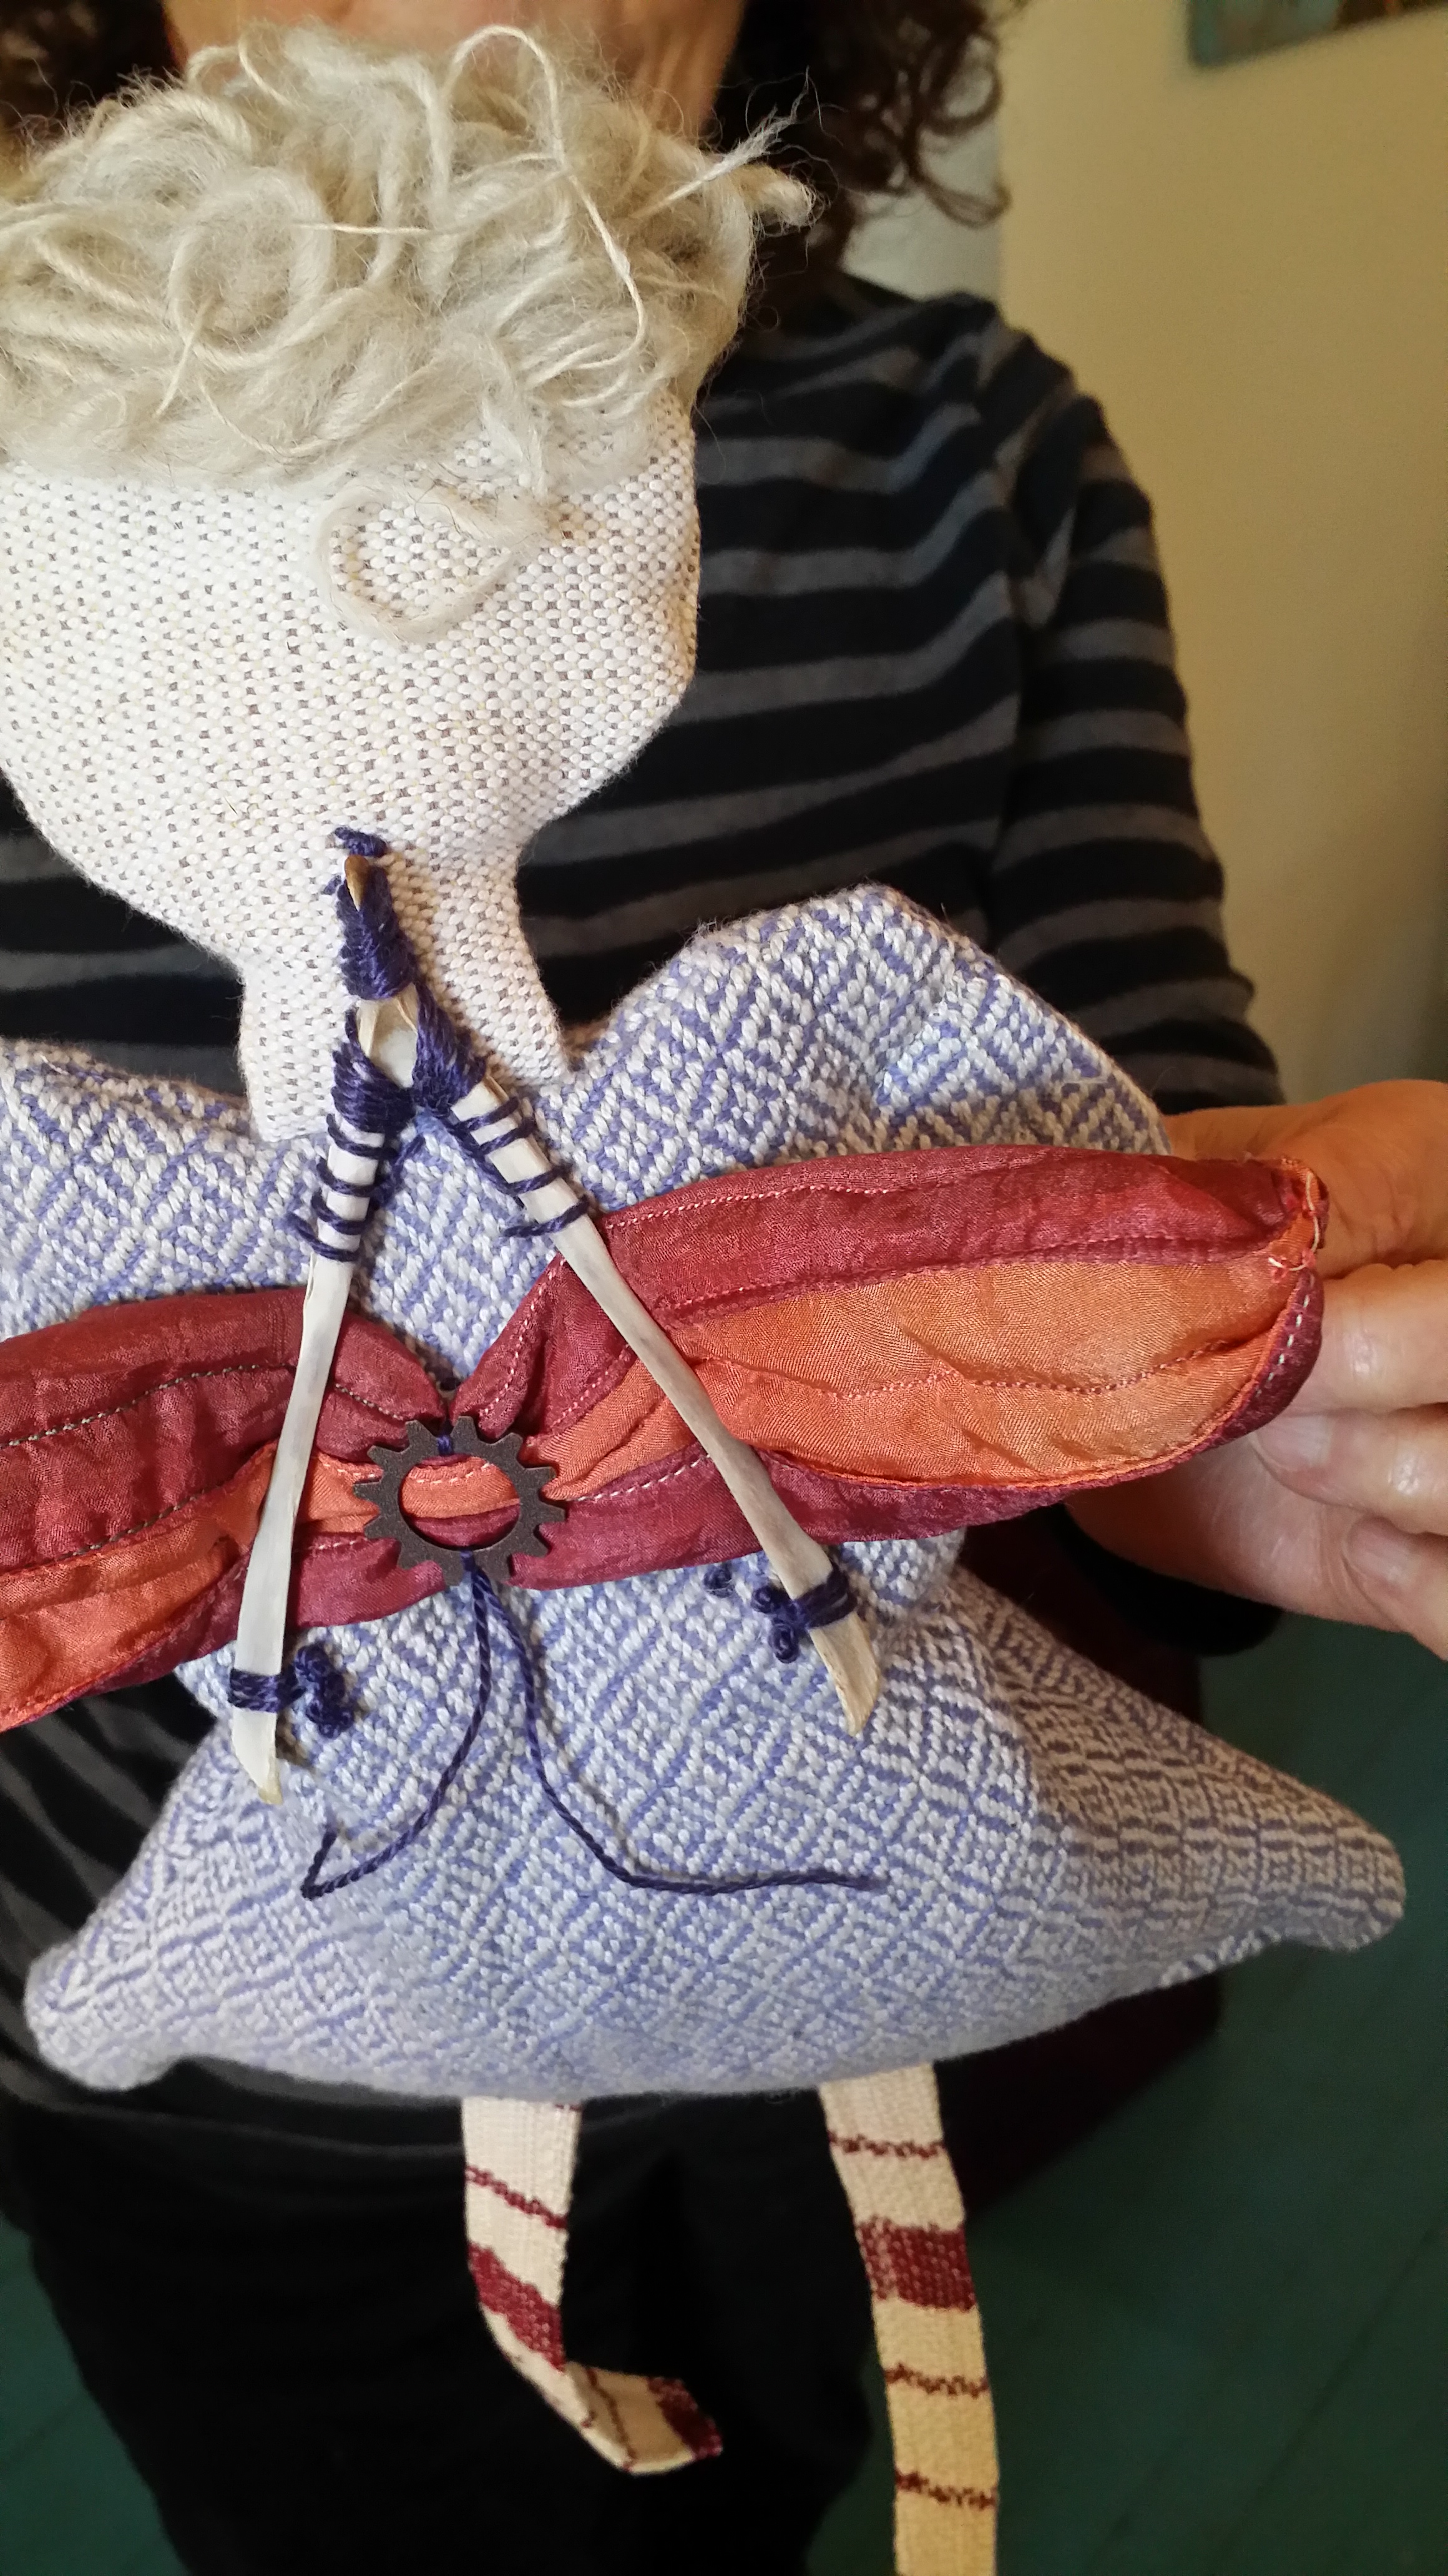
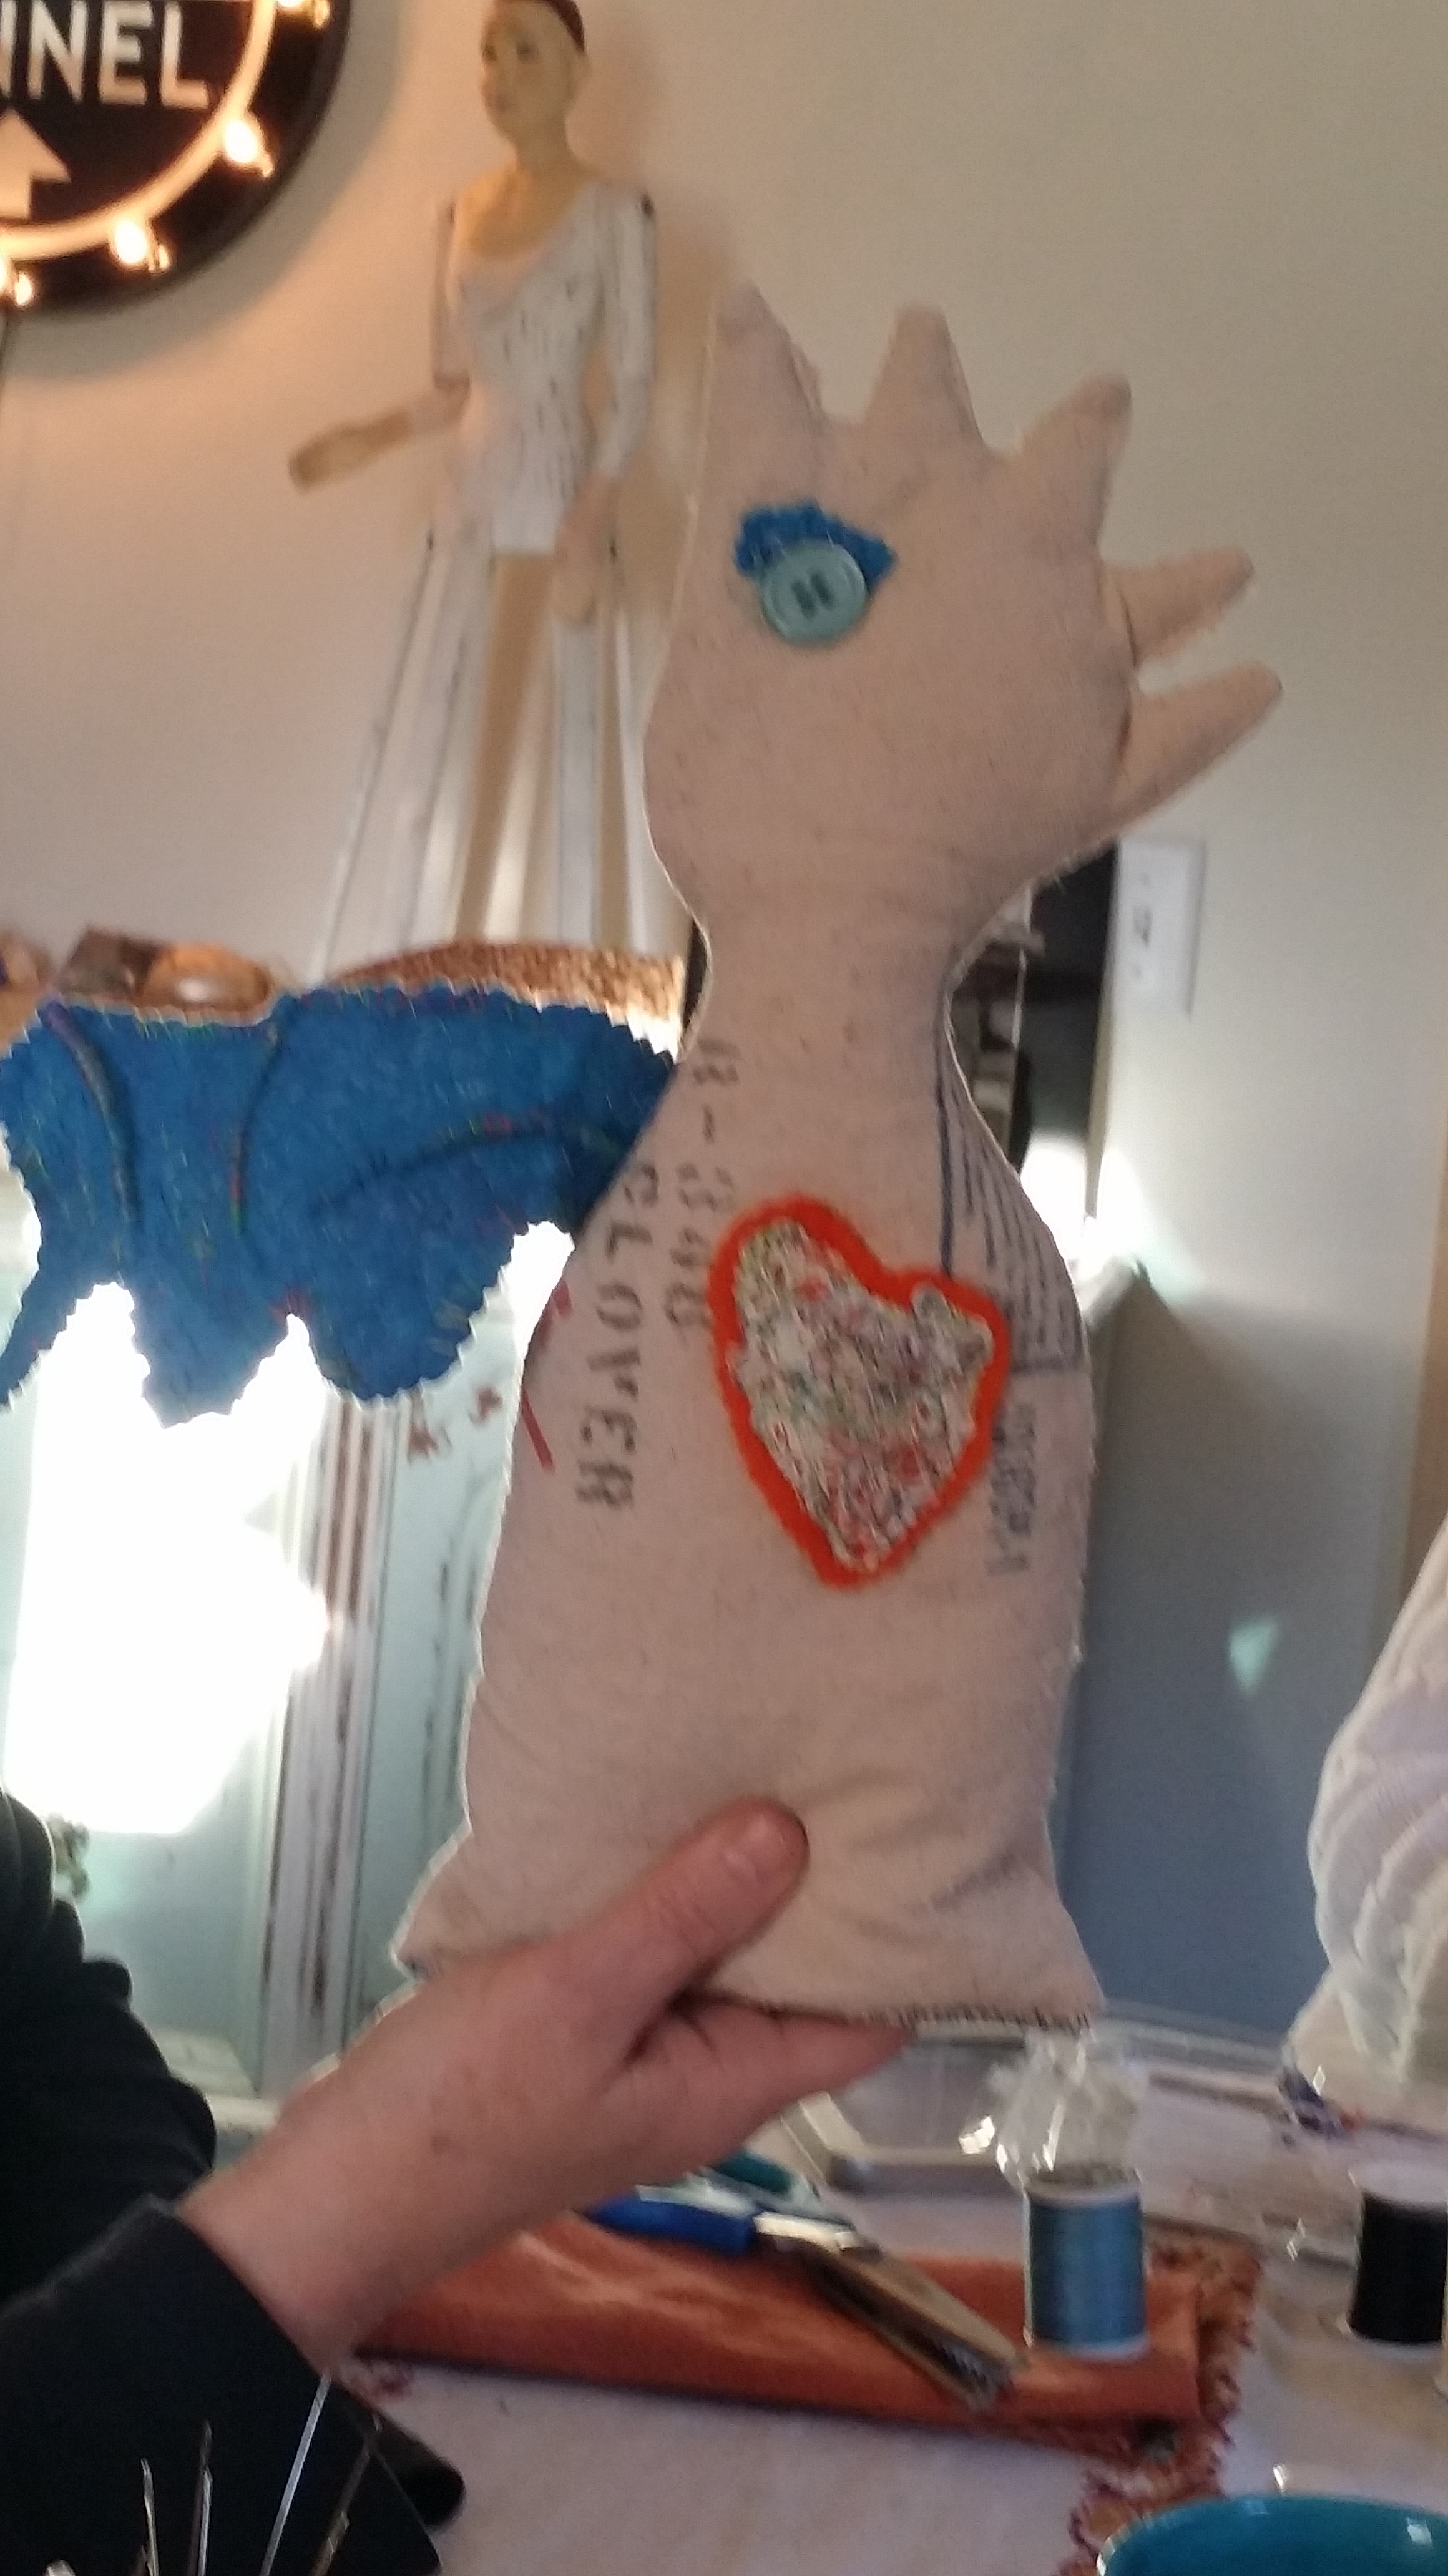
Let’s take a look at what the other artists did:

20140329_172444 20140329_172500 20140329_172534 20140329_172553 20140329_172641 20140329_172659

IMG_4397 IMG_4398 IMG_4399 IMG_4400 IMG_4402 IMG_4403

Check out the fire trucks.  Yes, the workshop was in a fire hall. No fire alarms went off, thank goodness. Such a cool place to make art.

IMG_4393


Jessica – happy art lady. We were at the same table, moaning and groaning while we pushed past our comfort zones.

IMG_4396


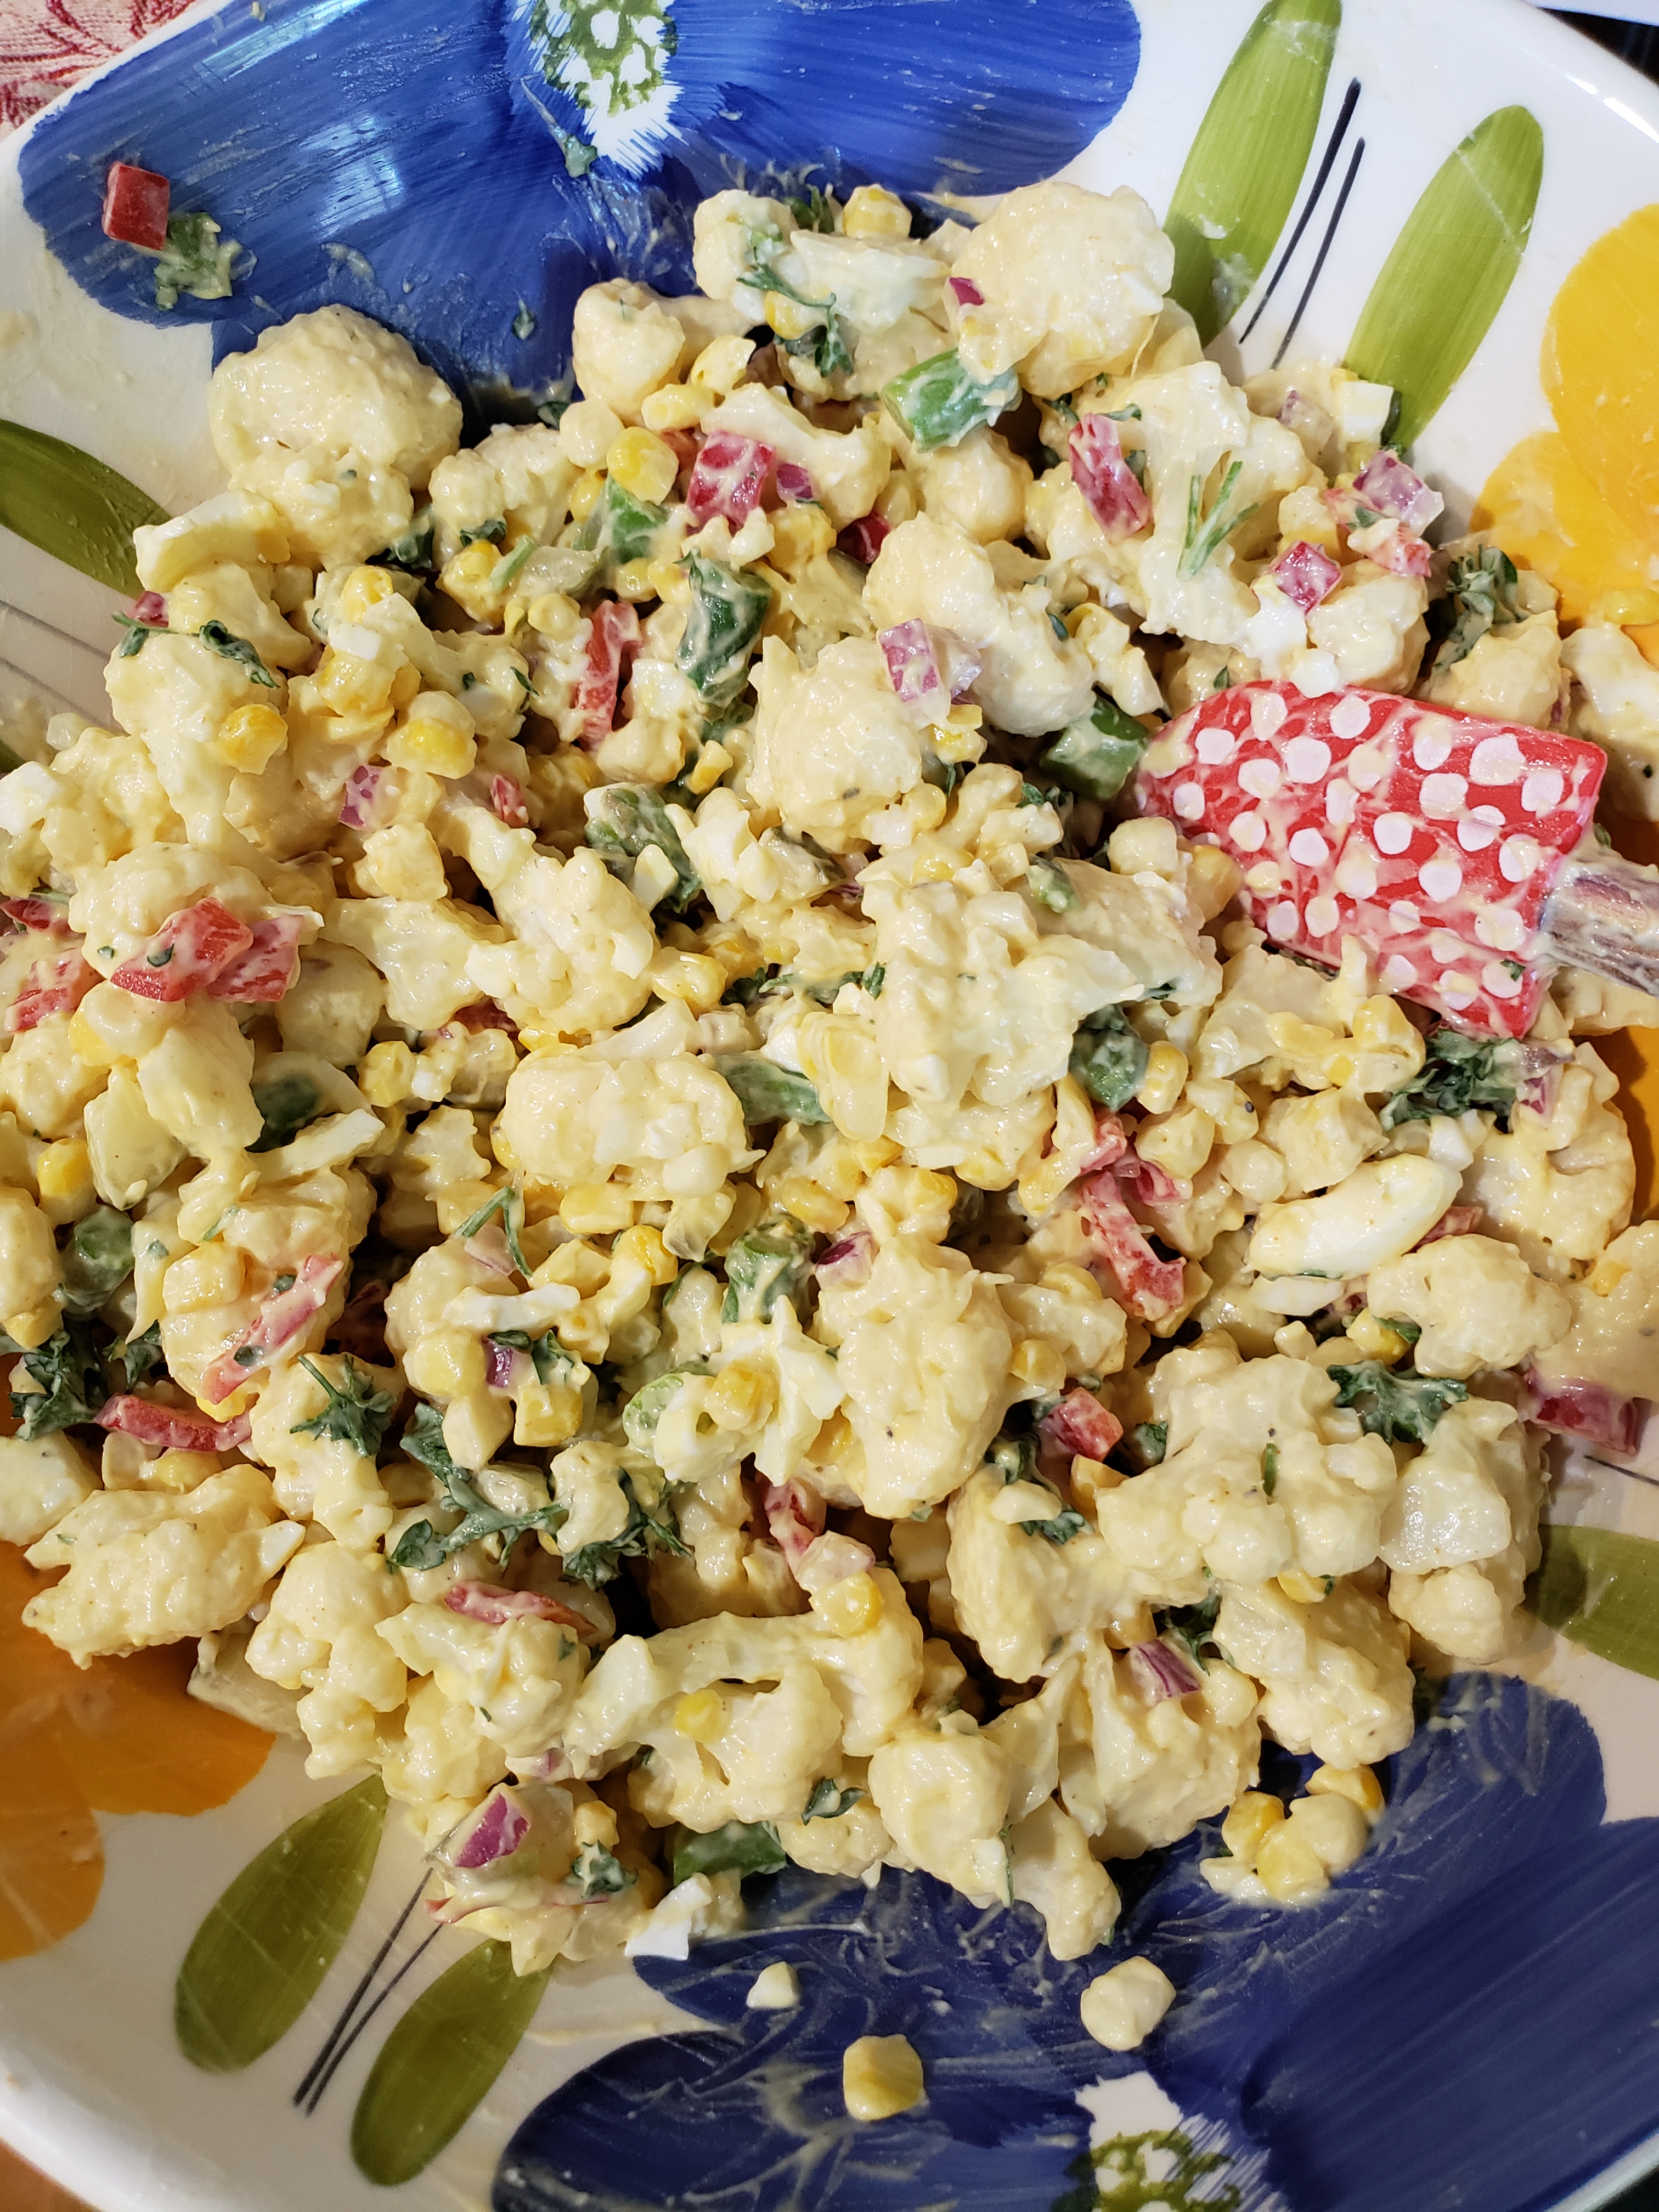
Now, let’s talk about food. My favorite subject, besides art.  Two lunches and one dinner were prepared by a caterer. Her name is Ali West from HN Williams Store Deli (check it out).  All the meals were vegetarian. I’m in love. If someone could cook for me like this everyday, I’m sold on skipping the meat.  Lunches were brought into the fire hall’s kitchen and the dinner was hosted at our rental house.  Here’s a shot of Jane, Jessica and myself after dinner.

20140329_204728

Well, what can I say about this weekend in summary? A sense of community, a challenge and lots of fun.  But.. it’s all what our minds need once in a while.. a challenge,  to get out of your comfort zone and push through it.  Jane welcomed that and now I know why.  If you don’t have the “breakdown”, then you’re not pushing hard enough. Did I want to go sit in a corner and suck my thumb?  Ah… ya. But, I ate the goodies in the kitchen instead.

Jessica did a great post about our weekend on her blog HERE.

Jane has a quick recap of BFA on YouTube HERE.

Jane, thank you. I’ll see you again soon.

Again and again, I thank you for stopping by to visit and/or comment. I read each and every reply and I can’t thank you enough for your support.

Judy ♥ ♥ ♥ 

StencilGirl and Andrea Matus deMeng = A Great Blog Hop

Standard

StencilGirl LOGO

  Hey everyone… I’m back again for another Blog Hop.  This time StencilGirl is introducing Andrea Matus deMeng as a new designer and announce her new stencils. Andrea is a fantastic artist and an amazing teacher. I know this because I’ve taken a class from her before and I will again at Art Is You in Stamford this year. Just amazing. Today, I am using Andrea’s face stencil called “Abigail, A Timeless Woman”.  This is the first face stencil I own and let me tell you, I was excited to say the least.

AndreaAbigaleStencil

I had my idea rolling around my mind for a while. Had it all planned out. This will be easy, I told myself.  Can I just tell you….. it was NOT.  Why, you ask? Well, I thought, make a background, which I did.  Stencil the face on the background, which I did. Then make her hair look wild and colorful, which I did.  But it did not go as fast or as smooth as I had planned.  Why am I telling you this?  Well, we can be tough on ourselves as artists and I was on this one, for sure.  I’m being honest and so you know the behind the scenes is not always a breeze.  It’s so true that practice practice practice is very key.  I wanted to take this beautiful face and do it justice.  Did I accomplish that? You tell me. Ok, enough of the whining Judy. Chop chop…let’s get teaching.

I started with large piece of Bristol paper.  Got my paints ready to squirt down and let some magic happen. Spray some water for more movement of the of the paint.  This definitely went through some ugly stages. I said to myself.. “self.. DON’T JUDGE”.  I covered up the purple and pinks; you’d never know they were in there.

IMG_4345 IMG_4346 IMG_4347 IMG_4348 IMG_4349 IMG_4350 IMG_4351 IMG_4352

Added bubble wrap stamping.  Then I used some air brush paint and sprayed water. Too much water? Paper towel to the rescue. Dripping color from the top of the page.

IMG_4353 IMG_4354 IMG_4355 IMG_4356 IMG_4357 IMG_4358 IMG_4359 IMG_4360 IMG_4361 IMG_4362 IMG_4363 IMG_4364 IMG_4365

Ok.. not so bad, but there are a lot of layers to get to a happy point. Over an hour has passed. Tick tock, people.

Now, comes the face stencil. Lay it on the background after it has dried. Use cosmetic sponge with black paint through the stencil. I used a beige/buff paint for the face.  Now mind you, to me, I am not a face artist.  Eyes are probably my best, but when it comes to noses and lips… fuhgeddaboudit.  So, this was also a challenge for the skin tone. You know, I didn’t want to make it a big deal here, but once you start, you want it to look good. Okay, so not so bad, right?

 IMG_4366 IMG_4367 IMG_4368  IMG_4369

Time for some Portfolio Crayons. My favorite. I started to shade some areas. I used acrylic paint for the eyes, however.  Abby is coming alive.

IMG_4370 IMG_4371 IMG_4372 IMG_4373 IMG_4374

Next up, what I’m going to show you is how I made the “headdress”.  First, Light Molding Paste on plastic wrap on a piece of cardboard.  Next time, I’ll use palette paper. In each plop of molding paste, I added acrylic paints. The yellow is a Folkart paint.  Don’t use that. I could really tell the different. Icky. I took pieces of stencils (also from StencilGirl) to make flowers all over her head. I tried to find stencils that had full flowers, but I only had a couple to choose from (no, I don’t have all of them).  One was from Terri Stegmiller, Garden Swirl and the other was Maria McGuire’s Butterlfy Duo. I used a section of the wing for most of the flowers.  I decided to cut apart the butterfly duo for ease of placement (don’t be mad at me.)

IMG_4378 IMG_4379 IMG_4380 IMG_4381 IMG_4382 IMG_4383 IMG_4384 IMG_4385 IMG_4387 IMG_4389 IMG_4390

So, back and forth with colors of molding paste, making sure they are looking good… not always easy, especially in a crowded area.  I added some of my “bellishments” of polymer clay that I made.  Added rhinestones to the center of the flowers and slap on my clay butterfly and here she is…. Meet Abby.

IMG_4392

Well, she is not perfect, but she was sure fun to create.   She sort of looks like if Frida and Carmen Miranda came together.  I kid I kid.  I just crack myself up sometimes.

Thank you, Andrea for creating Abigail. I hope I did her justice for you. I think I need more lessons.

Next, it’s time to HOP… join the rest of the Creative Team and see what they did with Andrea’s new stencils.  But, first the giveaway… and a video to get you excited for THE HOP.

Giveaway = Two winners-one will receive a set of the new 6″x 6″ stencils and one will receive a set of the new 9″ x 12″. All comments on the hop are eligible for the giveaway. The more blogs you comment on, the more chances you have to win. Giveaway will close on Sunday, April 6th at 11:59PM Central Time.

Again and again, I thank you for stopping by and choosing to subscribe to me.
Happy Spring (if it ever gets here).
Judy ♥ ♥ ♥

StencilGirl and Lost Coast Designs Blog Hop – Clay ATCs

Standard

LostCoastBlogHop

It’s been quite a long few intense months at work here… hence my absence.  It’s calmed down now and I am determined to keep up my blog and do some art for ME an StencilGirl.. and today with Lost Coast Designs, too.

We have a great blog hop today and you’ll be able to visit with all my art friends in a minute. But before I let you go hopping and to an amazing giveaway, I’m gonna go creative on you or should I say “clayative”. Oh, good one, Judy.  Let’s see what we can do with rubber stamps and stencils.

Rubber stamps first.

Today, I are making ATCs+ (Artist Trading Cards)  The “+” means I’ll be putting them on stenciled coasters; so, my version of presenting ATCs a different way.   I’m making them with polymer clay using Lost Coast Designs rubber stamps.  Rubber stamps and clay have a great relationship. I’ve been pushing stamps and textures into clay for years and I never get tired of the result.

I love the look and color of natural/beige clay. It’s very wood-like to me, especially after I stain it. So, I have conditioned some Fimo Soft clay by softening it with my hands then running it through the clay dedicated pasta machine. I have to admit, I was NOT happy with this clay this time.  It just wouldn’t soften up like I wanted it to. But, I managed to get what I needed, and I had to make do with a result I didn’t like.  Friend and great artist, Carolyn Dube, calls them, OOPS – “Outsanding Opportunities Presenting Suddenly”. Indeed it was. Read on.

Let’s start with the rubber stamps the Lost Coast Designs sent me. I chose birds and a face.  I also chose unmounted, because the rubber stamps are more flexible and easily pushed right into the clay.

Spray the clay with a little water after is flattened. I used an acrylic roller. I gave it a sturdy push as I rolled.

(CLICK ANY IMAGE FOR CLOSE UP)

IMG_4277 IMG_4278 IMG_4279 IMG_4284

I created a template the size of an ATC (3.5 x 2.5″). Lay it over the bird image and cut around the center with a craft knife. Lay plastic wrap over the ATC and just rub around the edges to smooth it out.  Note: You can use a playing card as a template also.

IMG_4287 IMG_4288 IMG_4292

I did the same with another bird and the face.  I decided to take my “difficult” clay and let it look uneven, like a shard of some sort. I did this with the face.  Not a true ATC, but hey, my world, right? I took some of my favorite buttons and impressed some texture into the clay around the images. Time to bake.  I used a ceramic tile and baked in a clay dedicated oven.  Follow the package directions for timing.  Let the clay cool and now it’s time to stain and paint.

IMG_4293 IMG_4294 IMG_4295 IMG_4297

Antique/stain:  I took brown acrylic paint and rubbed it into the now cooled clay and then wiped it off with damp cloth or paper towel.  Just look at the images come to life.  Lookie see.

IMG_4299 IMG_4302

I painted the first bird with cobalt teal acrylic paint, let dry and the same with the to other bird, but I used red acrylic paint. For the woman’s face I started  to paint her hat and lips. I manipulated the image a little with tools to bring out the eyes and lips a bit.  I mixed the paint with a little glazing medium for a bit of a shine.  Once the paint was dry on the birds, I put a wash of brown paint and water and rubbed it over the words in the bird’s body so they would appear more.

IMG_4303 IMG_4304 IMG_4305 IMG_4306 IMG_4307 IMG_4308 IMG_4309

Once the paint was dry on the ATCs, I gave them a sealer coat of Diamond Glaze.  Let them dry.

IMG_4316 IMG_4317

I wanted to give the ATCs a little flair. I opened up my rhinestone tray and give them a little bling. Then I used glitter glue to go around the birds.  I also took a Krylon Paint Pen and went around the edges of the clay.

IMG_4323IMG_4325IMG_4326

Now, onto the stencil part.  I used 3 StencilGirl stencils..  Scales by Jessica Sporn, Circle Rays by Michelle Ward and Mandala by Mary Beth Shaw.

I took 3 beer coasters and gave them a coat of heavy gesso. I painted them with acrylic paint to contrast with the image colors.  You’ll see I used green, but me no likey. I changed to purple later on.

IMG_4311 IMG_4314 IMG_4315

I stenciled the coasters with each design, using a make up sponge with acrylic paint.  I then put a coat of Collage Pauge to seal it and give it a deeper look. Love this stuff.. no sticking after it dries.

IMG_4327 IMG_4328 IMG_4329 IMG_4330 IMG_4331 IMG_4332IMG_4333 

I used  Posca Paint Marker Pen to add some doodling.  Then I glued the Clay onto the coaster.  Added a few “bellishments” that I made.

IMG_4336 IMG_4335 IMG_4334 IMG_4338

Final results. Click on images for close ups.

IMG_4339 IMG_4340 IMG_4341 IMG_4342

Wasn’t that fun?  Ready for the giveaway???

lostcoastimage

Two 9″ x 12″ stencils from StencilGirl and a $25 credit in the Lost Coast Designs store will go to ONE lucky winner!

All comments on the hop are eligible for the giveaway. The more blogs you comment on, the more chances you have to win. Giveaway will close on Sunday, March 30th @ 11:59PM Central.

Now, it’s time to hop on over to see what Bibiani created.

StencilGirl Talk
LeighSBDesigns
Mary Beth Shaw
Mary Nasser
Cherri Robb
Judy Shea (that’s me… next is Bibiana)
Bibiana Martinez-Ziegler
Linda Kittmer
Carolyn Dube
Leslie B. Turner
Janet Joehlin
Karen McAlpine
Leslie Tucker Jenison
DominoARTblog
Lindsay Weirich
Maria McGuire

I hope you enjoyed the ATCs and this blog hop.

As always, I love hearing from you and let me know if you have any questions.  Thanks for your patience and sticking by me as I continue my balance of life, work and art.

Judy ♥ ♥ ♥

Blog Hop with StencilGirl and Walnut Hollow (Video)

Standard

Displaying Coming Soon-stencil-StencilGirl-Walnut Hollow-1.jpg

IMG_4176

Hi and welcome to another Blog Hop with StencilGirl.

Today, StencilGirl is collaborating with Walnut Hollow.  You can check out Walnut Hollow’s blog today where they will be joining our hop using StencilGirl stencils.

I decided to do a video showing you what I’ve done with the box that Walnut Hollow sent me and with one of my favorite SG stencils designed by Maria McGuire called simply “Butterfly”.  As you can see from the picture above, it was a perfect design and perfect fit.  Wish that would happen to me in a shoe store. I kid.

Enjoy the video.. it speaks for itself. (taped during last weekend’s snow storm). I had 3 hours of taping before my editing and I got it down to about 15 minutes.  Now I know how Spielberg feels. I kid, again.

I hope you enjoyed that.

If you missed any of the other creatives on this hop, just follow the line up below. Next up is Maria McGuire.

StencilGirl Talk/Judi Kauffman
Walnut Hollow
Mary Beth Shaw
Kirsten Reed
Carolyn Dube
Janet Joehlin
Linda Kittmer
Mary C. Nasser
Julie Snidle
Jessica Sporn
Judy Shea : )
Maria McGuire

Wow.. that was amazing. I need a minute.  Okay.. now for the giveaway…

There will be a giveaway consisting of StencilGirl and Walnut Hollow products. All comments on the hop are eligible for the giveaway. The more blogs you comment on, the more chances you have to win. Giveaway will close on Sunday, March 2nd at 11:59PM Central Time.

Thank you for stopping by.  I love hearing from you.  I am beyond appreciative of your support.

Judy ♥ ♥ ♥

In the studio…Playing with StencilGirl stencils

Standard

Seems as though I’m spending more time on Facebook lately than posting on my blog. I realize that many of you do not have a FB page, so I wanted to show a couple of things I’ve been playing with in my studio.  That is, when I have time away from my job. That’s a funny phrase to say out loud, because I don’t seem to have much of that in my life lately.  Ahhh, the woes of a full-time assistant trying to be creative and find time to make art. Remember that balance thing I’m striving for? Well, I continue to reach for it and all I can do is accept what it is and maybe I need to stop trying so hard and let it go.

We move on…

Playing with my Gelli Plate in my journal using stencils.  Lots of sprayed layers with fabric sprays (same ones I used in this post). Checkerboard duct tape on the bottom and some doodles to the sides. Love this depth effect. Stencil by Carolyn Dube.

IMG_4100

Doodling inside traced stencils with a black fine marker. Using Prisma colored pencils and watercolors. Bottom stencil by Michelle Ward.  Inspired by Michael Trent, new Creative Team Member of StencilGirl.

IMAG1178

More stencils using heavy gesso and spray inks. Then playing with colors in Picasa. Stencil by Mary Beth Shaw.

IMG_4152  IMG_4153

My favorite.  Playing with stencils in the background and making image transfers on top using old photos of my parents. Stencil by Carolyn Dube.

IMAG1167 IMAG1169 IMAG1158

Playing around with this photo in Picasa.

IMAG1165

Finally, I leave you with a photo I captured of a Snowy Owl just outside of our town at Plum Island. I had never seen an Owl in my life.  People come from all over to the sanctuary here for bird watching.  Some days it’s like a paparazzi with all the people and the cameras.  And, oh, by the way…. the Eagles have landed. No, seriously, the eagles (the bird, not the band), have migrated to Plum Island. I’m hoping to get some good photos of them; I’ll let you know how that goes.

IMG_4053

Just wanted to keep in touch with my peeps.  I’ll be back soon with another Blog Hop with StencilGirl.

Thanks for stopping by.  I love hearing from you.

Judy ♥ ♥ ♥  (Happy Valentine’s Day!)

Blog Hop with StencilGirl Designer, Michelle Ward – Abstract Note Cards

Standard

StencilGirl LOGOStencilGirlImage

Welcome to another StencilGirl Blog Hop.

I’m always excited to do a blog hop for a few reasons.  One, is, it makes me get in my studio to create and stop working. Two, I get to share the spotlight with other amazing artists that I truly respect… and three.. ok ok.. I guess it was just two. No, I kid I kid. There are others, but you are here to hop and have fun, so let’s do that.

Today, I’m using StencilGirl Designer, Michelle Ward’s new stencil.   I’m using the 6″x6″ stencil called Intersections.  (Side note: I had the pleasure of meeting Michelle this year in Stamford, CT at Art is You and what a wonderful, down to earth person. Hi Michelle!)

WardS187-1

I am using this stencil as a STAMP, not in the traditional way of using it.   I decided to make my own abstract note cards.

Here are the blank cards laid out. Working on all of them at the same time, makes it easier to keep the colors and design consistent. (wow, my table surface is a mess, I think it’s time to make some art out of that too… sorry, sidetracked already).

IMG_4123

I recently got a hold of some Simply Paint fabric sprays.  I am not in love with these for a couple of reasons. The nozzle gets clogged up and you have to stick something sharp in to open it up and if you look at the nozzle while you are poking it, it may release and spray in your face. Can you guess how I know this? Right.  The paint drizzles once you stop spraying, thus leaving drips on your art. Now, you may like this sometimes, but not for delicate and exact purposes.  I will use them up in some journal pages and spraying through stencils onto paper and fabric. It leaves a nice flat finish.

I used the fabric spray to lay down the front area of the cards first.  I first spray blue, then green. For the envelope, I only sprayed the left side edge, so I could leave room for the address.

IMG_4102 IMG_4124 IMG_4125 IMG_4126 IMG_4128 IMG_4131 IMG_4132 IMG_4133

Now, it’s time for the “stamping” with the stencil.  I used masking tape to block out any of the stencil I did not want to use. Then with Ranger Distress Paint, using the color “Barn Door”, I dabbed the paint onto the stencil.  Flipped it over and placed in on the card and used a brayer to gently, but firmly roll the paint on the card.  Some areas of the lines are inconsistent, but I like that look.. messy abstract.

IMG_4134 IMG_4136 IMG_4137 IMG_4138 IMG_4139 IMG_4142 IMG_4143

I did the same thing with the edge of the envelopes. Then I took Ranger Distress Paint color “Picket Fence” and dabbed around the edge of a cardboard circle I had. You can also use a bottle cap or toilet paper roll.  I added some white circles to the card. I liked this white pop it gave to the design… and the same with the edge of the envelope.

IMG_4145 IMG_4146 IMG_4147 IMG_4148

Now, of course you know I had to add one of my “Button n’bellishments” to the card, so each one got a small heart.  How cute to send a card to someone on Valentine’s day. I stacked and wrapped them with some twine.  There are my cards ready to be addressed and mailed.

IMG_4149  IMG_4151

I’m so happy to be part of the art sister team below. Can’t wait to see what they do.

Judy Shea (yup, that’s me, on to Leslie next)

.. and now for give away info ….

There will be a giveaway on StencilGirl Talk for Michelle’s new stencils. All comments on any of the posts  are eligible for the giveaway. The more blogs you comment on, the more chances you have to win.
Giveaway will close on Friday, January 31st at 11:59PM Central Time.

As always, thanks for stopping by, for all your support and comments.

Judy ♥ ♥ ♥

Sito’s Kitchen – Shambooduc

Standard

Happy New Year!  I can’t believe my last post was before the holidays and now it’s 2014. How did that happen?  Such a busy time of the year for me for work, plus the holidays and family stuff.  Well, you know what I’m talkin about, right?

Let’s get right to my cooking channel with my mom.  I’m so blessed to have my mom feel so well and be a great sport doing these videos.   They are tiring for her sometimes and can take all day.  My girls were with me for this video, so I was cracking up a bit.  You’ll see the blooper at the end.

So… it will speak for itself.


That’s a wrap!

I’ll be back this week with a new blog hop for StencilGirl Products.

Thanks for stopping by.  I love your comments and all your support.  Means so much to me.

Judy ♥ ♥ ♥

StencilGirl Blog Hop – Polymer Clay Dress

Standard

Welcome to another Blog Hop with StencilGirl.

StencilGirl LOGO

By the way, did you take advantage of StencilGirl’s Cyber Monday shopping deals? Well, I’m just sayin that someone that you know who writes this blog took advantage of it and got herself some early Christmas presents, that’s all.  I am so looking forward to the holiday break where our company shuts down for over a week.  I plan on taking some serious time in my studio to create with my new “toys”.  Wish you could join me.

Ok.. let’s hop to it.

The stencil I’m using this time is by Sue Pelletier’s called “Loose Dress #2”

dressstencil

I decided to make a cute dress out of polymer clay.  My goal was to create a gift for a “welcome baby girl” or young girl.

I used Premo clay. I wanted pink for a girl, so I made some pink clay mixing white and a little red.  It took quite a while to condition this clay by keeping in warm in my hands and trying to squeeze and smoosh it to keep it warm and soften it. Once it softened up, I let the pasta machine help me to the rest –  set at the largest roller width.  Probably went through about 20 passes before it was soft and pliable.

IMG_3969 IMG_3970 IMG_3971

It needed to be a little bigger than the dress stencil which is 6″x6″.  Spray the clay with water.  Lay the stencil down on the spritzed clay.  Put them through the pasta machine together, but do not hold them while they run through. The width was one size smaller than the largest setting.

IMG_3974 IMG_3975 IMG_3976

If you don’t have a pasta machine you can use an acrylic roller or a rolling pin dedicate to clay (not food).  Push down firmly while rolling on a piece of card stock.

Now, take the stencil and clay and lay them down (they should be stuck together).  Gently peel the stencil off of the clay.  Cool, huh?

IMG_3977 IMG_3978

With an exacto knife gently cut around the dress form.. I am only taking the dress, not any other shapes outside of the dress form.  Now, you will see that the edges are a bit rough.  Take a piece of plastic wrap and lay it over the edges and gently smooth around the edge of the dress.  Now it’s ready to bake. I put it on a ceramic tile.  Last photo is baked and cooled.

IMG_3979 IMG_3980 IMG_3985 IMG_3984 IMG_3987 IMG_3986 

Tips: Follow the clay package instructions for baking.  I have a clay dedicated oven for baking my clay. If you do not, you can use a lined parchment paper cookie sheet. Lay the clay piece on the parchment paper and tent the clay with aluminum foil.  DO NOT BURN THE CLAY.  Oven vary; make sure your oven is accurate with temperature.

While the dress cooled down, I made tiny buttons to put on the dress.  I took turquoise clay and make tiny balls and pushed each ball into an old button I used for texture. I tried to take a clear picture of the buttons before I baked them, but I could not manage a good close up.  Bake the buttons.  Once cool, glue them onto the dress using your favorite strong glue.  Let buttons dry thoroughly.. I waited overnight.

IMG_3989 IMG_4000 IMG_3999 IMG_3998

Looking good so far, don’t you think.. soooooooo cute. Say it with me.. all together… “AWE”.

Now it’s time to “antique” the dress and make it look old and vintagy.  Yup, that’s a word… now.

Take brown acrylic paint, and begin to smoosh it into the dress, making sure to get it into the crevices. I find my finger is best.  With a damp paper towel, gently wipe off the excess paint.  This may take some time, as you want pating to say in the crevices.   In some of the smaller areas, you can use a cotton swab and alcohol to get the paint off.

IMG_4001 IMG_4003 IMG_4005 IMG_4006  IMG_4007-001

When you get the dress to where you like it, let that dry completely.  Now, it’s time to shine it up.  If you had read my clay tutorials before, I use Future Floor Finish. You could also any clear sealer.  I wanted to add one of my polymer clay hearts to the dress, but which one? After I glued the heart on the dress, I also glued a ribbon to the back as a hanger.

IMG_4009 IMG_4010 IMG_4011 IMG_4015

… .and here you are.. a cute little pink girly dress.   Doesn’t this just look so adorable hanging up?  Imagine it on a little girl’s bedroom door.  You could take a white gel pen and put the child’s name on one of the ruffles of the dress also.  I had thought about blinging the dress up with rhinestones, pearls or glitter glue, but I wanted to keep it simply vintage.  You could do SO much with this.

IMG_4018

Let me know if you give it a try. I’d be happy to help if you get stuck.

Time for a give-a-way –   Music to my ears.  Leave a comment here and on all the blogs in the list below.  All comments on the hop are eligible for the giveaway. The more blogs you comment on, the more chances you have to win. Giveaway will close on Monday, December 16th at 11:59PM Central Time.

Now off you go…. next on the list from my blog is Corrine.

Healthy and Delicious Vegetable Chicken Chili – Repost

Standard

I thought I would re-post this chili recipe since it’s cold out and we need some warming up… don’t you think?

Enjoy it!

=========================================================================

Today, I decided to make a chili with chunky vegetables and ground chicken.  If you are a vegetarian, you can completely leave out the chicken. It’s just as great without it.

Let’s go….

Ingredients:

1 pkg ground chicken
1 zucchini
1 summer squash
1/2 of a large onion or 1 small
1 red pepper
about 6 white mushroom caps.
1 28 oz. can of crushed tomatoes, plus 1/2 of another
2 cans of beans.  I used one kidney and one black.  Use what you want.  Rinsed and strained.
2 TBLSPN olive oil for pan

IMG_3232

Cut all the veggies the same size; about a 1/2 inch thick.  You want this chili to be chunky and full of love.

IMG_3233 IMG_3234 IMG_3236

In a large sauce pan, add a couple of tablespoons of olive oil, add ground chicken.  Medium high heat; Cook until no longer pink.

IMG_3238 IMG_3240

Add all the veggies in the pan and stir and mix it all together.  Cook this on medium heat, stirring occasionally, about 15 minutes or until the onion and veggies have all softened.  Can you see the difference in the pictures, above?  CLICK FOR LARGER VIEW.

IMG_3241  IMG_3242 IMG_3246

Add your can and a half of the tomatoes, stir, then add the beans which have been rinsed in cold water through a strainer.  Incorporate all the beans into the sauce.  I started with one can of beans, but then decided to add another. Why not, right?

IMG_3243

Now, for seasonings:  Salt, pepper, granulated garlic, chili powder and ground cumin.  ALL TO YOUR TASTE.  Add more or less of what you like.  I end up with about a tablespoon or more of the chili powder and the garlic. Then add in the cumin as you like.  If you want some heat, then add a little cayenne pepper.. start small. Keep testing the taste to see what it may be missing.  It’s always better to under season, you can always add it.. but don’t over season, you can’t take it out.

IMG_3247

Now, if you can wait, let this simmer gently about 30 minutes.. if you can’t wait… GO FOR IT.. It’s your world.

IMG_3248

Serve this hot with some grated sharp cheddar cheese and some tortilla chips.  I used blue ones .   Just scooping the chili onto some chips with a little melted cheese just makes your mouth so happy.  The corn, crunch, cheese and chili together.. oh my.   I have issues.. I watch too much FoodTV Network. Guy Fieri would be proud.

Notes: Now, this chili is practically fat free.. the only fat in there is from the olive oil.  I also used Sargento Reduced Fat Cheddar Cheese, but only because that was my choice. I draw the line on completely fat free products, however.. no taste in my opinion.  This recipe will serve about 6 people.  Save the leftovers for another day or mix in some cooked pasta for another meal.  Freeze the rest, if you want.

I hope you enjoyed this recipe.  Stay warm if you are experiencing the cold like us.  This will do the trick.  ENJOY!

Thanks for stopping by. I love hearing from you. Let me know if you tried this recipe and how it came out.

Judy 

Butternut Squash Soup

Standard

Time for some culinary art.

Any soup fans out there?  Well, this Fall, Panera Bread had a soup on there menu.  I believe it was called Autumn Squash Soup.  Let me tell you.. cuz you know I’m gonna anyway.  This soup was the best I have ever had.  If I could have licked the bowl and not looked like an idiot, I would have.  But, I digress.. I’ve heard it’s off the menu now. Very sad.  But, I’m happy again, cuz I made it myself.  I did some investigating on line and took some advice here and some there.  So, I put this concoction together and I must say, cuz you know I must.  It was fabulous.  Now, would I still play around with the tastes?  I may.  I think I would add a little coconut milk to it next time… cuz you know there will be a next time. The first time I made this, I roasted the squash.  The second time, I steamed it.  Here’s what I did.

Take one whole butternut squash.  Peel and clean and cut it into 2″ squares.  OR, you can get lucky and buy the ones already chopped for you.  So, you can either roast it in the oven or steam.  For this recipe, I steamed.

IMG_3945

In addition, you’ll need:

1/2 Cup Unsweetened Vanilla Almond Milk (this is where I would substitute Coconut Milk)
1 1/2 Cartons Chicken or Vegetable Broth (this can be varied, you can use less if you want a thicker soup).
1/2 medium sweet onion, chopped small
1 apple, peeled and chopped small (you can use whatever you want; I think mine was Gala)
Brown sugar to taste
Cinnamon and/or nutmeg to taste
Honey to taste
1 TBSP of healthy oil (olive/canola)

Steam the squash; mine took a good 30 minutes.

IMG_3954

Once the squash has steamed fully, put it aside in the steamer basket.  In that same pot, saute the onion and apple in the oil until tender. Then, add the squash to the pot. Add the broth and the almond milk and let this simmer about 30 minutes.

 IMG_3955 IMG_3957

Now it’s time to pull out your blender, or if you are one of the lucky ones, your immersion blender (much easier). I don’t have this, I used my old fashioned blender (I seriously got his for a wedding gift almost 30 years ago). Carefully ladle the hot squash mix into the blender, about 2-3 cups at a time and blend until smooth.  Put this in another pot or bowl until you blend the rest.

 IMG_3960 IMG_3962

Once you have finished blending, transfer it all back in the pot.  Now you can add your brown sugar and cinnamon.  I added a little bit of honey to sweeten it up a little.  This is where you can play with the flavors. Can you smell this? You can Google this recipe and find many variations. It was a lot simpler than I thought it would be.

I hope you try this and enjoy! Thanks for stopping by and for your support.

Judy ♥ ♥