![]()
Hey everyone… I’m back again for another Blog Hop. This time StencilGirl is introducing Andrea Matus deMeng as a new designer and announce her new stencils. Andrea is a fantastic artist and an amazing teacher. I know this because I’ve taken a class from her before and I will again at Art Is You in Stamford this year. Just amazing. Today, I am using Andrea’s face stencil called “Abigail, A Timeless Woman”. This is the first face stencil I own and let me tell you, I was excited to say the least.

I had my idea rolling around my mind for a while. Had it all planned out. This will be easy, I told myself. Can I just tell you….. it was NOT. Why, you ask? Well, I thought, make a background, which I did. Stencil the face on the background, which I did. Then make her hair look wild and colorful, which I did. But it did not go as fast or as smooth as I had planned. Why am I telling you this? Well, we can be tough on ourselves as artists and I was on this one, for sure. I’m being honest and so you know the behind the scenes is not always a breeze. It’s so true that practice practice practice is very key. I wanted to take this beautiful face and do it justice. Did I accomplish that? You tell me. Ok, enough of the whining Judy. Chop chop…let’s get teaching.
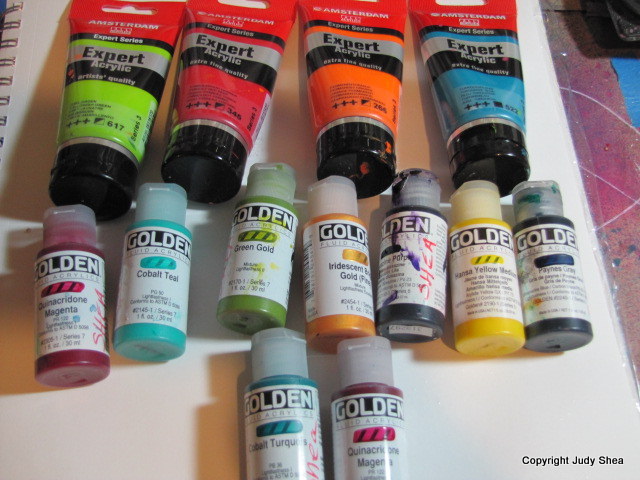
I started with large piece of Bristol paper. Got my paints ready to squirt down and let some magic happen. Spray some water for more movement of the of the paint. This definitely went through some ugly stages. I said to myself.. “self.. DON’T JUDGE”. I covered up the purple and pinks; you’d never know they were in there.


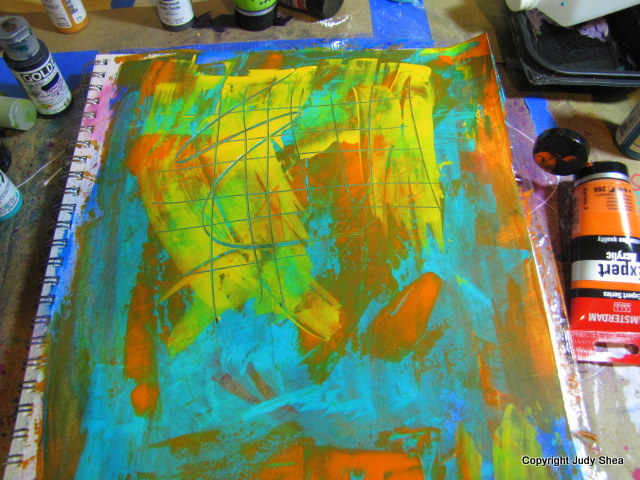


Added bubble wrap stamping. Then I used some air brush paint and sprayed water. Too much water? Paper towel to the rescue. Dripping color from the top of the page.


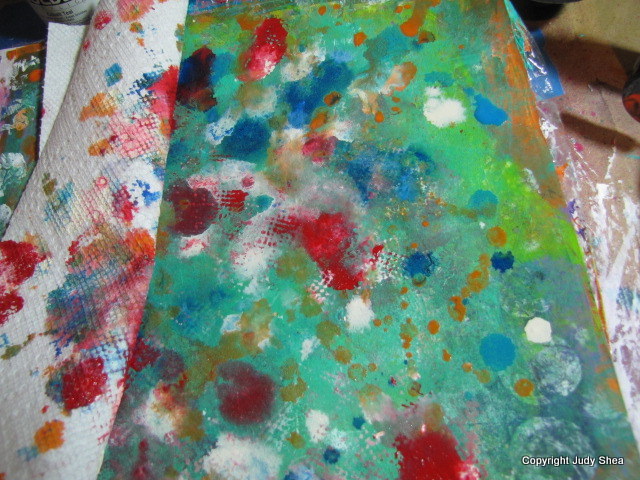


Ok.. not so bad, but there are a lot of layers to get to a happy point. Over an hour has passed. Tick tock, people.
Now, comes the face stencil. Lay it on the background after it has dried. Use cosmetic sponge with black paint through the stencil. I used a beige/buff paint for the face. Now mind you, to me, I am not a face artist. Eyes are probably my best, but when it comes to noses and lips… fuhgeddaboudit. So, this was also a challenge for the skin tone. You know, I didn’t want to make it a big deal here, but once you start, you want it to look good. Okay, so not so bad, right?


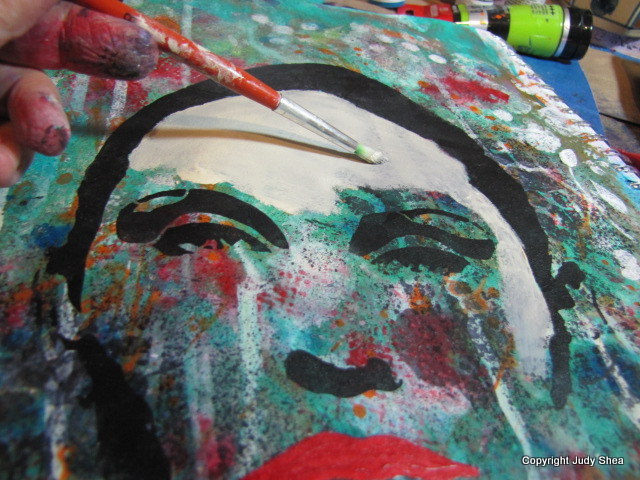

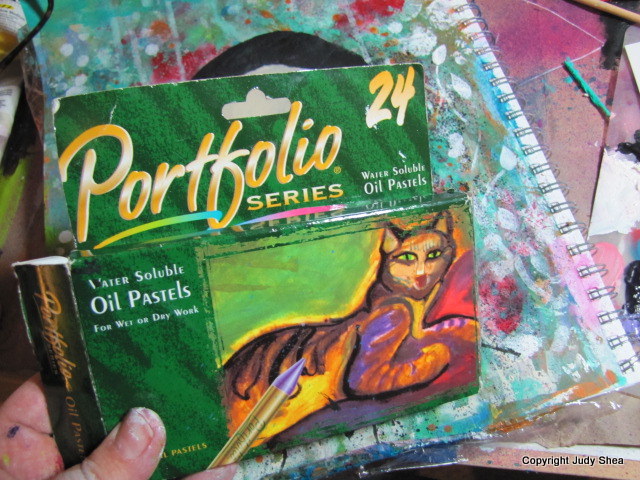
Time for some Portfolio Crayons. My favorite. I started to shade some areas. I used acrylic paint for the eyes, however. Abby is coming alive.


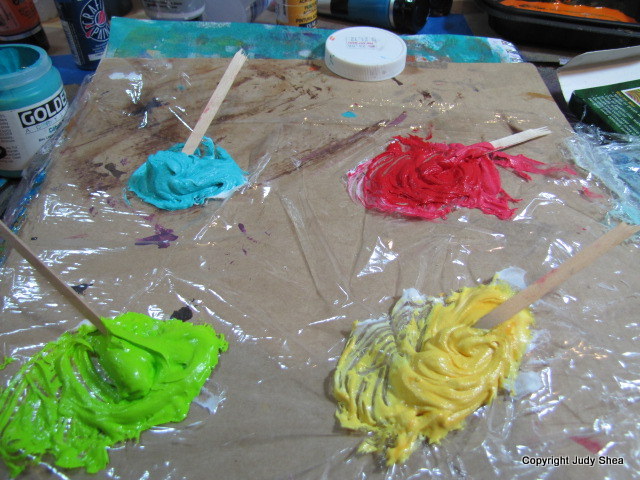
Next up, what I’m going to show you is how I made the “headdress”. First, Light Molding Paste on plastic wrap on a piece of cardboard. Next time, I’ll use palette paper. In each plop of molding paste, I added acrylic paints. The yellow is a Folkart paint. Don’t use that. I could really tell the different. Icky. I took pieces of stencils (also from StencilGirl) to make flowers all over her head. I tried to find stencils that had full flowers, but I only had a couple to choose from (no, I don’t have all of them). One was from Terri Stegmiller, Garden Swirl and the other was Maria McGuire’s Butterlfy Duo. I used a section of the wing for most of the flowers. I decided to cut apart the butterfly duo for ease of placement (don’t be mad at me.)


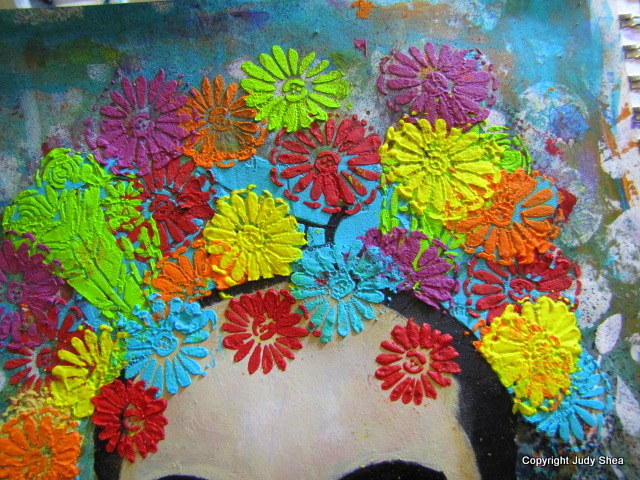


So, back and forth with colors of molding paste, making sure they are looking good… not always easy, especially in a crowded area. I added some of my “bellishments” of polymer clay that I made. Added rhinestones to the center of the flowers and slap on my clay butterfly and here she is…. Meet Abby.

Well, she is not perfect, but she was sure fun to create. She sort of looks like if Frida and Carmen Miranda came together. I kid I kid. I just crack myself up sometimes.
Thank you, Andrea for creating Abigail. I hope I did her justice for you. I think I need more lessons.
Next, it’s time to HOP… join the rest of the Creative Team and see what they did with Andrea’s new stencils. But, first the giveaway… and a video to get you excited for THE HOP.
Giveaway = Two winners-one will receive a set of the new 6″x 6″ stencils and one will receive a set of the new 9″ x 12″. All comments on the hop are eligible for the giveaway. The more blogs you comment on, the more chances you have to win. Giveaway will close on Sunday, April 6th at 11:59PM Central Time.

Beautiful work Judy!
Love Abby and her flowered headdress
Oh wow I love your technique, thank you for sharing, I love the background and how you did the face stencil on top.
Thank you for sharing your techniques.
Wow……so much detail! Great work! Love the flowers-)
love the hair and the colours are perfect
Awesome art piece! You really made som magic using the colours ant the stencil. Thanks for the inspiration!
She’s gorgeous as always. Love her crown of flowers…xox
Wow! That’s one powerful face!
Fabulous results Judy!!!! xo
Judy, you kill me, I swear I love reading your posts, Frida & Carmen Miranda, lol!! And that headdress with all your embellishments simply rocks! xo
Very inspiring. such creativity.
Love it! Thank you for sharing your process, even what you “thought” was the uglies!
Fabulous, Judy!
I sooo LOVE her amazing headdress and all the embellishments you added! Rich!
Love the face!
I’m new to stenciling and find all of your work so inspiring!
Thanks for all your tips.
xxx
Well done, Judy! I am amazed at how much personality you were actually able to impart to Abigail! A lot of work, but so well worth it in the end! Way to go, Face Painter!
Love the flowers and headdress!
Very cool lady – both you & your stencil girl. I go with Carmen & that’s a very wild headdress. Maybe you could make one for your own Easter bonnet. Those Portfolio crayons are so much fun to play with aren’t they?
Great eyes.
Love the leaves on her eye brows, would not have thought of that.
Oh what fun! Love the shading on her face and her fun, funky hair!
So nice of you to admit that your project didn’t always go smoothly. Sometimes we think the more experienced and successful artists don’t have these problems. Good inspiration and the end result was well worth any frustration. Thank you.
Great piece Judy! And your addition of the music is fabulous! LOL I’m dancing with the dog…ever service dog needs to know how to dance right!?
Beautiful! Love this stencil
Love this lady – but of course you already knew that!
Very cool. I can’t wait to get my hands on these stencils!
Nice job, Judy! I love your ‘bellishments on her, too. They really jazz her up!
very nice work
LoVe the flowers in her hair & the colors you used. Thanks for sharing your talent with us on this Hop. Thanks for the chance to win… ;0)
She is just beautiful!
What a beautiful face! I love all the embellishments.
What a great combination: artist + comedienne = outstanding blog post:)
Judy…you Had me at your Banner! I am so bookmarking your blog:) Great job on the stenciling. This blog hopping is FUN 😉 Laura
Oh, Oh the colors! And the wonderful headdress with your clay!
Very eye catching!
What a fabulous process! I love the headdress. Very much a Frida and/or Carmen look!
Fabulous project. TFS
that turned out very pretty
Judy what a great page…ideas….techniques! thanks 🙂
Love it–all of it!!! And thanks for sharing your process–the technique and the ‘talk’ (head talk that is!) : ) I think you succeeded greatly.
LOVE the headband-very inspiring!
Happy Spring to you too!
Wow Judy, great results.
She’s fab, Judy! Love how you’ve colored her face and that cool head dress. So fun being in Andrea’s class with you last fall @ Art Is You!
That is one gorgeous page!! Great background you created with all those layers. And the woman is beautiful with those flowers for hair and all her bling!
Judy, you certainly did do Andrea’s stencil justice! Both pieces are fantabulastic. I love her flower colorful headdress. Cant wait to plan with some of Andrea’s outstanding stencils too. Thanks.
Wow that was a lot of work. It looks great 🙂 hopping along…
I saw Frida right away but, yes, probably more Carmen. I love that even an experienced artist starts off with the uglies sometimes. I’m still learning to move through them. Love the final product!
Great work!
What fun, Judy!
I love these face stencils – they really help people like me to be able to paint faces. Your page turned out really good, Judy, but with patience, which is a virtue, and you got it girl! And your embellishments are just the icing on the cake – thanks so much for sharing this beautiful piece of art with us!
wow..you beat yourself up too much, I think she came out great!
Gorgeous canvas Judy!! love all of your yummy details! and thanks so much for the video- got me up and dancing this morn! (much to my hub’s chagrin @ 7am!) heehee
Great job. It was super to see all the photos and progression …. good lesson to keep going and see it through to a nice ending!
SusieW
Great job Judy! 🙂
I love your “self-talk”. Such sultry eyes!
Good job! Love the face and the Carmen Miranda look. Too funny
Judy…my friend, you are WAY too hard on yourself. Loved seeing the process of this. I think what made this special was all the finishing touches and elements you added. That headdress 🙂 🙂 and the polymer elements give it so much texture and interest!!!
Love how you used this stencil!
what you did is so colorful! great project
bibiana
You crack me up! I am going to have that song in my head all day now… ‘at the hop’! I love your crazy, colorful girl! 🙂
I love love love her! You’ve made her so 3D! The garden of flowers and her Portfolio crayon make up – you are so creative Judy!
This is great…the flower hair is awesome!
Faces are my favorite stencils, try to make them look different, in my own way….just beautiful work, Judy!
Looks like you had great fun with your first face stencil.
love it. thanks for the inspration
Fabulous! and what fun you had!
Love the colours of the modelling paste flowers, great way to use the stencil.
awesome! made me think of frida! aloha, angi in hana
Fabulous love chlld of Frida and Carmen!! This stencil rocks!
You did an amazing job. I think she is stunning and this is my fav stencil. I am so glad to see how you used her. Now I just need these stencils. Glad I found your blog!