Category Archives: molding pastes

Bigger is not necessarily better

Standard

Huh?

I took on a challenge to start of large canvas measuring 24″ x 30″.  Not as easy as gluing, painting and collaging things on it like my other smaller works.  There are bigger spaces and I do the blank stare.  You know the look I”m talking about?  What the hell am I going to put in that big space?  Well, let me show you how it started and where I am with it now.

I gessoed the canvas then put on molding paste to get some texture on the surface.

I put a wash of quinacridone nickel azo gold paint then added Cobalt Teal in certain areas using Golden Fluid Acrylics.

So far so good, right?   Then I added some more texture with molding paste, stencils, doilies.

Then I added “Wood Icing” texture.

Here’s what the canvas looked like after the texture pastes.

Ok.. then I added two fleur di lis with molding paste, stained the wood icing and then I went on to painting the checkerboard and the fleur de lis…   Some parts I’m loving.. some.. eh.. not so much..

I am not liking the checkerboard… too overpowering.. so I”m going over it with a blue crackle paste.  I know, I know.. don’t worry.. it’ll be ok.

While the crackle paste was still wet, I ran a metal comb around in a cirle to give a spiral effect. Cool.

Here’s what the crackle paste looked like after it dried.  Love it.

Next up was to add some fabric to the canvas.  I used a caulking I bought at a dollar store a few years ago.  Works great.. strong bond.  I don’t stay with necessarily one product for adhesives.  I use gel medium, caulking and one of my favorites, “Weldbond“.

Let me stop here and tell you how much I changed on this canvas.  I got so engrossed into it that I didn’t take some pictures.  BUT… after I covered the checkerboard, I painted over the doily texture, then I put gold leaf on it.. then I put fabric over that.  Next, I painted over the wood icing, then I put fabric upholstery over the bottom half of that. I just was not liking where everything was falling.  I have a larger space towards the bottom that I’m not sure how that will flow.

So, here is the rest of the pix I took and then the last one is where is stands now.

Below, you can see I added more fabric and one of my coffee filter art pieces, and modeling cream by Viva Decor.

I pushed white acrylic paint into the crackle paste section then wiped it off.  The white sank into the cracks.  You can see the fabric to the bottom left and the roses on top.  Also in that area, I added an old paper doily piece that was ripped.

I also added cheese cloth to the large space on the bottom right and gold leaf.

See..this is what I mean.. bigger is not better, it’s a bit intimidating.  But, I am convinced that I will finish this and once I do, I’ll feel confident to tackle another one.

See what I mean about all the open space…. dun dun dun…. (insert scream here).

My plan is to get this done while I am on vacation from work.  I still have so much to do to it…collage papers, polymer clay…. I can’t wait to find out what I’ll do next.   I’ll blog my final pictures.

HAPPY HOLIDAYS, EVERYONE !!!

Thanks for subscribing and stopping by.

Judy

In the Artist’s Studio

Standard

Been away for a little bit..sorry.  Work has me shackled.

Here are some fun things I’ve been playing around with in the studio when I get up there..

First… a couple of crooked houses.. look how cute my black bird is on top of the roof… all together… “awwwwwwwe”.

Click to see more detail on any of the pictures.

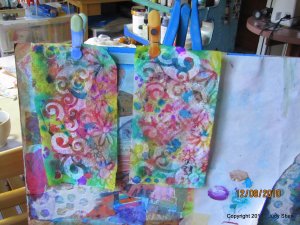
Next .. paper towel paint spills and then sprtized and stenciled.

These were left hanging to dry on my easel.

…and, I’m working on this canvas… LOADED with textures (gel medium, beads, paper doilies, embellishments)..then once dry.. painted with pearl ex powders… yummy.

Click on the picture for a close up and click again to see more deliciousness details.

Be good and thanks for stopping by.

I’ll be back with more to show you and a tutorial…

Judy

Mixed Media Citra Collage Tutorial

Standard

Last year about this time I did two posts on the beautiful Autumn that we had… you can see the posts HERE and HERE.  Well, that was last year.  This year is a different story.  I have no pictures because the colors are dull this year.  The summer was so hot for so long, the trees just got too stressed and couldn’t generate enough chlorophyl.   I guess that’s like us really isn’t it.. sometimes?  Dontchya think?   Let’s hope that next year it comes back in full force with beautiful backgrounds.

Speaking of backgrounds… I wanted to show you a very cool technique that’s been shown here and there using CitraSolv.  It’s a degreaser used for household cleaning.. well, check it out HERE.  Then check out the CitraArt HERE.  Pretty darn cool if you ask me.. go ahead ask me… .. It’s funny you should ask… Yes, I thinks it’s so cool that I made a mixed media canvas collage with it.

Let’s start from the very beginning.. …(wait do you hear Julie Andrews?)  Sorry.

I looked all over for a bottle of Citra Solv.. nothing in the local stores even though the CS website listed the retail store locations.  So, I finally found a bottle at Vitacost.com.   Citra Solv works well with the National Geographic magazine pages the best, as it is contains a clay coating used for the crisp images the magazine is known for.

Moving on….

Here are the steps I took to make my Citra Backgrounds.  Start with your bottle of Citra Solv and a Nat Geo magazine. Now, you may want to work with a window open or go outside.. it’s not a terrible smell.. just a very STRONG orangey odor.  I got sick of it after a while.

I put my CS in a small plastic spray bottle instead of using a brush.  I thought it would be easier to spray.  I started to use a small plastic “solo” bathroom cup and a brush to spread it on and this is what happened…

Ummm.. apparently the plastic in the cup did not agree with the CS.  However, this plastic spray bottle is fine…

Let’s begin… can you stand it????

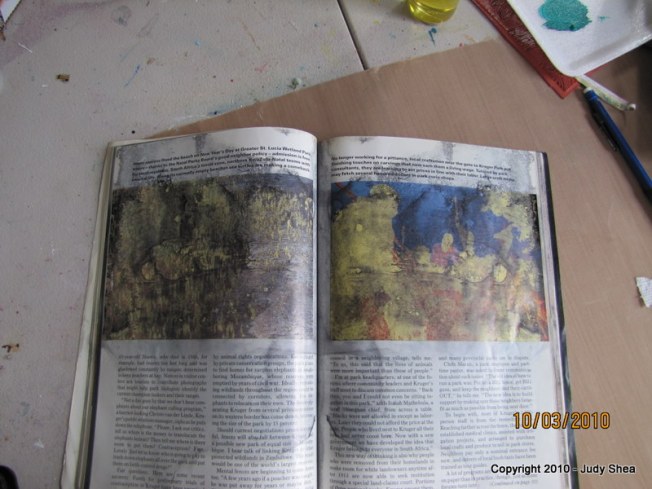
Open the magazine to some colorful pages and begin to spray.  Spray, turn to next colorful page.. spray,  next and so on…  now don’t be stingy with the liquid.. if it’s drippy that’s ok…

See how it begins to “melt”.. oh so fun.

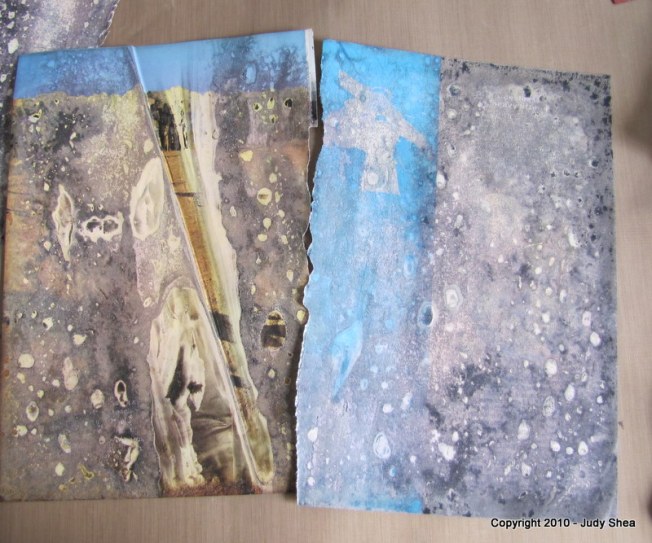
Spray all the pages you want and close the book and let it sit for a while.. at least 15 minutes.. if you don’t see a change when you open the page.. spray some more and close the mag… some pages are better than others…. BUT oh look and see some of my results…

Do you see where I have the pencil pointing above?… I saw a face in that blotch and I started to enhance it further.  Look for images and play.

Above, I started to rubber stamp and play with the face.

So, there you have the way to make the Citra Backgrounds.  Now, let me show you how I applied it to a new mixed media canvas piece.

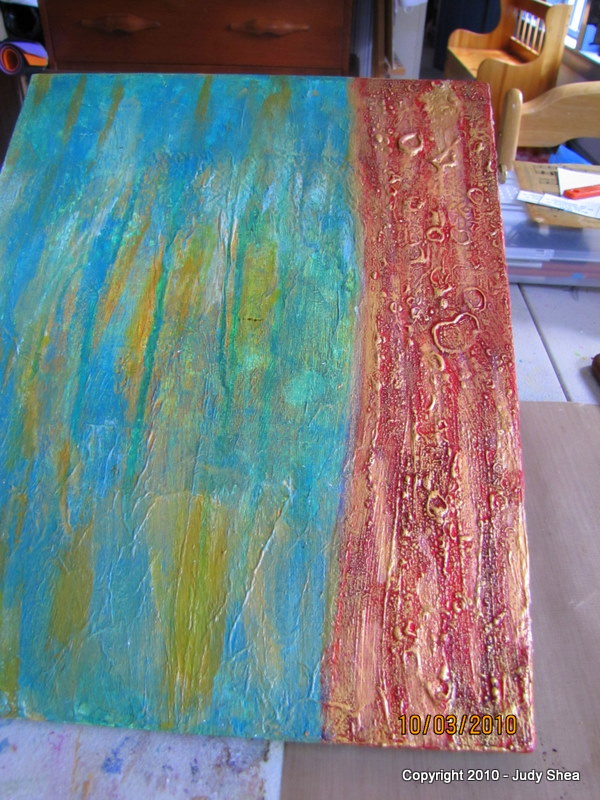
I started with a blank canvas, put down some fluid acrylics, letting each layer dry.  Then on the far right I put a large strip of heavy acrylic paint.

I let it dry then put my heat gun to it really close.  This will make the paint react with the intense heat and start to bubble… I got this technique from Gary Reef.  You’ve heard me mention him before.. such a love; you can see the video HERE.

Look at that beautiful texture.  I’m excited now.  When you are happy in bubble town, let it cool down (that rhymes, by the way).

I painted the white with gold acrylic paint and heated it again causing more bubbles… and then another layer of gold…

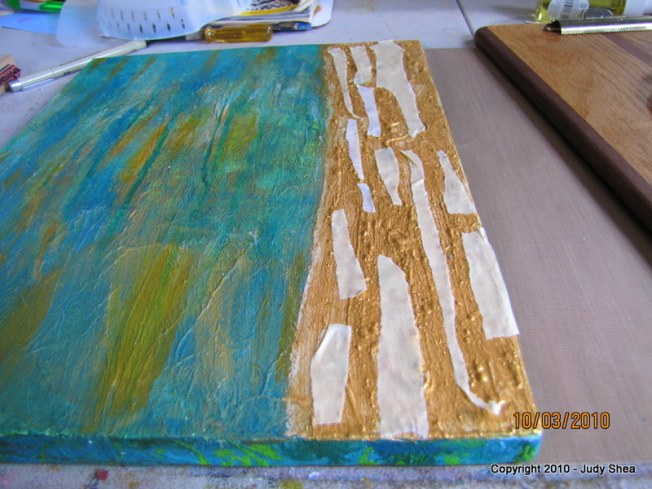
Once the paint was dry and cooled, I put random ripped masking tape over the gold.

Then painted it red then pulled the masking tape off revealing the gold underneath.

I DIDN’T LIKE IT…I needed to tone down the red.. just wasn’t working for me.

So, I painted the gold over it…..

Close up below.. love the texture…

OK… let’s get on with using the Citra Backgrounds….

So, here you can see the citra pages on the left and going up and on the top… Did a little rubber stamping on them and “antiqued” with some brown shoe polish around the edges..  On the bottom is a ripped resin music page.  It’s coming along, but still needs some lovin.

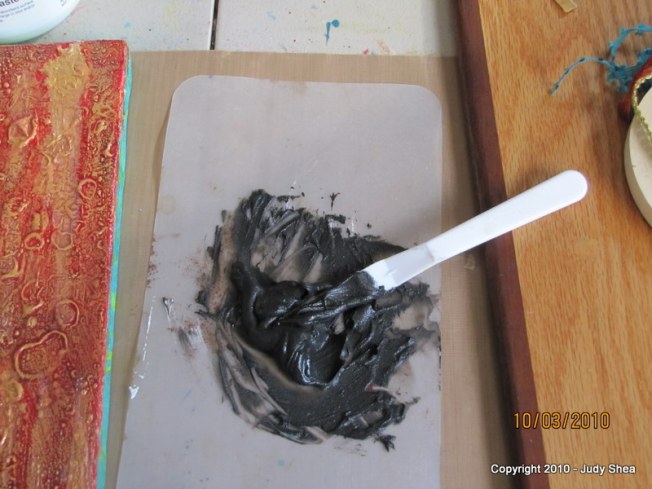
Ah Huh…. one of my favorite techniques.. pushing molding paste through stencil… Here, I tinted molding paste with black acrylic paint.. and mixed to make a black paste.

A little boo boo on the top left of the fleur-de-lis.  I’ll need to let it dry and redo that section.

Below is a picture after the fleur-de-lis was done and I added some gold trim along the red strip, hand made polymer clay embellishments, ribbon and gold paste that I rubbed over the molding paste design.  People, I’m just in love with Inka Gold waxy paste by Viva Decor.  I can’t get enough of it.

Here is the last picture I took.  At this point I’ve added, black tissue paper, black stenciling, fabric, lace paper and I blinged up a boring metal pendant.  However, I have to admit.. I know it’s not done.. it still needs a final image above the music paper.  It’s look very royal.. maybe a queen?  Beeswax?    What do you think?

I had so much fun creating this piece.  Hope you enjoyed the post and tutorial as much I as enjoyed creating it for you.   I’ll show my final canvas in my next blog post.

Thanks for stopping by.

Judy  ❤

Art Submission – Busting Your Boundaries

Standard

Hey Blogger Friends…

The New England weather has finally changed from hot and humid to crisp nights.  I’m just loving this.

The magazine, Cloth Paper Scissors, is having an art challenge for Artisan of the year.  I am biting the bullet and have submitted 3 pieces of my mixed media collages.  I’m really proud of them and whether I am selected or not.. It felt good to bust my boundaries by entering.

Here is what I’ve submitted, one picture in full, then two details of each piece:

Remember the sneak peek I posted, well, here is the final; I call this the Collage Garden.  The bottom half is created with my Dryer Sheet Collage Art Cloth.  This was fun and to think that the tic tac toe board underneath was being thrown away.

Details…

This is called “With Love”

Details…

Lastly, this one is called “The Key to my HEART”…

Details…

Well, there you have it..  you can go HERE and read the details of each piece.. I think you just have to create a username to see all the entries.  Look for mine.  Lots of BEAUTIFUL art I’m up against.  Good luck to everyone!

Thanks for stopping by.

Judy

Next up… Collaboration with a Crow

Background Checks

Standard

Hey Blogmeisters!

Welcome to Friday!   Been cold and rainy here and down right brrrrrr for June in New England.

I’ve been working on some backgrounds and thought I’d share.  These just sort of came about as I sat in my studio playing with some new creamy crayons that are water soluable.  Click here to check them out.

This one, I used a gold paint as the first layer, then I mixed in cobalt teal by Golden in some light molding paste and pushed it through an old plastic doily.  It may look blurry, but it’s actually when the molding paste pushed through the fine mesh like plastic.. giving it a dreamy effect.

Next are yummy layers of acrylic paints, crayons, stamps, music paper, acrylic skins.  On the face below, I added glitter to her face and tried to capture it by tilting it.

… and below are backgrounds using credit/gift cards.  How fun to put them in mixed media backgrounds whole or cut them into shapes.

That’s it for now, as I prepare for my upcoming class tomorrow.  I’ll post pictures of the workshop.  I have some surprise goodies for my students.. here’s a sneak peek…..

Thanks for stopping by.

Judy

Next up:  Workshop Success !

Open Your Hearts

Standard

Hey Blogsters!

For the past few months, on my walks, I’ve found some interesting heart shapes I’ve captured with my camera………BUT…

… Let me begin here with a quote from Melody Beattie’s book “Journey of the Heart”. She does daily meditations that are so touching.  I thought this would be appropriate for my heart post.

“Let your heart open-gently, safely, surely and certainly.  Do not let others decide when or even if you will open your heart, when or if you will embrace love.  Those choices are too big, too important to let others make for you.  Only you can decide when and how.” ….

“Look around.  It’s not your location that makes you safe.
It’s where you are in your soul, your mind and your heart.
That place is good.  That place is safe.
Open your heart.
Embrace life.
Go joyfully on your way.”
– Melody Beattie

So………….. I share my hearts with YOU:

vine

puddle on ocean rocks in Maine – I know this is pushing it a little.. but can you see it?

stones off my driveway; at this glance it’s a heart of stone.

vine leaf coming through brick walk

heart rock

… and finally I reveal to you my wooden heart collage that I’ve been promising.

I just love this piece.  You could even say I put all my heart into it.

Size: approx. 18″ x 14″

This piece started out as an old wooden painting I found at a consignment store.   What I used:  spackle, caulking, molding paste, vintage papers, tissue papers, fabric lace, gold leaf, old jewelry, polymer clay (face and button flowers),  found objects, charms, gesso, acrylic paints, stencils, rubber stamps, metal hinge.. whew.. that’s about all I can think of.

I hope you enjoyed my heart post..  Would love to hear back from you.

Next up:  Two weeks vacation from work for the holidays.  I’ll be in the studio to share some fun projects with you.

I hope all you have a wonderful and safe holiday… 2010.. can it be?

Judy