Category Archives: food

Sito’s Kitchen – “Itch”

Standard

Well, hello my friends and Happy Summer.

I sure hope you are all enjoying your weather wherever you are. We have had such a strange summer with lots of little thunderstorms and sunny, hot days.  It just feels good to leave the house without grabbing a jacket and walking in warm weather.  It doesn’t last long, so better enjoy it while we can, right?

Today, I am posting a video of Sito’s Kitchen with mom and I making a great dish called Itch (pronounced “eech”).  This simple dish is great alone, in a salad or as a scoop-able dip/appetizer.

As I write this, I realized you could replace the bulgar with quinoa.  Get creative, but the tomato paste is key here.  Take this to a party and you will be the talk of the town. LOL!!

I love hearing from you. Please leave a comment and like my post if you do enjoy it. Don’t forget to hit the thumbs up and subscribe.  I would love it if you shared with with your friends. 

I’ll be ready for an art video soon, so stay tuned for that.

“See” you soon

Judy ♥♥♥


Sito’s Kitchen – Making Tahini & Hummus

Standard

Friends… HELLO.

Here in Mass, the weather is cold and dreary. We are wondering where Spring is. I feel like I live in Forks, WA. You know.. where the movie “Twilight” took place? I think “Bella” and “Edward” are going to show up at my door.. LOL
Then, in July and August, we’ll be complaining how hot and humid it is, right?

Cooking and art is funny. Funny, as in “strange”. You know, I have to cook everyday.. everyday…. and I do enjoy trying to be creative in that department. BUT, art.. art… I have to make time for it. Some days, I don’t know why it’s hard to get in the studio. Anyone have that issue? Please say yes. 🙂 So much going on in my head.. thoughts.. always thoughts. Do you know we have THOUSANDS of thoughts that twirl around in our brains, everyday. Which ones to you take action on? Which ones do you ignore on purpose? Which ones do you forget? Many are negative, many are positive. Squirrel!! That’s me.

Art doesn’t have to be an all day process. They (who’s “they”?) say just do 15 minutes a day of art. I think for me it’s ALL OR NOTHING. I discussed this with a group of women this week. What does that mean to you.. all or nothing? If I’m going to get in my studio, I want it to be for a full out project. But.. it doesn’t have to be that way. A little more consistency with little visits than ALL or NOTHING. You with me??? Let me know what it means to you.

I’m trying to take advantage of my mom wanting to do these videos with me. She surely is fun to do these videos with. Even with her shyness and getting tired, she knows what needs to be done and wants to take over. The boss, the queen, the best!! I do so cherish the amazing stories (of family and survival) she tells me of the old country when we are together. Recently, we spent the weekend together, just her and I.  Those memories of that time with her, will always be forever in my heart.

I hope you enjoy this video as I attempt to make tahini from scratch and then hummus. I put so much garlic in. My mom tries to tell me to put more oil in the hummus to “kill” the garlic. As you can see, I try to ignore her and get through the video. It was really garlicky… no vampire visits today. Ha!!!

Thanks for being here. I do this for my readers and subscribers and at the same time, I hope you’ll love what I show you.

Would love it if you LIKED and SUBSCRIBED to my YouTube channel.

Happy Spring!!!

Judy ❤

Sito’s Kitchen – “Zahra”

Standard

So happy to share with you Part 2 of Sito’s Kitchen. Join us as we make “Zahra”. This is a cauliflower casserole made with ground beef and tomato paste.. so easy and the results are delicious. Such a warm, comforting food for the big snow storm we are experiencing right now.

I hope you enjoy and please click the thumbs up and subscribe if you love it.

As always, thanks for stopping by and leaving your lovely comments.

Judy

Butternut Squash Soup

Standard

Time for some culinary art.

Any soup fans out there?  Well, this Fall, Panera Bread had a soup on there menu.  I believe it was called Autumn Squash Soup.  Let me tell you.. cuz you know I’m gonna anyway.  This soup was the best I have ever had.  If I could have licked the bowl and not looked like an idiot, I would have.  But, I digress.. I’ve heard it’s off the menu now. Very sad.  But, I’m happy again, cuz I made it myself.  I did some investigating on line and took some advice here and some there.  So, I put this concoction together and I must say, cuz you know I must.  It was fabulous.  Now, would I still play around with the tastes?  I may.  I think I would add a little coconut milk to it next time… cuz you know there will be a next time. The first time I made this, I roasted the squash.  The second time, I steamed it.  Here’s what I did.

Take one whole butternut squash.  Peel and clean and cut it into 2″ squares.  OR, you can get lucky and buy the ones already chopped for you.  So, you can either roast it in the oven or steam.  For this recipe, I steamed.

IMG_3945

In addition, you’ll need:

1/2 Cup Unsweetened Vanilla Almond Milk (this is where I would substitute Coconut Milk)
1 1/2 Cartons Chicken or Vegetable Broth (this can be varied, you can use less if you want a thicker soup).
1/2 medium sweet onion, chopped small
1 apple, peeled and chopped small (you can use whatever you want; I think mine was Gala)
Brown sugar to taste
Cinnamon and/or nutmeg to taste
Honey to taste
1 TBSP of healthy oil (olive/canola)

Steam the squash; mine took a good 30 minutes.

IMG_3954

Once the squash has steamed fully, put it aside in the steamer basket.  In that same pot, saute the onion and apple in the oil until tender. Then, add the squash to the pot. Add the broth and the almond milk and let this simmer about 30 minutes.

 IMG_3955 IMG_3957

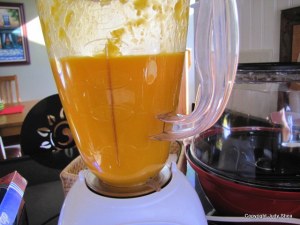
Now it’s time to pull out your blender, or if you are one of the lucky ones, your immersion blender (much easier). I don’t have this, I used my old fashioned blender (I seriously got his for a wedding gift almost 30 years ago). Carefully ladle the hot squash mix into the blender, about 2-3 cups at a time and blend until smooth.  Put this in another pot or bowl until you blend the rest.

 IMG_3960 IMG_3962

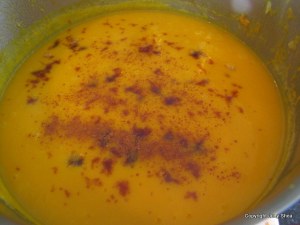
Once you have finished blending, transfer it all back in the pot.  Now you can add your brown sugar and cinnamon.  I added a little bit of honey to sweeten it up a little.  This is where you can play with the flavors. Can you smell this? You can Google this recipe and find many variations. It was a lot simpler than I thought it would be.

I hope you try this and enjoy! Thanks for stopping by and for your support.

Judy ♥ ♥

Sito’s Kitchen – Making bread with mom

Standard

I’m starting a series of cooking videos with my mom.  Both of my parents are from the Middle East.  Some of you know the story of how my dad went back to the old country to choose (yes, choose) a wife going from door to door.  When he brought my mom back to America, they started a family.  We had a busy household with my mom taking care of all 5 of the kids.  There are so many stories to be told about my parent’s life; especially with my mom coming to the USA, not knowing a word of English.

With all that said, I grew up with Sryian food and watching my mom make amazing food to not only feed the 7 of us in the family, but cousins, aunts and uncles.  Every holiday was at our house.  After I got married, I started to try to make a few of my mom’s recipes, but they never came out good.  Practice makes perfect.   So, as the years went on I kept on cooking and eventually, it all made sense.  Now, needless to say, nothing ever tastes like my mom’s food.  I don’t know what it is.  I guess there is a lot of pinches of love in it.

I thought it would be fun to cook with my mom and share it with you.

In our first premier episode, we are making a bread we call “Cleecha”.  This is compared to a bagel.  I started eating these when I was very young and my mom tells me that I used to eat them with my coffee at 2 years old. Yup.. that’s when I started drinking coffee.   AND.. I still dip them in my coffee after all these years.  The only way, in my opinion.

I hope you enjoy this episode.

Thanks for stopping by.  I love hearing from you and appreciate ALL the comments.  I read them all.

Judy ♥♥

Vegetable & Turkey Chili

Standard

I’m just loving this cool, yet gorgeous sunny day we have today.

A little culinary art, if I may.

I’m copying a post from a while back, but I thought I’d share again since this time I used ground turkey and added sweet potato. Oh my.

Here goes……

For those that follow me, you know I try to make my recipes fast and simple.  With my full-time job, who’s got time for long drawn out preparations? I don’t.  Here’s one you’ll hopefully love.

Today, I decided to make a chili with chunky vegetables and ground chicken/turkey.  If you are a vegetarian, you can completely leave out the chicken. It’s just as great without it.

Let’s go….

Ingredients:

1 pkg ground chicken or turkey
1 zucchini
1 summer squash
1/2 of a large onion or 1 small
1 red pepper
2 med. stalks celery
1 large sweet potato, about 1/2″ cubed.
1 cup of white mushrooms
1 28 oz. can of crushed tomatoes, plus 1/2 of another
2 cans of beans.  I used one kidney and one black.  Use what you want.  Rinsed and strained.
2 TBLSPN olive oil for pan

IMG_3232

Cut all the veggies the same size; about a 1/2 inch thick.  You want this chili to be chunky and full of love.

IMG_3233 IMG_3234 IMG_3236

In a large sauce pan, add a couple of tablespoons of olive oil, add ground chicken.  Medium high heat; Cook until no longer pink.

IMG_3238 IMG_3240

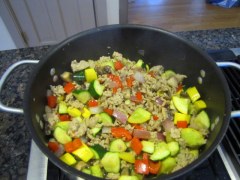
Add all the veggies in the pan and stir and mix it all together.  Cook this on medium heat, stirring occasionally, about 15 minutes or until the onion and veggies have all softened.  Can you see the difference in the pictures, above?  CLICK FOR LARGER VIEW.

IMG_3241  IMG_3242 IMG_3246

Add your can and a half of the tomatoes, stir, then add the beans which have been rinsed in cold water through a strainer.  Incorporate all the beans into the sauce.  I started with one can of beans, but then decided to add another. Why not, right?

IMG_3243

Now, for seasonings:  Salt, pepper, granulated garlic, chili powder and ground cumin.  ALL TO YOUR TASTE.  Add more or less of what you like.  I end up with about a tablespoon or more of the chili powder and the garlic. Then add in the cumin as you like.  If you want some heat, then add a little cayenne pepper.. start small. Keep testing the taste to see what it may be missing.  It’s always better to under season, you can always add it.. but don’t over season, you can’t take it out.

IMG_3247

Now, if you can wait, let this simmer gently about 30 minutes.. if you can’t wait… GO FOR IT.. It’s your world.

IMG_3248

Serve this hot with some grated sharp cheddar cheese and some tortilla chips.  I used blue ones .   Just scooping the chili onto some chips with a little melted cheese just makes your mouth so happy.  The corn, crunch, cheese and chili together.. oh my.  I nice loaf of Italian bread is a great choice also… or both.  I have issues.. I watch too much FoodTV Network. Guy Fieri would be proud.

Notes: Now, this chili is practically fat free.. the only fat in there is from the olive oil.  I also used Sargento Reduced Fat Cheddar Cheese, but only because that was my choice. I draw the line on completely fat free products, however.. no taste in my opinion.  This recipe will serve about 6 people.  Save the leftovers for another day or mix in some cooked pasta for another meal.  Freeze the rest, if you want.

I hope you enjoy this recipe.

Thanks for stopping by. I love hearing from you. Let me know if you tried this recipe and how it came out.

Judy 

Stuffed Grape Leaves… Sito’s Way

Standard

Hey everyone… it’s June and you know what that means?  No?  Okay, well is grape leave picking time.  I thought I would re-post how to make stuffed grape leaves.. the way my mom taught me.

Let me know if you give it a try or if you have any questions about it.  Most of all enjoy!!!

========================================================================

Today, I’m excited to share with you a childhood recipe that is loved by the whole family to this day.  Stuffed Grapes Leaves.

First, let me say this recipe has never left our family.. eva.  My mom, Sito (grandmother in Syrian), has made this for us since we were little wee ones.  I think I had a few too many myself, but these are truly my favorite Syrian food.  With four daughters and one son, at least two of the daughters have made them.  It’s such a great recipe to carry down the family tree.

There are a coulple of ways (that I know of) the leaves can be stuffed.  Some cultures use lamb, some beef.   We use beef.  Mind you, this recipe has never be written down by mom, it’s all from memory.  My oldest sister, Joan, was able to capture many of Sito’s recipes for us and gave us our own Syrian recipe book.  Love her for that.  Oh, and my mom is still alive and makes these for family gatherings. She’s 86.  Yubbo!

Ok, ok.. I’ll stop chatting and get to it.  Here’s what you need:

1 -lb hamburg
1- cup long grain rice (uncooked)
1- 6 oz. can of tomato paste
1/2 tsp allspice
1 tsp salt
1/2 tsp pepper
1/2 cup lemon juice (or more for tartness)
3 1/2 cups of water
5-6 whole garlic cloves – OR whatever you like.. some people like more garlic than others
and of course… grape leaves.

Now, let’s talk about the leaves for a minute.   You can certainly buy a jar of prepared leaves at the grocery store. .. but we have never done that.  After all, grapes leaves are all over the place to pick from the side of road or maybe a neighbor’s back yard (thanks, Diane; check out her delicious blog and fun adventures).  The best time to pick them is in June, here in Massachusetts.

So, let’s say you want to be an ethnic diva and prepare your own leaves.  Great.  I’m proud of you.

Pick, say, 50 leaves; that’s a good number, I think. Bring them home and lay them out on a counter or table.  Snip off the stem and begin to put them in piles from largest to smallest.  Put about 10 leaves in one pile.. you’ll have 5 piles of leaves.  Make sure there are no icky bugs, spiders or dirt on them.  You want nice healthy looking leaves.   Now, go grab some string, yes, I said string.  You know the kind you sew with.  Roll up each pile of leaves into a jelly role like shape and wrap the string around them. You are winding the string around the roll about 8-10 times.. just get them secure enough that they don’t unravel.   Fill a pot with water and bring to boil.  Once boiling, put the rolled leaves in the pan and boil for about 1 minute.  You’ll see the leaves go from bright green to a darker shade.  Make sure you roll them around so it’s fully boiled.  Take out and drain and cool.

At this point, you can begin the stuffing, but you can also freeze these in freezer bags as they are (all rolled, boiled and cooled).  Then when you want to use them for a meal, just defrost ahead of time (I’ve had leaves in my freezer for over a year).  But, for this purpose, once they are cooled, unravel or snip the string and lay them flat, ready to be stuffed.

Let’s put the meat stuffing together.

Mix the hamburg, raw rice, tomato paste, allspice, salt, pepper all together in a bowl.  Mmmm the smell of the allspice and tomato paste… oh my.  Get in there with your hands and mix.  Ahh, now that feels good or as my girls would say.. “ew”.   Now, I know this may sound gross, but take a little of the stuffing and just taste it.. you don’t eat it, but take a little and put it on your tongue.  You don’t want it to be bland. If you like the balance, you’re golden.

Next….get your station prepared… on the table.. stuffing on one side leaves on the other.  Take one leave at a time, lay it vein side up and put a log shape of meat in the bottom center of the leave; stem side towards you.


Watch how it’s rolled… sides in first, the roll up from the bottom.


Ok..there’s ONE.  Now do the rest.  Make sure they are rolled nice and tight. You don’t want them unraveling when they are being cooked.  Great job… they are ready to cook.  I’m excited!


Get a pan.  Now, you want to protect the bottom layer of grape leaves as they cook.  We use broken dishes.  No, you don’t have to break your dishes.  You can use a good dish if it fits in the bottom of the pan OR line it with aluminum foil.  Again, the idea is to not burn the bottom layer.  One at a time, start to layer the rolled leaves evenly.


Once you layer all the leaves in the pan, you must prepare the liquid it will simmer in.

Take 3 1/2 cups of water and 1/2 cup of lemon juice and mix together in measuring cup.  Some people like more tartness, if you are one of those, then use more lemon.  Taste it and see if you like the balance.
Cut your peeled garlic cloves in half.  Pour the water/lemon mixture gently over the leaves, until they almost cover the top layer.. you don’t want the top layer submerged.  If you don’t need all the water and it’s at the right level, then STOP pouring.  If you need more water, then make a little more of the liquid.


Take the garlic and spread all over the top of the leaves.  I used granulated garlic that I mixed in with the water/lemon.  But, just picture a lot of garlic on top.

To finalize this lovely presentation, you need to set something on top.. Yes, more broken dishes or even a small plate.  The idea here is to put a bit of pressure on top so the leaves aren’t moving around from the simmering.  Sito uses her pressure cooker that she has down to a science.  That woman!

Cover the pan with a lid and let come to a simmer..you can get it to start boiling, then bring it down to low. You want to hear a simmer.. little bubbling sound, but NOT BOILING… nooooooooooo.

Let this simmer for about a hour.  I say “about”, because stoves vary. Some use gas, some have electric.  Mine took about 50 minutes and I had about 70 leaves.  Check them after 45 minutes.. test one. If the rice is soft and cooked, they’re done.   The liquid will evaporate; no need to pour any excess out.. there will very little.  GENTLY take each one out of the pan and present for eating.


More ideas:  This meat stuffing can be used to stuff cabbage rolls, tomatoes, summer squash or even red peppers.  Green ones too, but I’m not a fan of the green ones.  You use the exact same set up with the pan and the water/lemon/garlic.

Pair these up with a nice big salad, fresh bread and what a meal.

Please let me know if you have any questions on this delicious dish and if you make them, send me a comment; I would love to hear from you.

Thanks for stopping by!

Judy 

Stuffed Grape Leaves… Sito’s Way

Standard

Today, I’m excited to share with you a childhood recipe that is loved by the whole family to this day.  Stuffed Grapes Leaves.

First, let me say this recipe has never left our family.. eva.  My mom, Sito (grandmother in Syrian), has made this for us since we were little wee ones.  I think I had a few too many myself, but these are truly my favorite Syrian food.  With four daughters and one son, at least two of the daughters have made them.  It’s such a great recipe to carry down the family tree.

There are a coulple of ways (that I know of) the leaves can be stuffed.  Some cultures use lamb, some beef.   We use beef.  Mind you, this recipe has never be written down by mom, it’s all from memory.  My oldest sister, Joan, was able to capture many of Sito’s recipes for us and gave us our own Syrian recipe book.  Love her for that.  Oh, and my mom is still alive and makes these for family gatherings. She’s 86.  Yubbo!

Ok, ok.. I’ll stop chatting and get to it.  Here’s what you need:

1 -lb hamburg
1- cup long grain rice (uncooked)
1- 6 oz. can of tomato paste
1/2 tsp allspice
1 tsp salt
1/2 tsp pepper
1/2 cup lemon juice (or more for tartness)
3 1/2 cups of water
5-6 whole garlic cloves – OR whatever you like.. some people like more garlic than others
and of course… grape leaves.

Now, let’s talk about the leaves for a minute.   You can certainly buy a jar of prepared leaves at the grocery store. .. but we have never done that.  After all, grapes leaves are all over the place to pick from the side of road or maybe a neighbor’s back yard (thanks, Diane; check out her delicious blog and fun adventures).  The best time to pick them is in June, here in Massachusetts.

So, let’s say you want to be an ethnic diva and prepare your own leaves.  Great.  I’m proud of you.

Pick, say, 50 leaves; that’s a good number, I think. Bring them home and lay them out on a counter or table.  Snip off the stem and begin to put them in piles from largest to smallest.  Put about 10 leaves in one pile.. you’ll have 5 piles of leaves.  Make sure there are no icky bugs, spiders or dirt on them.  You want nice healthy looking leaves.   Now, go grab some string, yes, I said string.  You know the kind you sew with.  Roll up each pile of leaves into a jelly role like shape and wrap the string around them. You are winding the string around the roll about 8-10 times.. just get them secure enough that they don’t unravel.   Fill a pot with water and bring to boil.  Once boiling, put the rolled leaves in the pan and boil for about 1 minute.  You’ll see the leaves go from bright green to a darker shade.  Make sure you roll them around so it’s fully boiled.  Take out and drain and cool.

At this point, you can begin the stuffing, but you can also freeze these in freezer bags as they are (all rolled, boiled and cooled).  Then when you want to use them for a meal, just defrost ahead of time (I’ve had leaves in my freezer for over a year).  But, for this purpose, once they are cooled, unravel or snip the string and lay them flat, ready to be stuffed.

Let’s put the meat stuffing together.

Mix the hamburg, raw rice, tomato paste, allspice, salt, pepper all together in a bowl.  Mmmm the smell of the allspice and tomato paste… oh my.  Get in there with your hands and mix.  Ahh, now that feels good or as my girls would say.. “ew”.   Now, I know this may sound gross, but take a little of the stuffing and just taste it.. you don’t eat it, but take a little and put it on your tongue.  You don’t want it to be bland. If you like the balance, you’re golden.

Next….get your station prepared… on the table.. stuffing on one side leaves on the other.  Take one leave at a time, lay it vein side up and put a log shape of meat in the bottom center of the leave; stem side towards you.


Watch how it’s rolled… sides in first, the roll up from the bottom.


Ok..there’s ONE.  Now do the rest.  Make sure they are rolled nice and tight. You don’t want them unraveling when they are being cooked.  Great job… they are ready to cook.  I’m excited!


Get a pan.  Now, you want to protect the bottom layer of grape leaves as they cook.  We use broken dishes.  No, you don’t have to break your dishes.  You can use a good dish if it fits in the bottom of the pan OR line it with aluminum foil.  Again, the idea is to not burn the bottom layer.  One at a time, start to layer the rolled leaves evenly.


Once you layer all the leaves in the pan, you must prepare the liquid it will simmer in.

Take 3 1/2 cups of water and 1/2 cup of lemon juice and mix together in measuring cup.  Some people like more tartness, if you are one of those, then use more lemon.  Taste it and see if you like the balance.
Cut your peeled garlic cloves in half.  Pour the water/lemon mixture gently over the leaves, until they almost cover the top layer.. you don’t want the top layer submerged.  If you don’t need all the water and it’s at the right level, then STOP pouring.  If you need more water, then make a little more of the liquid.


Take the garlic and spread all over the top of the leaves.  I used granulated garlic that I mixed in with the water/lemon.  But, just picture a lot of garlic on top.

To finalize this lovely presentation, you need to set something on top.. Yes, more broken dishes or even a small plate.  The idea here is to put a bit of pressure on top so the leaves aren’t moving around from the simmering.  Sito uses her pressure cooker that she has down to a science.  That woman!

Cover the pan with a lid and let come to a simmer..you can get it to start boiling, then bring it down to low. You want to hear a simmer.. little bubbling sound, but NOT BOILING… nooooooooooo.

Let this simmer for about a hour.  I say “about”, because stoves vary. Some use gas, some have electric.  Mine took about 50 minutes and I had about 70 leaves.  Check them after 45 minutes.. test one. If the rice is soft and cooked, they’re done.   The liquid will evaporate; no need to pour any excess out.. there will very little.  GENTLY take each one out of the pan and present for eating.


More ideas:  This meat stuffing can be used to stuff cabbage rolls, tomatoes, summer squash or even red peppers.  Green ones too, but I’m not a fan of the green ones.  You use the exact same set up with the pan and the water/lemon/garlic.

Pair these up with a nice big salad, fresh bread and what a meal.

Please let me know if you have any questions on this delicious dish and if you make them, send me a comment; I would love to hear from you.

I’m exhausted and hungry now from writing this.

Thanks for stopping by!

Judy 

Israeli Couscous Salad

Standard

Ah, summertime.  Can you believe that July is over?  Where, tell me where did it go?

I was inspired by my sister, Linda and her daughter, Tara, with this couscous recipe.  Thanks, lovely ladies.

Of course, you know me.. I don’t stick to any recipe perfectly.  So, I decided to give the salad a try and I’m so glad I did.  It’s perfect for anytime.  With a meal or alone.

Here how I put it together….

Ingredients:

1 Box of Israeli (pearl) couscous – cooked and cooled down – (I get mine at Trader Joes).. But you can use Orzo or any smaller pasta.
1/2 of a large red pepper, chopped
3 scallions chopped
1/2 Cup fresh curly parsley, chopped
1/2 Cup fresh spinach leaves, chopped
1/2 Cup of tomatoes, chopped.. I take out the juice and seeds
1/2 Cup or less of dried cranberries
Feta Cheese or even chopped fresh mozzarella would be delightful.

I wanted to chop up some Kalamata olives, but I didn’t have any, but that’s what I would do next time.

Now, everyone..you can put whatever you want in this salad.. less or more.. it’s your world.


In a large bowl, add all the ingredients.. look how purdy above.

For the dressing:  make it to your taste.. more lemon, less.. more olive oil, less??

3-4 tablespoons olive oil
1/8 cup lemon juice
1 tablespoon granulated garlic (not powder) or use fresh, but chop it really fine.
1/2 teaspoon sugar (or not)

Whisk this up.. taste it before you pour it on.. and adjust it to your liking.  You can also add balsamic vinegar to this.

Add crumbled Feta cheese on top… OR…

I added some left over bbq chicken, cut up.

This was a great fresh lunch. Easy peasy.  Imagine what you could put in this. Don’t get me started.. Ok, well, just a little… chopped fresh zucchini, summer squash, cooked corn kernels cut off the cobb.  I’ll stop now.

Try it, let me know and most of all… ENJOY!

Thanks for stopping by.

Judy ♥ (green for salad)