Here I am again, doing another Blog Hop with StencilGirl for the NEW RELEASE of Seth Apter’s stencil designs.
I just love Seth’s art style and for him to create stencils.. well.. is a bit exciting. Take a look at his blog HERE.
I will be using Seth’s “Timeless” stencil. I love these markings he’s made and the words… and what better way to use all this texture than with polymer clay. Are you surprised?
When I begin the process in my head of what I will create for each blog hop, most of the time, I don’ t know what I’m going to create until I sit at my art table. This time was no different. I knew I was going to use clay. Let’s see.. bookmarks, buttons, journal… yes a little funky journal. Let’s HOP to it.
I started with a package of beige polymer clay. Then conditioned it by softening it with my hand and through my clay dedicated pasta machine. Not loving that it is not getting soft. I’ve been through this before. Maybe my basement is too chilly or the clay is old.. not sure. But, let’s go with it, shall we?
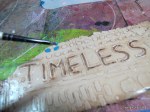
Once I got a good sheet of clay soft enough, I sprayed the clay with water and put the stencil on top. Put my pasta machine on a thinner setting so I could get a thin cover for a journal. Cool, huh?
FOR A CLOSER LOOK, CLICK ON ANY PICTURE.
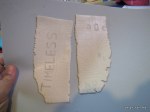
Now, I have to think about what shape of journal I want. At this point, I still don’t know and let’s face it, I don’t have a lot of options. So, I’m gonna split the clay in half and make a “shard” shape, as if it were ripped. Get them even enough so the front and back covers somewhat match. I wanted the words to be engraved into the clay. I took a pencil and went over the letters to indent them. I did this because when I stain the clay, the paint will sit in them. That’s coming up. I put holes at the top of the covers and now it’s time to bake in my clay dedicated oven.
While the clay was baking, I had to choose some pages to go inside of the journal. I had some scrapbook paper from years ago that was double-sided. A neutral color to go with the covers. I stamped a clock image and a “remember” rubber stamp over the pages. Now, I had to trace the covers on the paper so I could get the same, sort of, shape. Then punch holes with an awl into the paper to match the holes I put in the clay. I used a distress stamp pad to darken the edges of each page.
Now, it’s time to “antique” the clay covers. I took brown acrylic paint and with a bristle paint brush (or an old toothbrush), I smooshed the paint onto and into the clay getting into the deep lines. Let it sit for about 30-45 seconds. Then wipe it off with a damp paper towel until you like the look. After this was dried, I brushed a coat of Liquid Laminate over the front and back covers (cuz, I can’t find my Future Floor Polish… ugh).
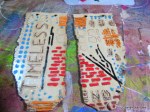
Time to add some color. I took acrylic paint and started to make the covers look purdy. Going over the parts of the design that are risen. Turquoise, red, black, orange. After the paint was dry, I put another coat of Liquid Laminate over the covers again.
What do I use to bind this funky journal? I tried binder rings, too shiny and clunky. I had some twine and using a dental floss threader, I ran the twine though the holes with the inside pages in between.
Here is the final journal… you likey???
Well, thank you, Seth for creating such fun stencil designs.
Before you go off to the next artist, let me tell you about the giveaway…
All comments on the hop are eligible for the giveaway. The more blogs you comment on, the more chances you have to win. Giveaway will close on Sunday, May 4th at 11:59PM Central Time.
PRIZE: 2 lucky winners, each will get a set of Seth’s new releases. Seems pretty cool to me.
Before you leave me to go to Leslie’s blog, I want to thank you, as always, for stopping by and supporting my crazy work/life/unbalanced world. Ok, now you can go to the next person on the list…. Judy ♥ ♥ ♥


Wow! I really like how you made this book. Very inspiring. Thanks!
What a fun project!
~Linda
Hai Judy, I think it is stunning, the journal you made. Love to try it to. But I have no pastamachine.
Do you have any experience with other, more softer clay, that I might be able to work on by hand? Love to here it.
As for the new Seth Apter Stencil; I’m just as a true follower of his blog than of yours.
I love his new stencil. And I would love to win one.
So, thanks for this opportunity, and your always inspiring blog.
Greetings from the heart,
Sofia
I think I will have to try something else other than paint through my stencils yours look really good
Judy I love your clay work, it seems so easy when you show a tutorial with clay, you really give me the feeling to jump to my art supplier and get some fimo!
Wow Judy, Such a cool process. On one hand the cover to me resemble a torn piece of hardboard, and then it also looks like a piece of vintage tile! I love it! Thanks for taking the time to show your process- very helpful indeed! “) Jackie
Judy, this is incredible! I love all of your creative ideas and your fabulously beautiful execution of those ideas!!!
wow. This is WAY cool! I LOVE the way you used the clay. (Obviously I am new to your blog!! ha ha!!) I can see adding this to an art journal page, a scrapbook, a card…ANYTHING!
Fabulous shape for the book! Loved this.
Judy you are so amazing. Love that you can just go for it without a lot of planning and it turns out so wonderful!
This is great. I would have never thought to do this. Thanks for the inspiration!
This is a fabulous idea, love the use of the stencil on the clay through the pasta machine! I never would have thought of doing that. Thank you for sharing!
Wow. The process is amazing. Such a creative strategy.
Awesome clay work…as usual… What a great book! Seriously! There is so much potential with Seth’s stencils! The possibilities are endless! Thanks dear Judy! xo
Wow, what a great idea, loving this unique and fun idea
Very cool idea. Love the stencil on the clay.. I think this stencil will lend itself to a lot of neat ideas!
Thanks so much!!
I likey! very unique!
Another brilliant polymer covered art journal! Love the textures you achieve and the irregular shapes of the covers! Ingenious!
I typically don’t work with polymer clay, but you’re making me want to. What a great project. I never thought of using stencils with clay.
You’re always so creative and inspiring Judy. Very nice – one might say “timeless”.
wonderful idea. I don’t do much with fimo clay but this would make a great embellishment.
stamping sue
http://stampingsueinconnecticut.blogspot.com/
Wow, I never would have come up with this cleverly brilliant idea in a million years!
I love how this journal turned out.. particularly love the shape.
I am already a big fan of your art, Judy, but this book is just amazing! I am a lover of art, in general, but when I can touch art and feel art with my fingertips as well as my heart, I am doubly happy. A great stencil to start, but you have given it life! Good on you, my friend!
You are so inventive. I would never have thought to use clay with stencils. You really made it all come to life.
Super idea for stencil usage ….. will have to try it!!
SusieW
Can I just say – amazing?!!! So very cool and something I wouldn’t have thought of in a million years….. These blog hops are so fun and inspiring – takes a bit of time, but you each have such great ideas, it’s hard to skip one!
Judy this is fantastic!!!!!! What a great idea….xox
This is awesome! So organic!
Love the idea of using the stencils with clay! Very Cool!
How cool! Thanks for showing all of the steps!
Now I will have to play with the little bit of clay in my stash to see what I can do with a stencil!
Talk about lateral thinking!…what a fabulous idea…and result. Clever you.
Fantastic way to use stencils! I love everything “Seth” and these stencils are no exception. You did a great job.
What a creative idea for a journal! Love the idea of using the stencils with polymer clay.
I have never used clay before…..seems a little intimidating, but what fun this looks like! I love what you did! Thanks for sharing!
Judy, another different use of stencils with amazing results. Love this tutoriall
This turned out so cool! You do come up with the greatest ideas, Judy, I have to say! I love this stencil – must have!!!
Your journal cover looks so OLD & cool. Looks like something you’d find on an archeology dig. Great & inventive.
Thanks for sharing.
Wow, I can’t believe all you just did. I like your work and the stencil. Tommy
Ooooh this is different, looks fabulous and great idea to use a stencil with clay xxx
Cool,yes. Likey,yes. Colors wonderful,yes!!
Wow — so creative!
hang on i have to pick myself off the floor! your blog name got me first….and recipes! I said to myself outloud “I like this gal already!” (bookmarked to go stalk it later:) what a cool idea to use clay! I have some of course not used yet, but gosh thanks for planting that seed!
cool project!!
So very creative!!! The worn vintage look you achieved is fantastic. Looks like it was so fun to make… thanks for inspiration!
Never would have thought of using clay, will definitely have to try it
What great journal covers!
Love! Love! Love that journal! Awesome way to use the stencils.
Wow what a fab labor of love.
Hi Judy! What a great little book! I love the funky shape, too.
Hi Judy!
First of all, HAPPY ANNIVERSARY! I wish you at least 30 more!
I love the little book you made with Seth’s stencil. The funky shape really makes it unique.
Love,Raine
Date: Mon, 28 Apr 2014 05:01:59 +0000
To: aqualuna13@msn.com
Your project looks like so much fun using Seth’s new stencils. Will have to give the clay a try when I get the stencils. Thanks.
These new stencils are so cool! I’d love to have them! Thanks for the giveaway!
Can I say AMAZING!! Love this super cute idea. Would love to see it filled out. tfs, be blessed, Suzanne 🙂
What a great ideas to work with clay. Wonderful giveaway. Thanks for offering.
Judy – I love seeing you create with clay and this is no exception!
Beautiful!!! I really enjoyed seeing how you did it. Just gorgeous!
Incredible! Totally awesome use of Seth’s stencils.
That is just so cool!! You and these stencils make me want to try a new medium.
Amazing album. It looks like the sheath for a large hunting knife – the kind the Indians might have worn. I love these stencils and you made good use of then in a wonderful project.
Very cool project & awesome new stencils!
That was a super fun idea! Great use of Seth’s stencil! Something different, love it!
Hi Judy! I love the journal with the clay, must buy some clay… Yesterday, I received your card in the mail, that I won! Love it! It is now pinned on my memory board with all my ” love these things” Ty.
you know ii always look forward to coming here on the blog hops cause you never disappoint me…..always so inspirational. and yes, I LIKEY LOTS!!! really love the cute and very talented seth apter too…so i just have to win this one. wishing and hoping with all my might and thanking you all for the chances. xoxo
lurabrown@gmail.com
Likey! Likey!
Fabulous – I love it!
Oh my gosh! What an awesome little art book you made! I would never have thought of it.
Wow! What a fabulous use of the stencils! I’m going to try this.
Omg!! This is totally cool! Now I want to try this too! Aaargh!
I’m speechless. This is an awesome project!
FUN! Want to go out and buy another pasta machine,one to dedicate to art! Love how you used Seth Apter’s stencil design for you book! KEEPER!
Very creative way to use those stencils.
What a cool idea using the stencil to texturize the clay. Great project thank you for sharing.
The journal turned out great! That stencil is crazy cool!
I’ve never seen stencils used with clay…completely blown away!!! Speechless and inspired Judy!
Such a creative idea, did not know you could use stencils like this! Thanks for sharing:)
I love the work everyone has done using the Seth Apter stencils – such diversity
What a great idea with the Fimo clay – I’m going to give it a try. Seth’s latest set of stencils are so inspiring that I will use them together. Thanks for the opportunity to win these.
Oh, I definitely like it. What a great way to use Seth’s stencils. The journal you made is amazing. I love to see everyone’s creativity on this hope! Thanks for the great idea!
Thank you for sharing your process, and for the chance to win!
I absolutely love what you did. . . imagine clay. Wow, this is fantastic. There are more things to do with a stencil than I ever imagined. I am in love with all Seth’s stencils. Blessings, Janet PPF
This is so creative and I just LOVE it. Thank you for taking the time to do this and for the chance to win some great stencils.
Very creative and I don’t think I would have the patience to do this. But I am so glad you did. Thanks so much.
How cool is that! So creative.
Yes, me liky! Makes me want to get the Clay out.
What a fabulous idea and a great use of a fantastic stencil.
Very cool — always looking for ideas to embellish or make journal covers. Thanks for sharing.
Great amazing awesome you. Thanks for sharing everything. 💗
What a great idea ~ I would have never thought about clay journal covers! Love how it turned out!
What an interesting use of Seth’s new stencils! I’ve never seen them used on clay before but it’s very effective.
Such a cool project, thanks for sharing.
Very cool project! Love how you used clay to make the covers. Love your idea to use the stencils with this. Great job. Thank you for sharing.
Katie B.
Clay and stencils – who knew! Love your book; thank you for sharing your process.
His stencils look pretty cool and the style looks grungy. Not bad.
I like very much, you put a lot of work into that piece of art and you were very creative with that stencil. Like the idea.
Sandra d.